How to Make a Psybient Loop in Bitwig with Only Built-in Instruments
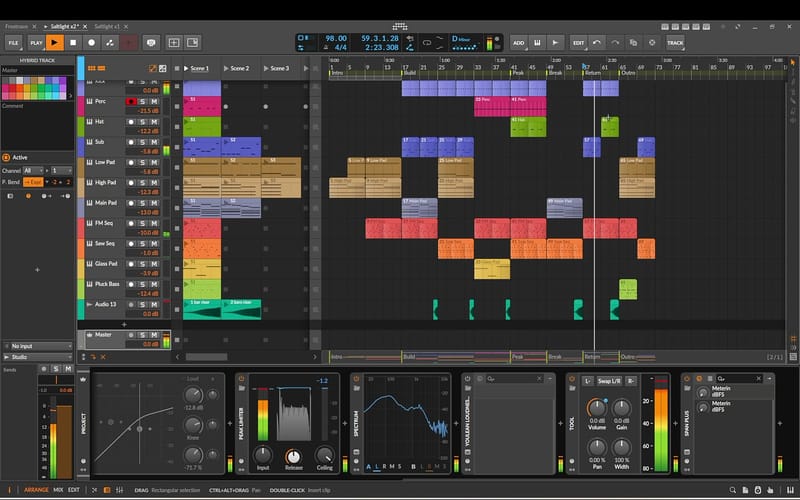
A full 32-bar psybient loop in Bitwig – pad, sub, rolling bass, stabs, arp, riser and drums – using only Polymer, Phase-4, Drum Machine and Sampler. Chords from Track Builder, sounds from Low Tide.
Most psybient tutorials open with a plugin list. This one doesn't have one. The whole loop – pad, sub, rolling bass, stabs, arp sequence, riser and drums – runs on the instruments that ship with Bitwig Studio: Polymer, Phase-4, Drum Machine and Sampler. If you own Bitwig, you can build every layer of it tonight, without buying or installing anything else.
That matters more than it sounds. A plugin-free project opens on any machine with Bitwig, never breaks after an update, and keeps your CPU free for the effects that actually shape the sound. It also forces good habits: when you can't reach for a new synth, you spend your time on harmony, groove and arrangement – the things that make psybient work in the first place.
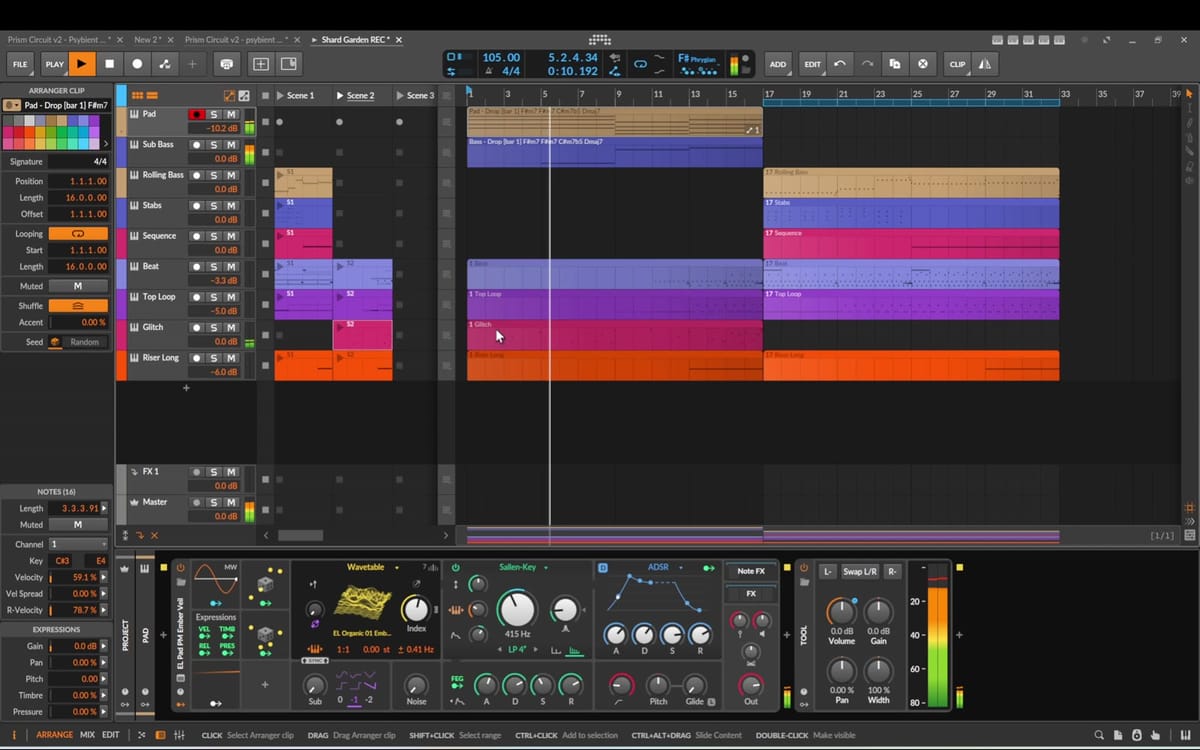
The track is called Shard Garden: 105 BPM, F sharp Phrygian, a sixteen-bar main part with a sixteen-bar intro that builds into it. Below is how it comes together, one layer at a time, with screenshots from the video.
Prefer to watch? The full step-by-step video is on YouTube: Psybient Loop in Bitwig – Only Built-in Instruments.
What you'll build
- A 32-bar psybient loop: a slow 16-bar intro and a 16-bar dynamic main part
- Harmony and bass MIDI generated in Track Builder
- Every synth sound from the Low Tide preset pack, built for Bitwig's own Polymer, Phase-4 and Sampler
- Drums on Bitwig's v8 E-drums inside Drum Machine – no sample packs to download
- An intro that builds the drums in stages, so the drop at bar seventeen really lands
What makes a loop sound psybient
Psybient sits between ambient and psytrance. It borrows the rolling bass, the hypnotic repetition and the psychedelic sound design from psytrance, but slows everything down and leaves much more space. A few ingredients do most of the work:
- Tempo between 90 and 110 BPM. 105 is fast enough to groove and slow enough to feel spacious.
- A dark mode. Phrygian, with its flat second, gives the music that mysterious, slightly eastern colour.
- A bass that moves. Offbeat bass notes create the rolling motion even at a relaxed tempo.
- Small details everywhere. Ticks, glitches, delays and slow modulation keep a repetitive loop alive.
Every step below serves one of these four ideas.
Step 1 – Start with the harmony in Track Builder
Everything starts with the chords. In Track Builder I set the genre to Psybient, tempo 105, key F sharp in Phrygian mode, seventh chords, a chord change every four bars and a sparse bass that only plays roots. One regenerate later the progression is there: F#m7 – C#m7b5 – Dmaj7.
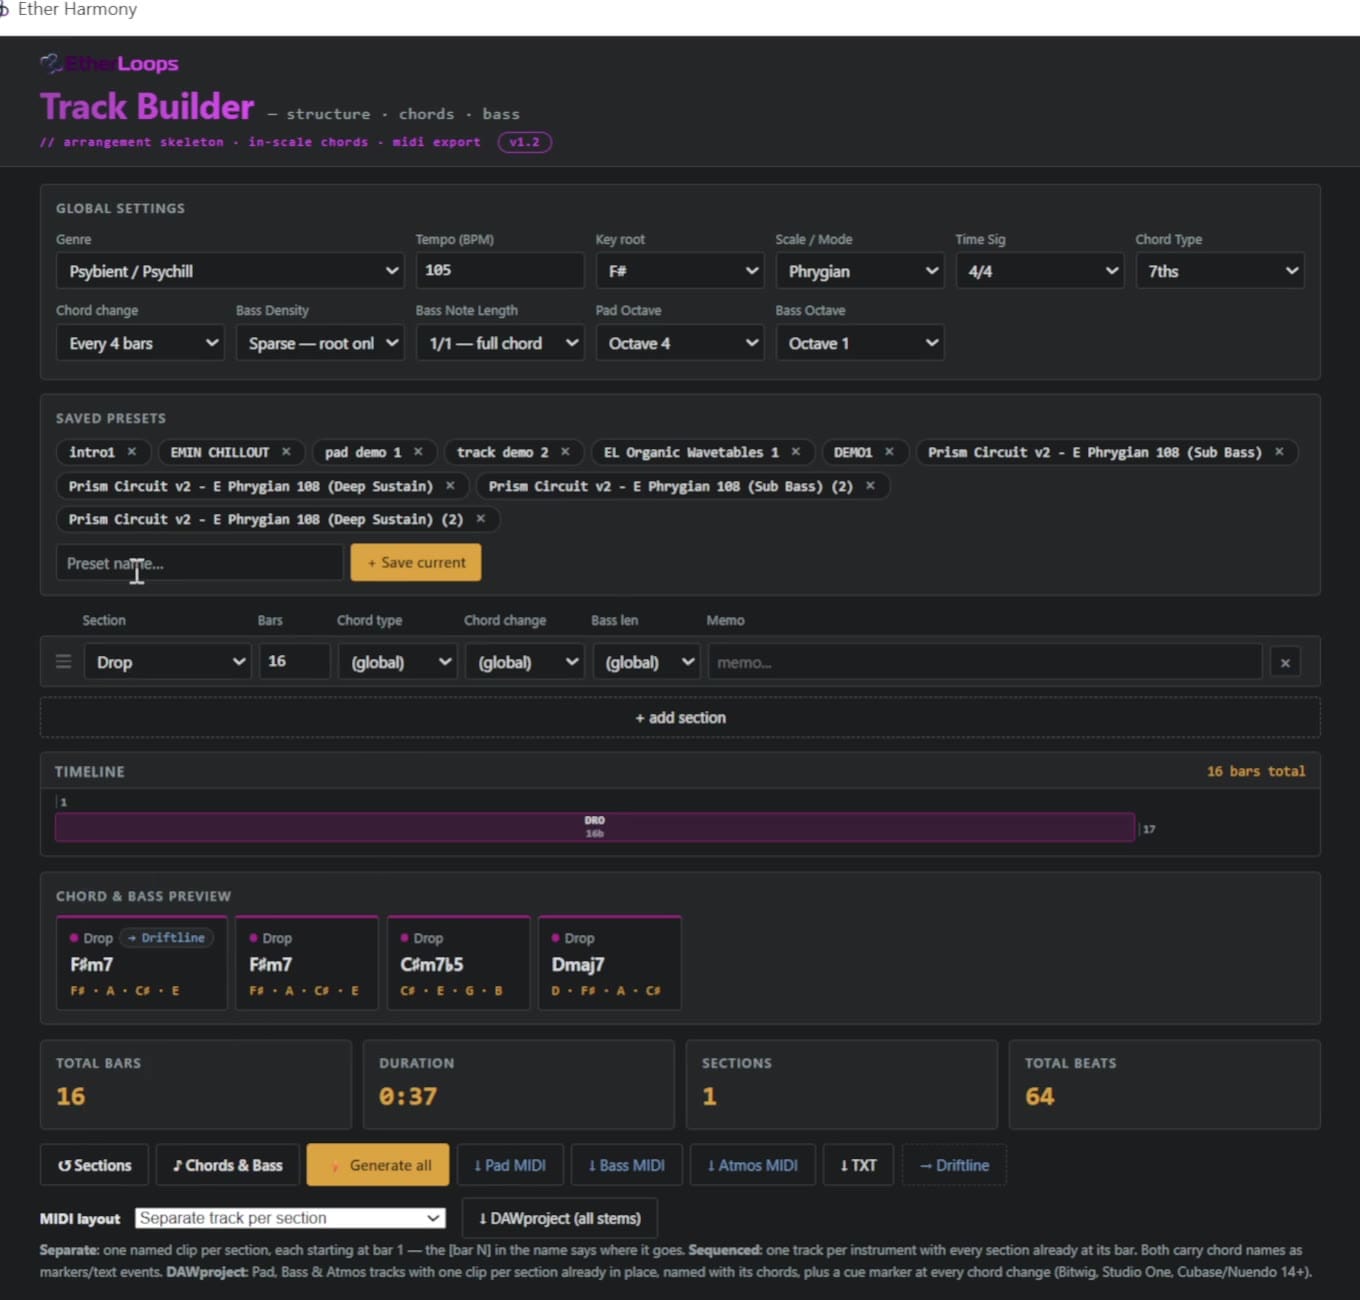
Why this progression works: F#m7 is home and stays for eight bars, which gives the loop its hypnotic, settled feeling. C#m7b5 is the tense, slightly unstable chord in the middle. The Dmaj7 at the end is the brightest moment – it lifts the loop just before it falls back to F sharp, and that small lift is what makes you want to hear the loop again. Seventh chords add softness, which suits the slower tempo better than plain triads.
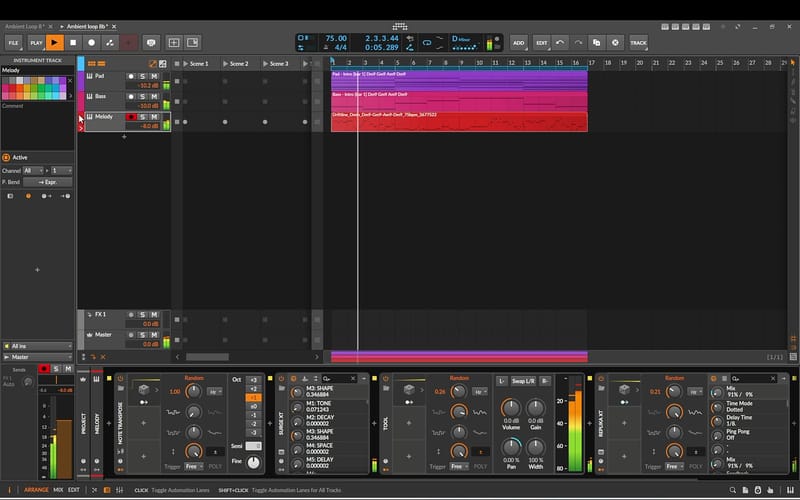
Next I export the pad and bass MIDI, drag both files into a new Bitwig project and confirm the tempo import. The chords and the sustained bass land on the timeline straight away. A little housekeeping follows: tempo 105, key set to F# Phrygian in the transport, tracks renamed to Pad and Sub Bass, project saved. A clean start saves a lot of confusion later, when the track count grows to ten.
Step 2 – Three drum tracks with Drum Machine
The drums get three separate tracks, each with its own job:
- Beat – the backbone: kick, clap, hats and snare fills, all from Bitwig's v8 E-drums.
- Top Loop – a lighter kit for ticks and shakers that brings the movement.
- Glitch – sixteen pads of clicks, stutters and digital crackle, loaded into Sampler, for the transitions.
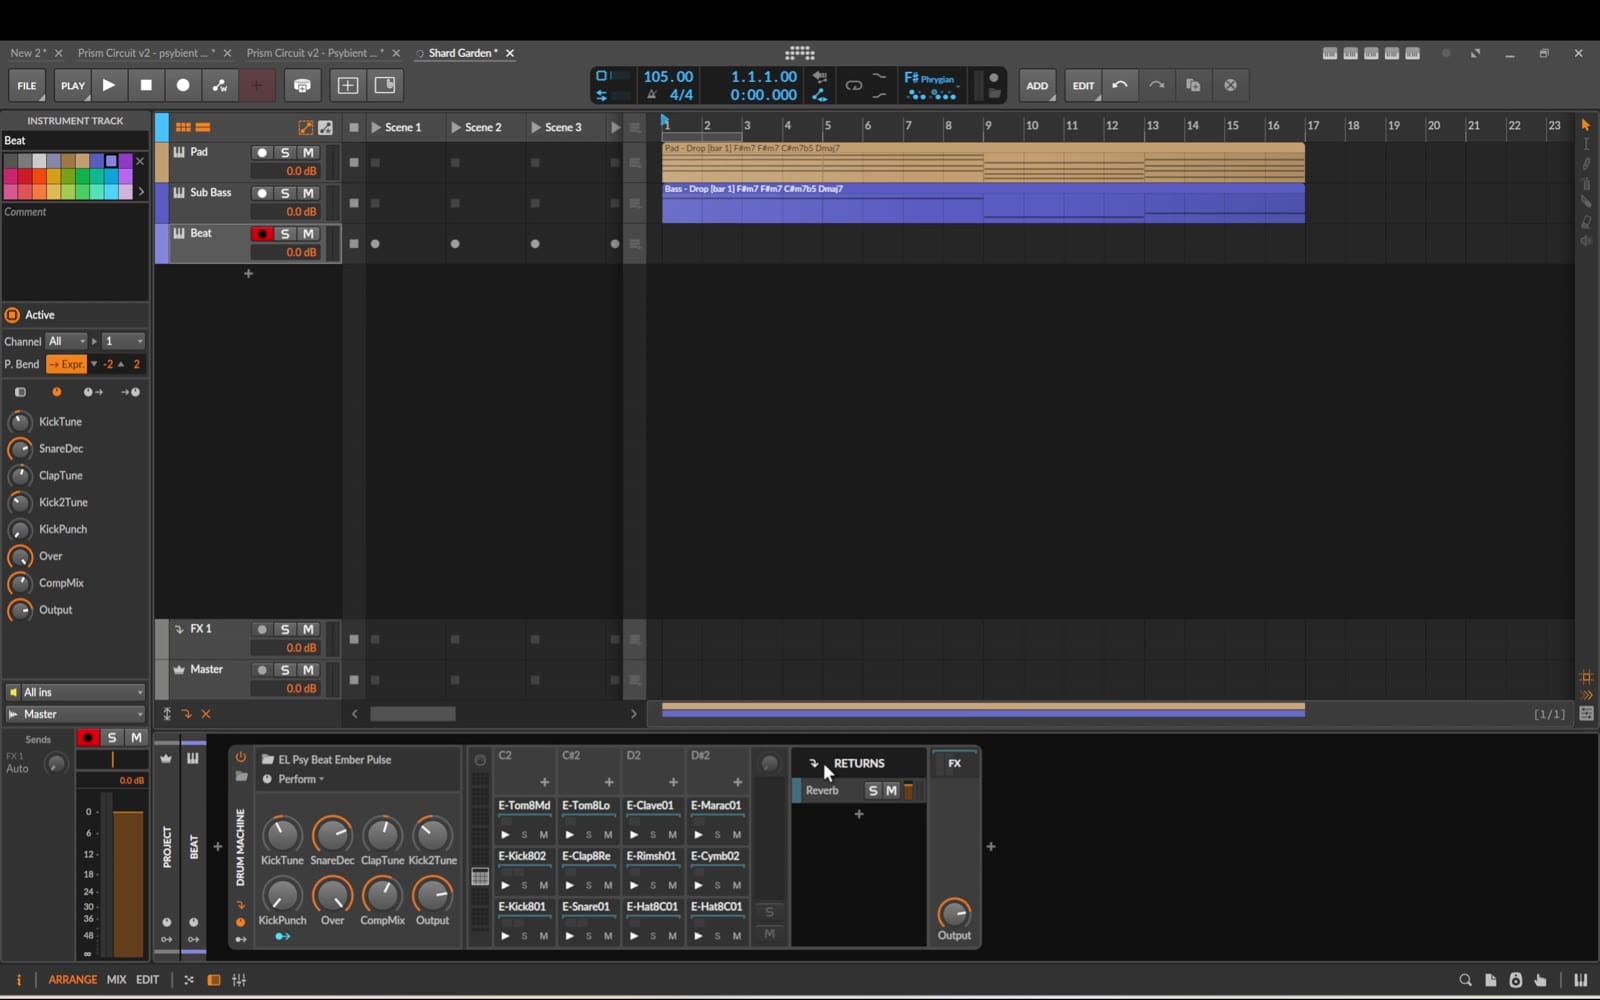
Splitting the drums this way pays off twice. In the mix, each track gets its own level and effects, so the ticks can sit quietly in the background while the kick stays solid. In the arrangement, each part can come in on its own – which is exactly what the intro build at the end needs. If everything lived in one clip, you'd have to cut it apart later.
The v8 E-drums are a good fit for psybient: they're synthesized, so you can tune the kick to the key, shorten the decay of the hats and keep everything tight and clean, without the noisy tails some sample kits bring.
Step 3 – Replace the placeholders: pad and sub bass
The imported MIDI plays on placeholder sounds, so they go first. The pad is a warm Polymer patch from Low Tide with a slightly dark wavetable. While it plays, I open the filter cutoff just enough to give it air without making it bright – in psybient the pad is a bed, not a lead, and it should sit behind everything else.
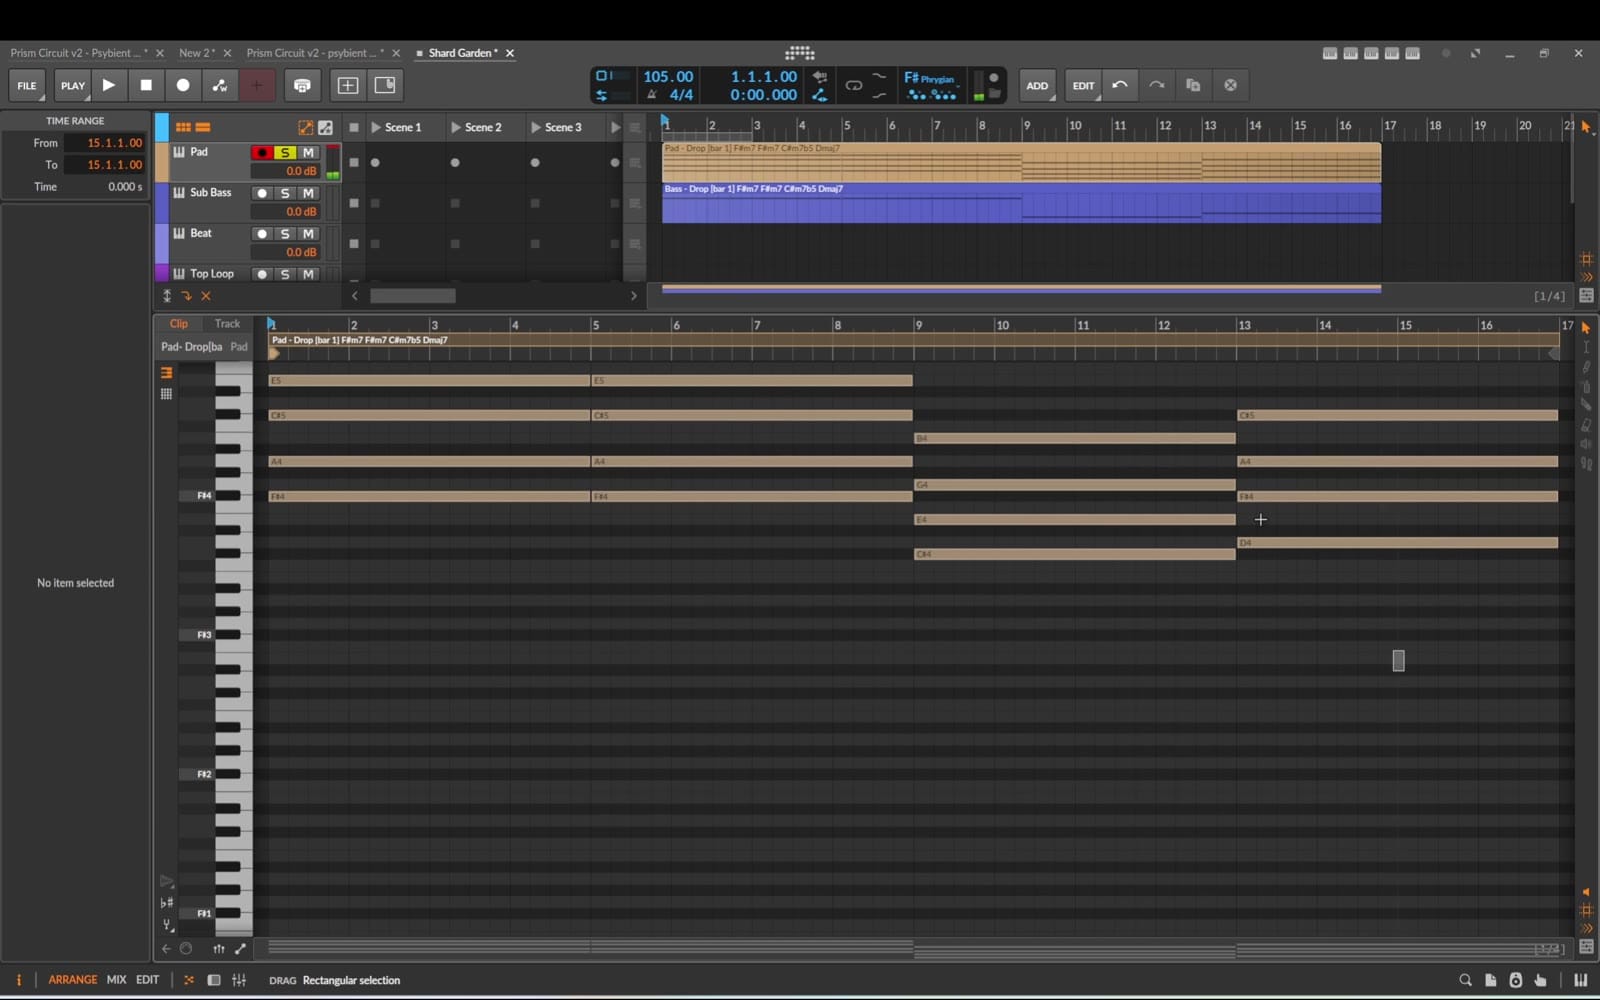
For the sub I auditioned a few Low Tide basses against the pad and settled on a clean, round Polymer sub. A touch of drive adds harmonics, so the bass still reads on laptop speakers and earbuds where the true sub frequencies disappear. The clip only holds roots: F sharp for eight bars, then C sharp and D, each for four bars.
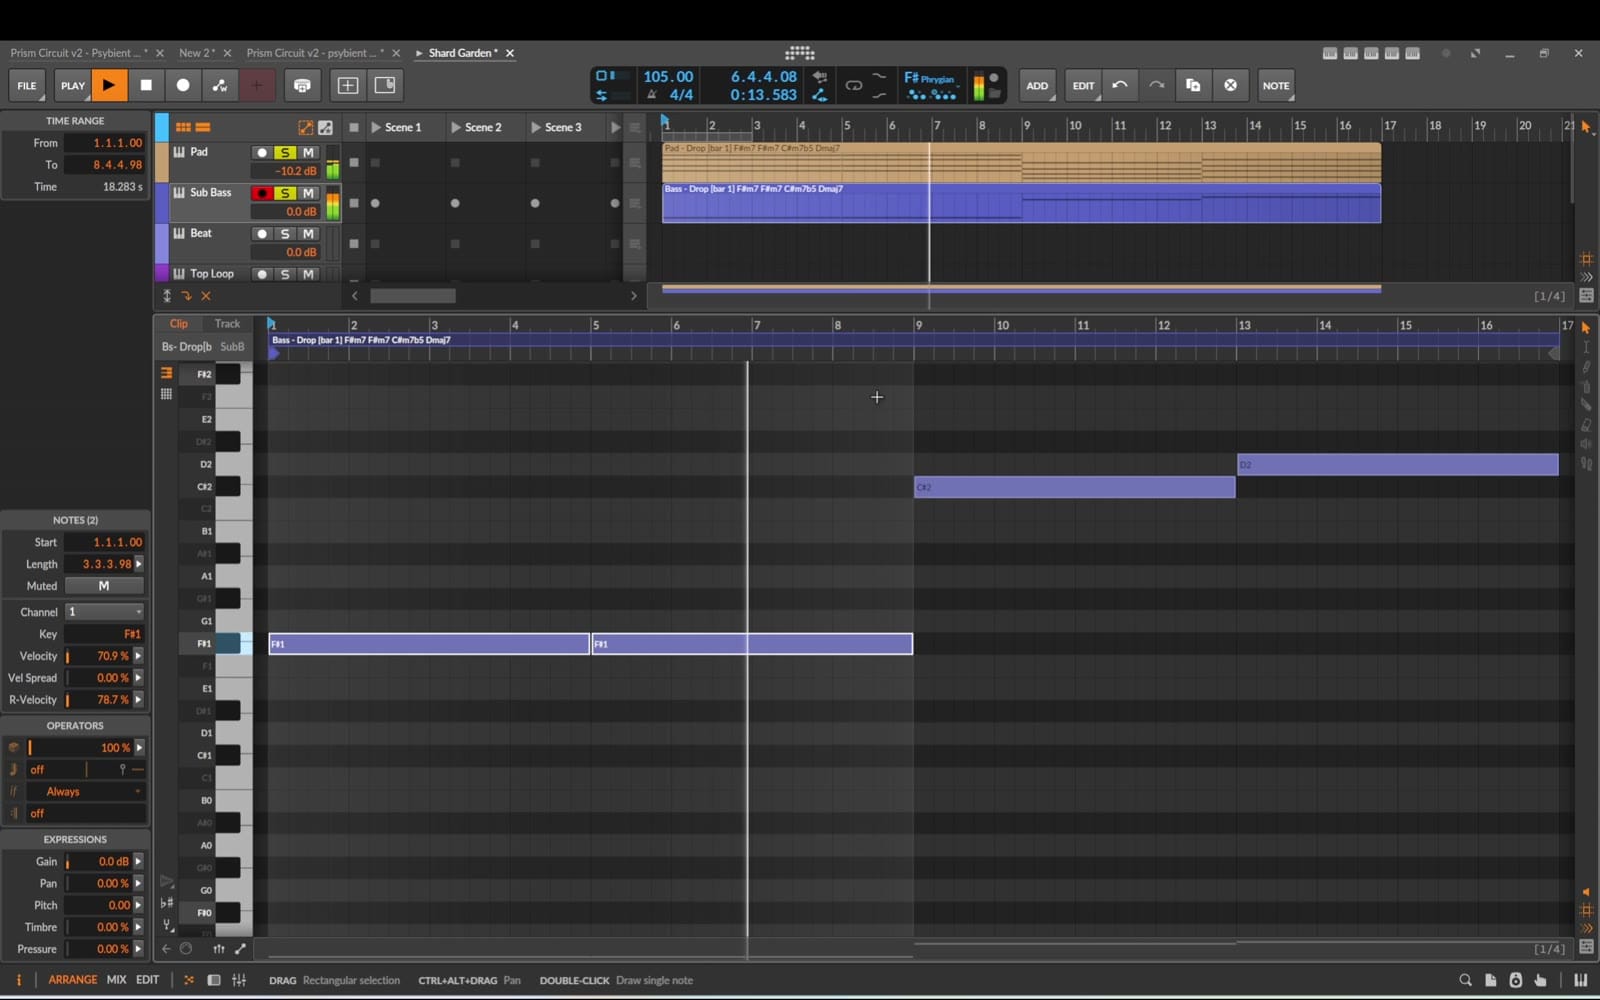
Listen to these two layers alone for a while. It's already a calm, breathing bed, and everything we add from now on has to fit around it. If the pad and sub don't feel good together here, no amount of drums will fix it later.
Step 4 – Rolling bass and stabs
Psybient lives on its rolling bass. I add a new instrument track under the sub and load a warm Phase-4 bass from Low Tide with a touch of FM growl. Then I adjust the attack and release of the amp envelope until every note rolls into the next instead of smearing. Too long a release and the notes blur into a drone; too short and the bass sounds clicky. The sweet spot is where each note just touches the next one.
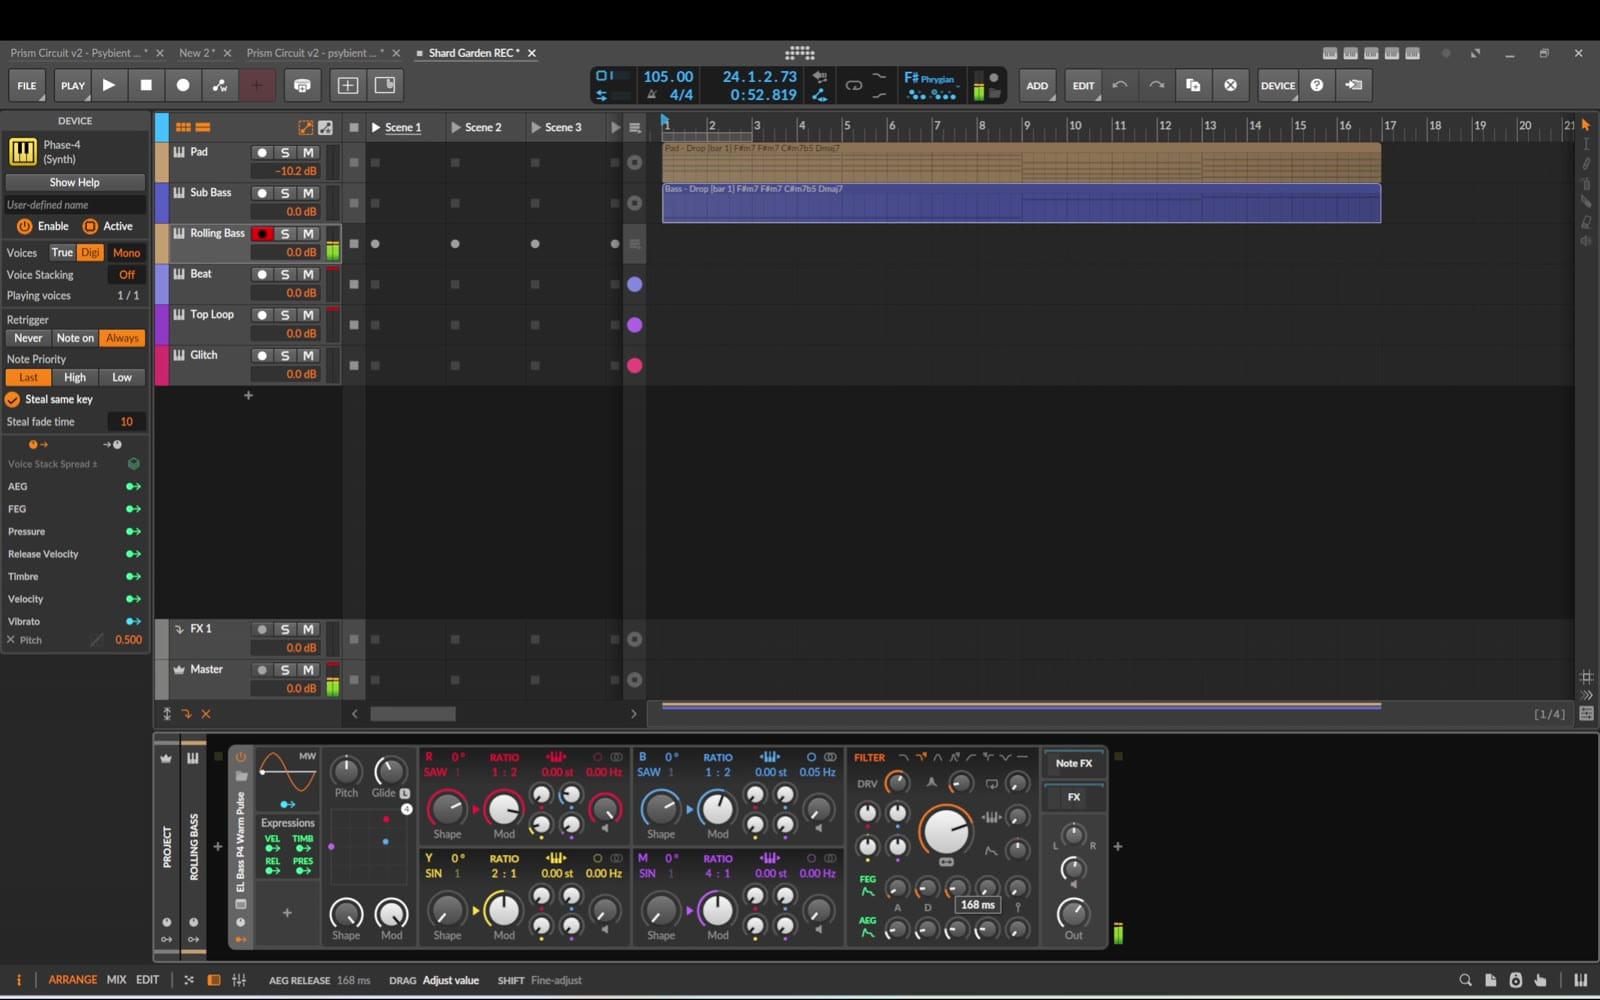
Having both a sustained sub and a rolling bass might sound like too much low end, but they do different jobs. The sub carries the deep fundamental and changes only with the chords. The rolling bass sits a little higher and carries the rhythm. Keep the rolling bass slightly brighter and shorter, and the two won't fight.
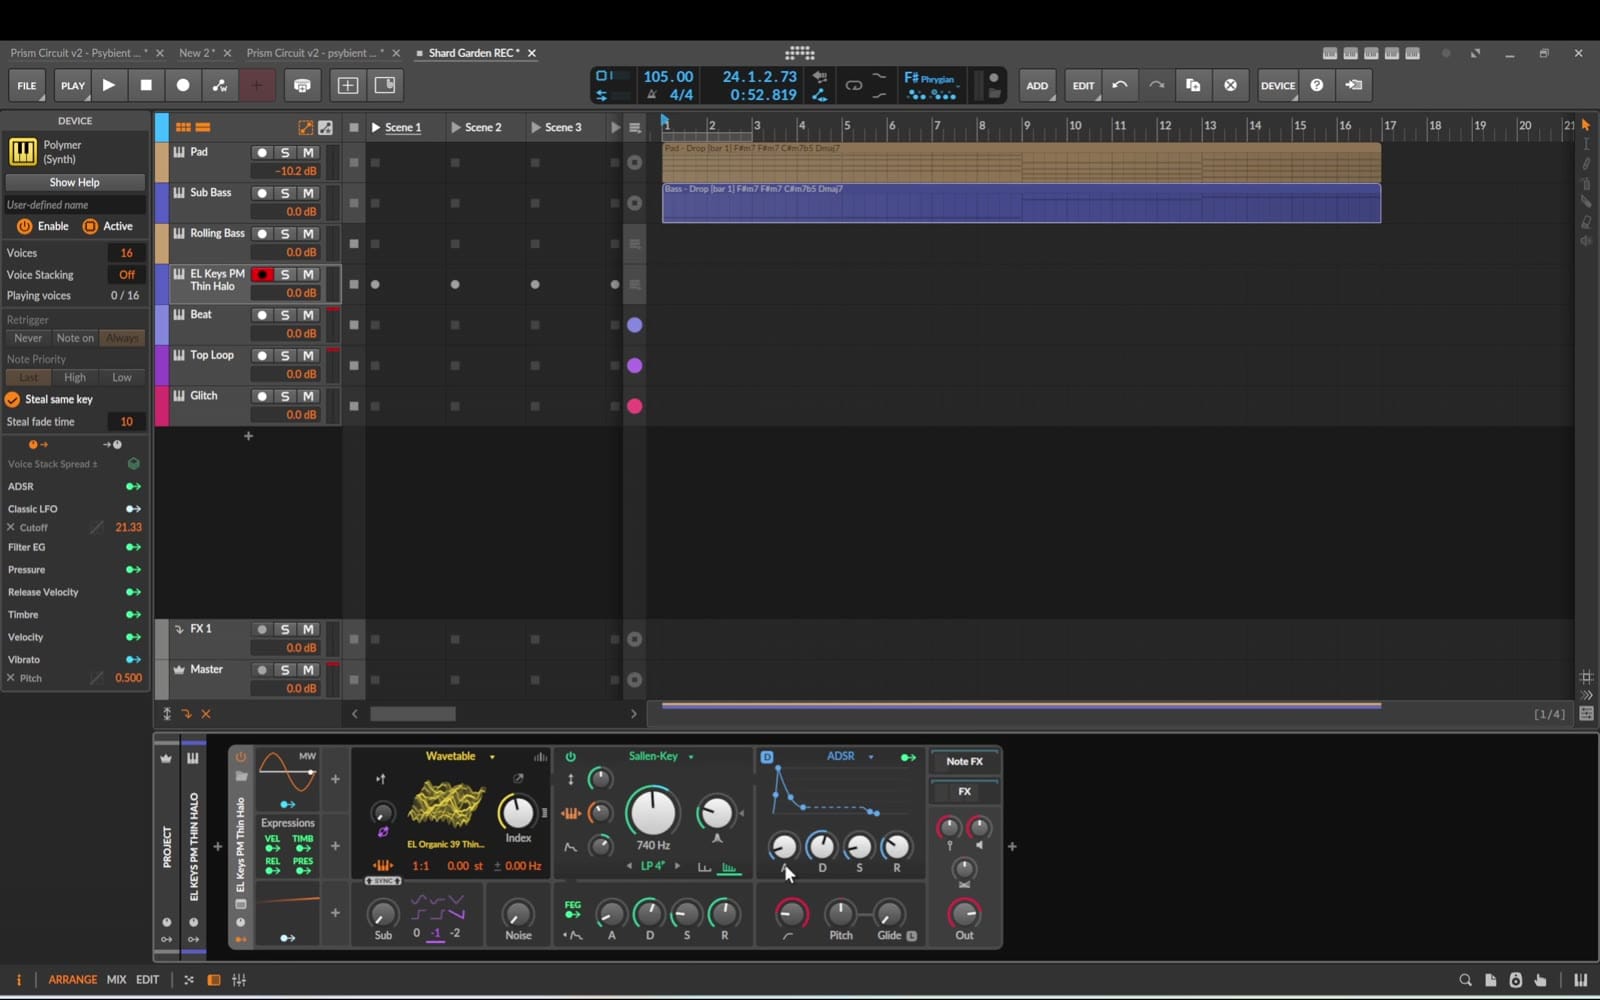
The stabs use a mellow, electric-piano-style Polymer sound with a soft halo. A quick attack and a short decay turn it into a stab that answers the bass and leaves room for the pad. Finally I rename the track to Stabs and keep a clear order in the track list: harmony on top, then bass and stabs, then the drums.
Step 5 – The MIDI patterns
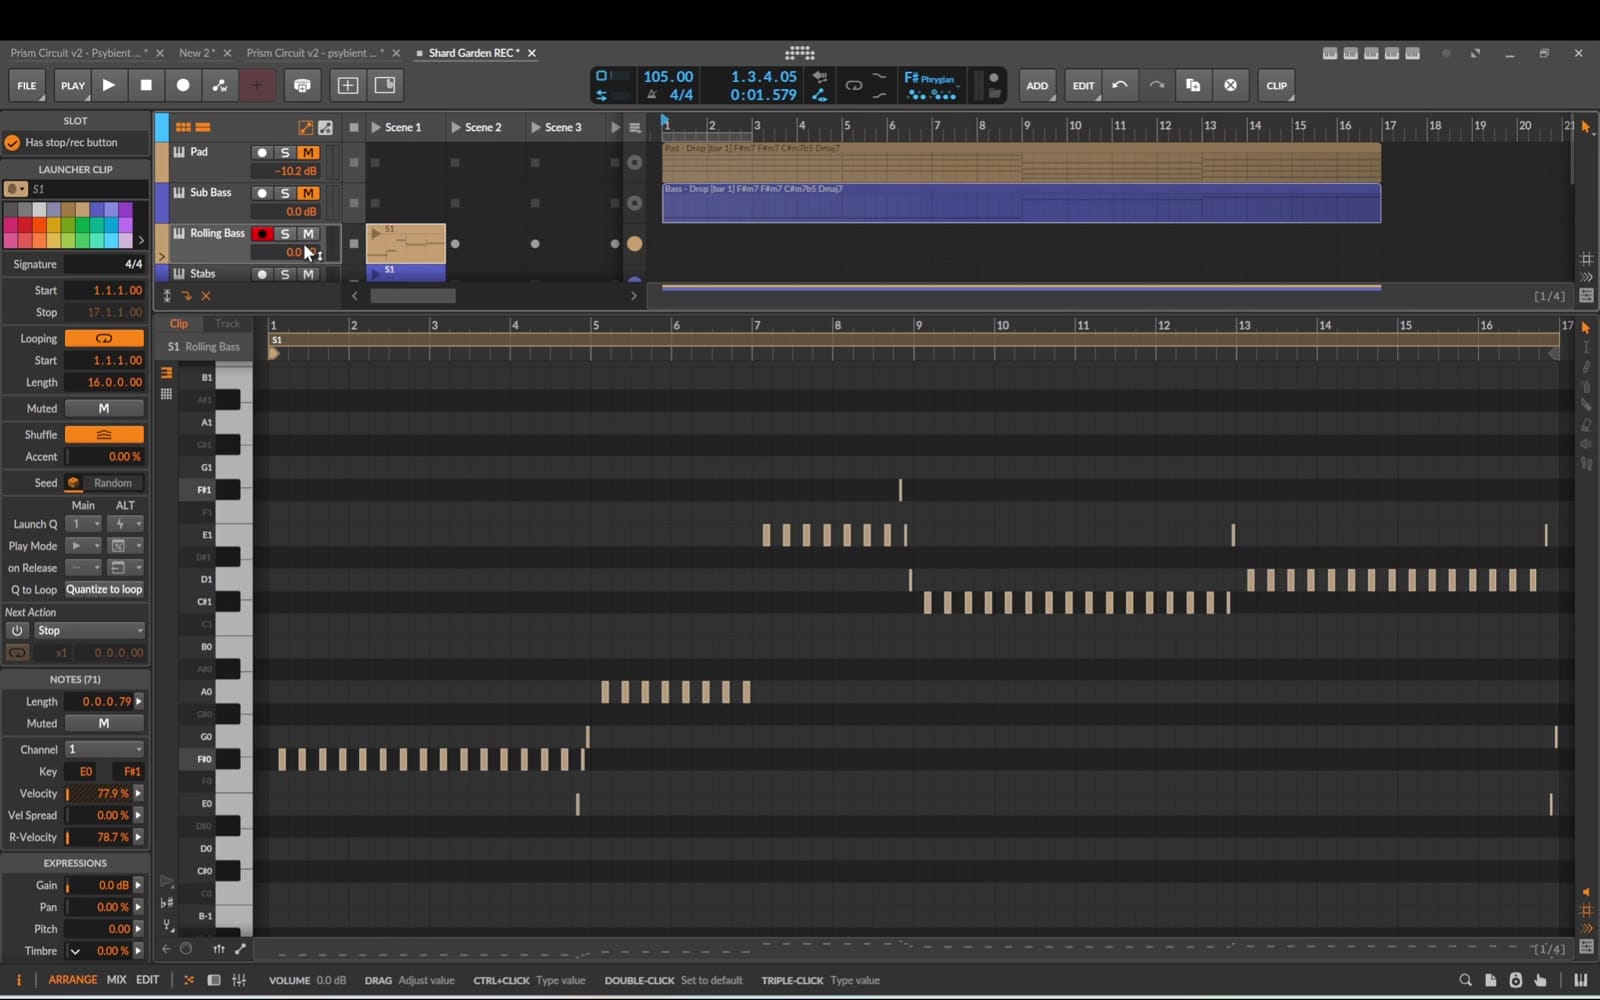
Each layer gets one launcher clip. The rolling bass plays short offbeat notes – F sharp, A and E in the first eight bars, with small passing notes at each four-bar change – then follows the chords to C sharp and D in the second half. The passing notes are tiny, but they tell the listener that a change is coming, which keeps a sixteen-bar loop from feeling static. A little extra filter drive gives the bass some grit.
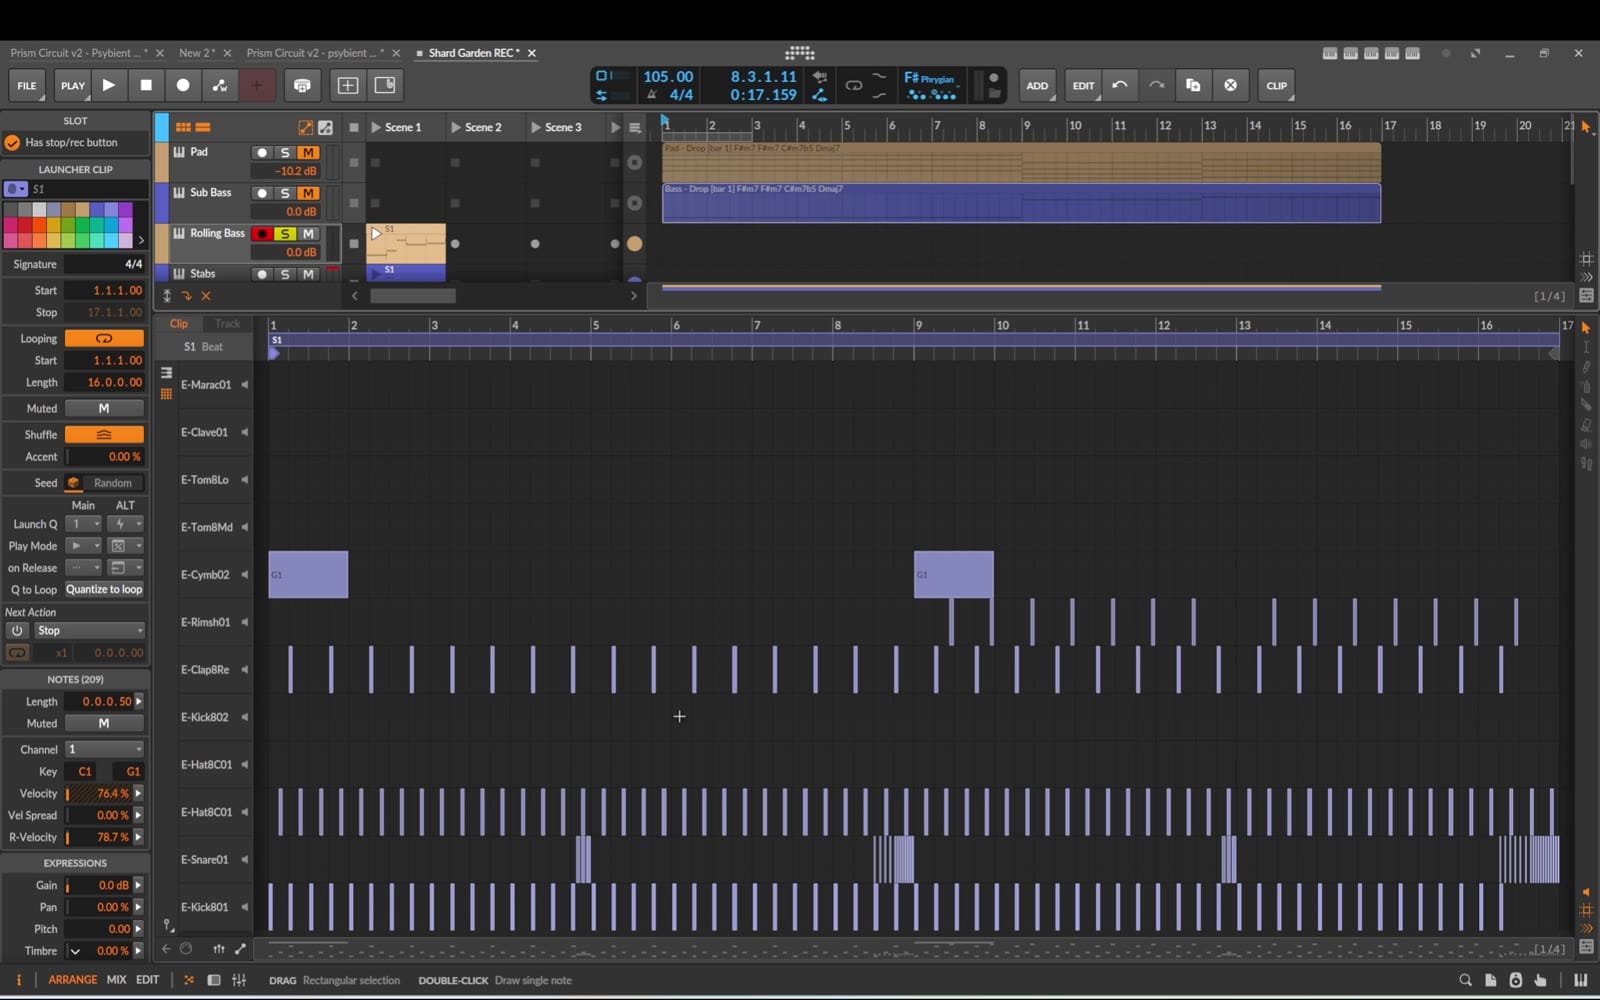
The Beat is a four-on-the-floor kick with the clap on two and four and offbeat hats. Because the bass sits on the offbeats, the kick and bass never hit at the same time – that's the classic psy trick that makes the low end bounce without sidechain compression. Snare fills mark the phrases: short ones at bars four and twelve, longer two-part rolls at bars eight and sixteen, first in sixteenths and then in thirty-seconds.
The Top Loop starts as a steady line of soft sixteenth ticks and gets busier from bar nine, with extra offbeat hits. My first version had low toms and triple hits too, but they made the groove crowded, so I removed them. Now the top loop stays light and grows mostly through velocity, filling the high end without stepping on the kick or the bass.
The stabs play short chord hits on the offbeats that follow the progression and answer the bass instead of fighting it. In bars seven and eight I moved them lower, so the end of the phrase feels heavier before the loop turns around.
Step 6 – An arp sequence from one held note
The sequence is a Low Tide preset with the arpeggiator built into the preset, so the clip holds a single note – F sharp two – from bar nine to the end. The arpeggiator turns that one note into a galloping pattern, and because the preset is in the same key, it never clashes with the chords.
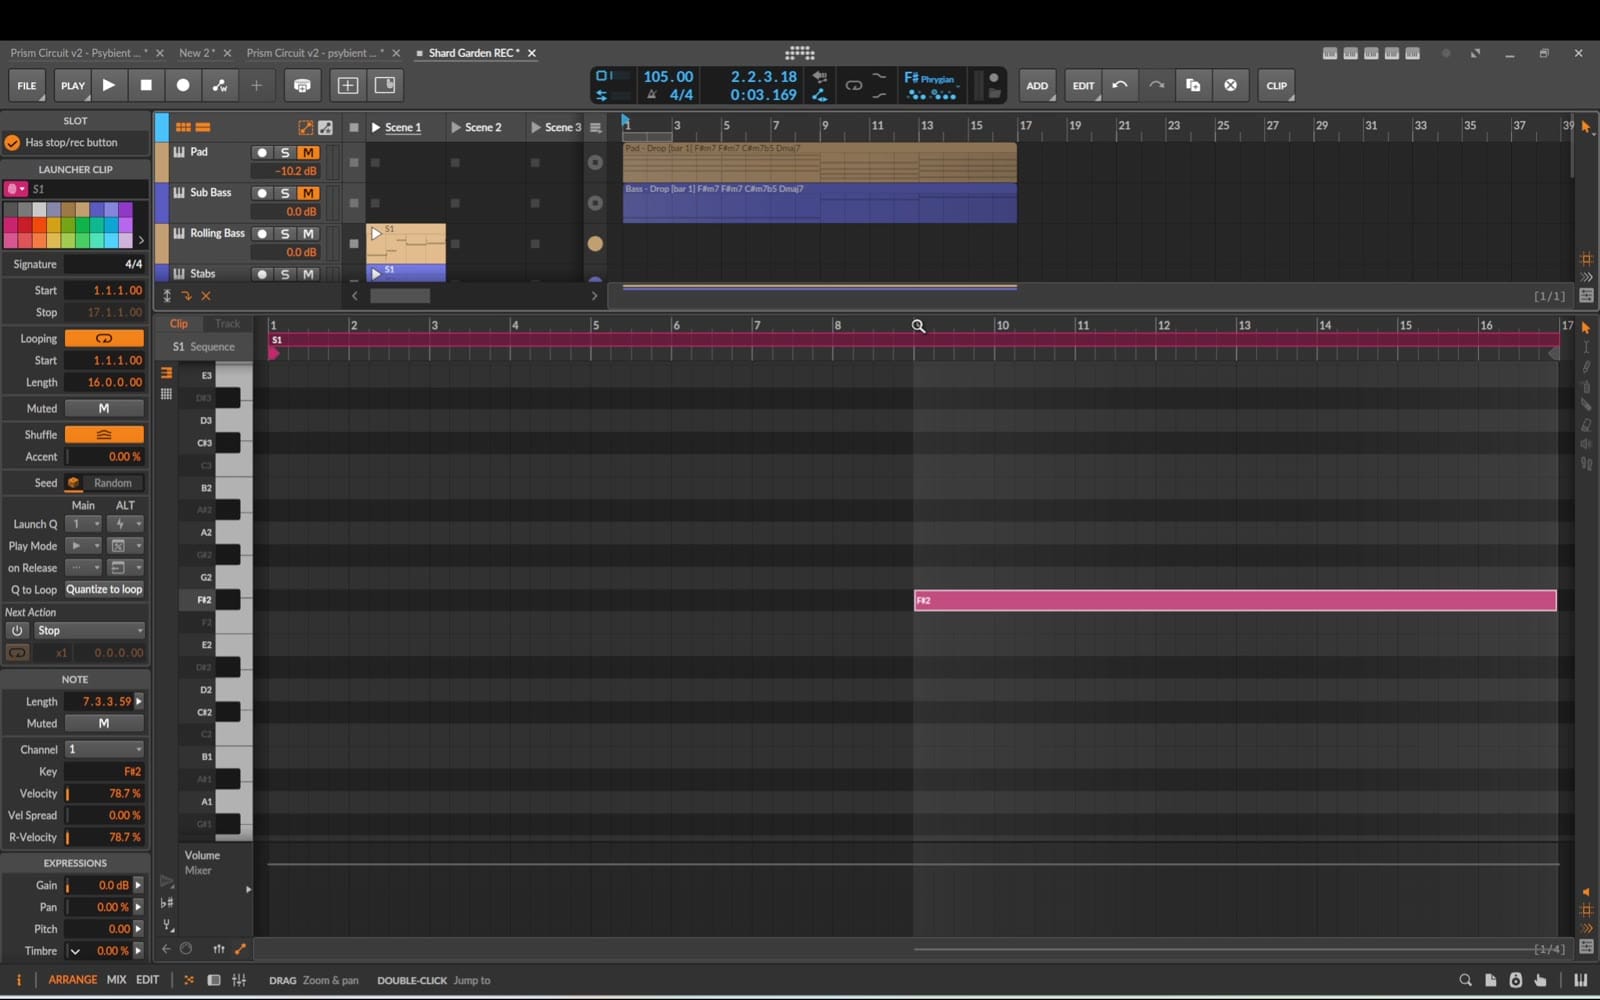
Here's the arrangement idea that makes the loop feel dynamic: in the first eight bars the stabs answer the bass; in the second eight the stabs stop and the sequence takes over. The listener always has one melodic rhythm to follow, never two competing ones. That handover keeps the loop moving without crowding it, and it gives the second half its own character.
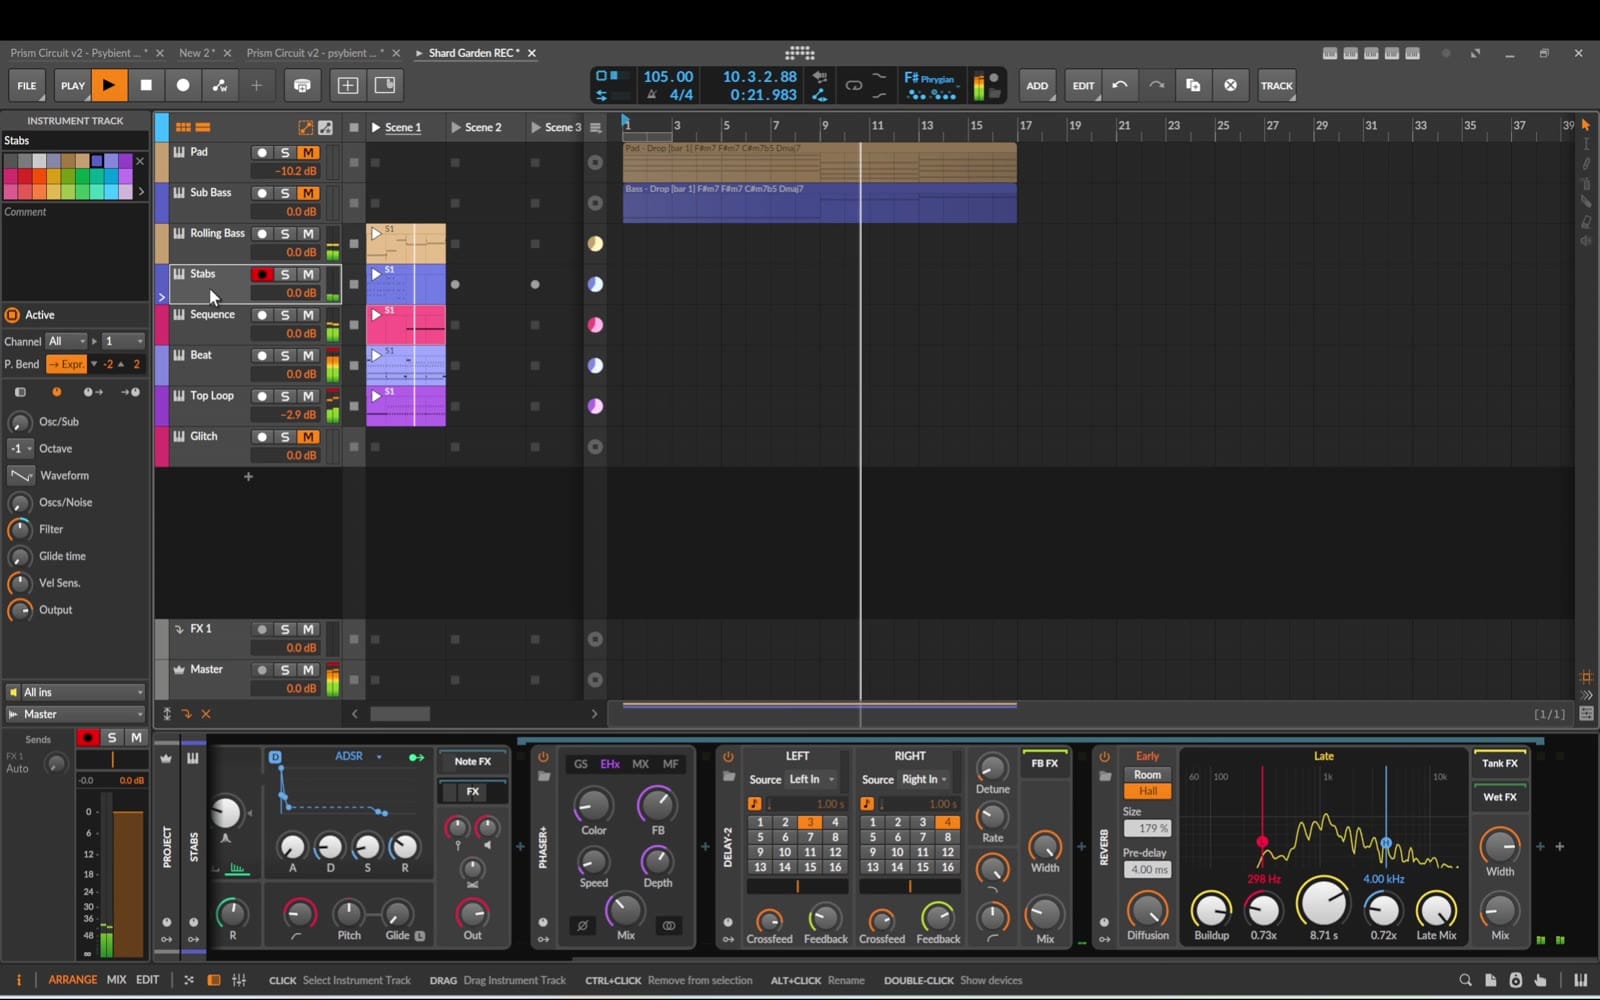
Effects stay native too. The stabs run through a modulation effect, a stereo delay and a reverb for that wide, spacey tail, and the sequence gets a filter and a chorus after the synth, so it slowly changes colour and never sounds static.
Step 7 – A riser and a limiter
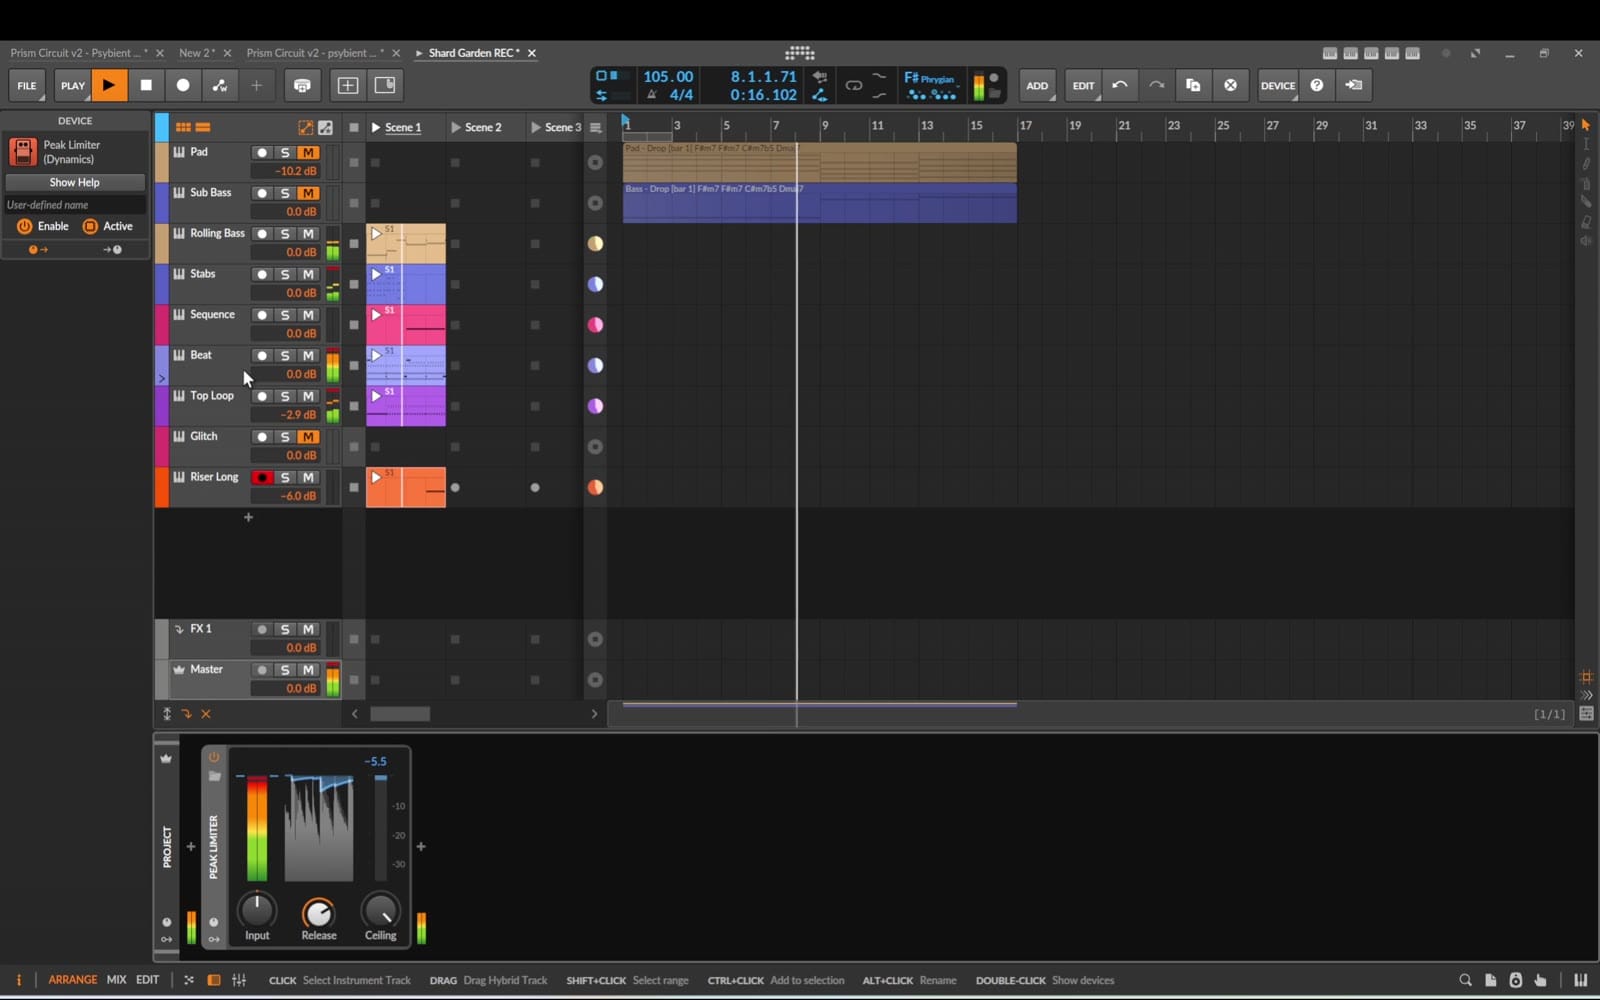
Every loop needs a lift at the end. The riser is a Low Tide preset held over the last four bars. After it sits a Tool device with an LFO on the panning, so the sweep travels across the stereo field before it cuts on the downbeat. I tried a second, short riser at bar eight as well, but it took the focus away from the main build, so one long riser it is.
With every layer now playing together, the master gets hot, so I add a Peak Limiter on the master to catch the peaks. It's a safety net, not a mastering chain – the balance should still come from the track faders.
Step 8 – Build the intro
With the main part finished, I drag the launcher clips into the arrangement, starting at bar seventeen, riser included. That's the sixteen-bar dynamic section. In front of it, bars one to sixteen keep only the pad and sub bass from Track Builder – a slow, evolving start.
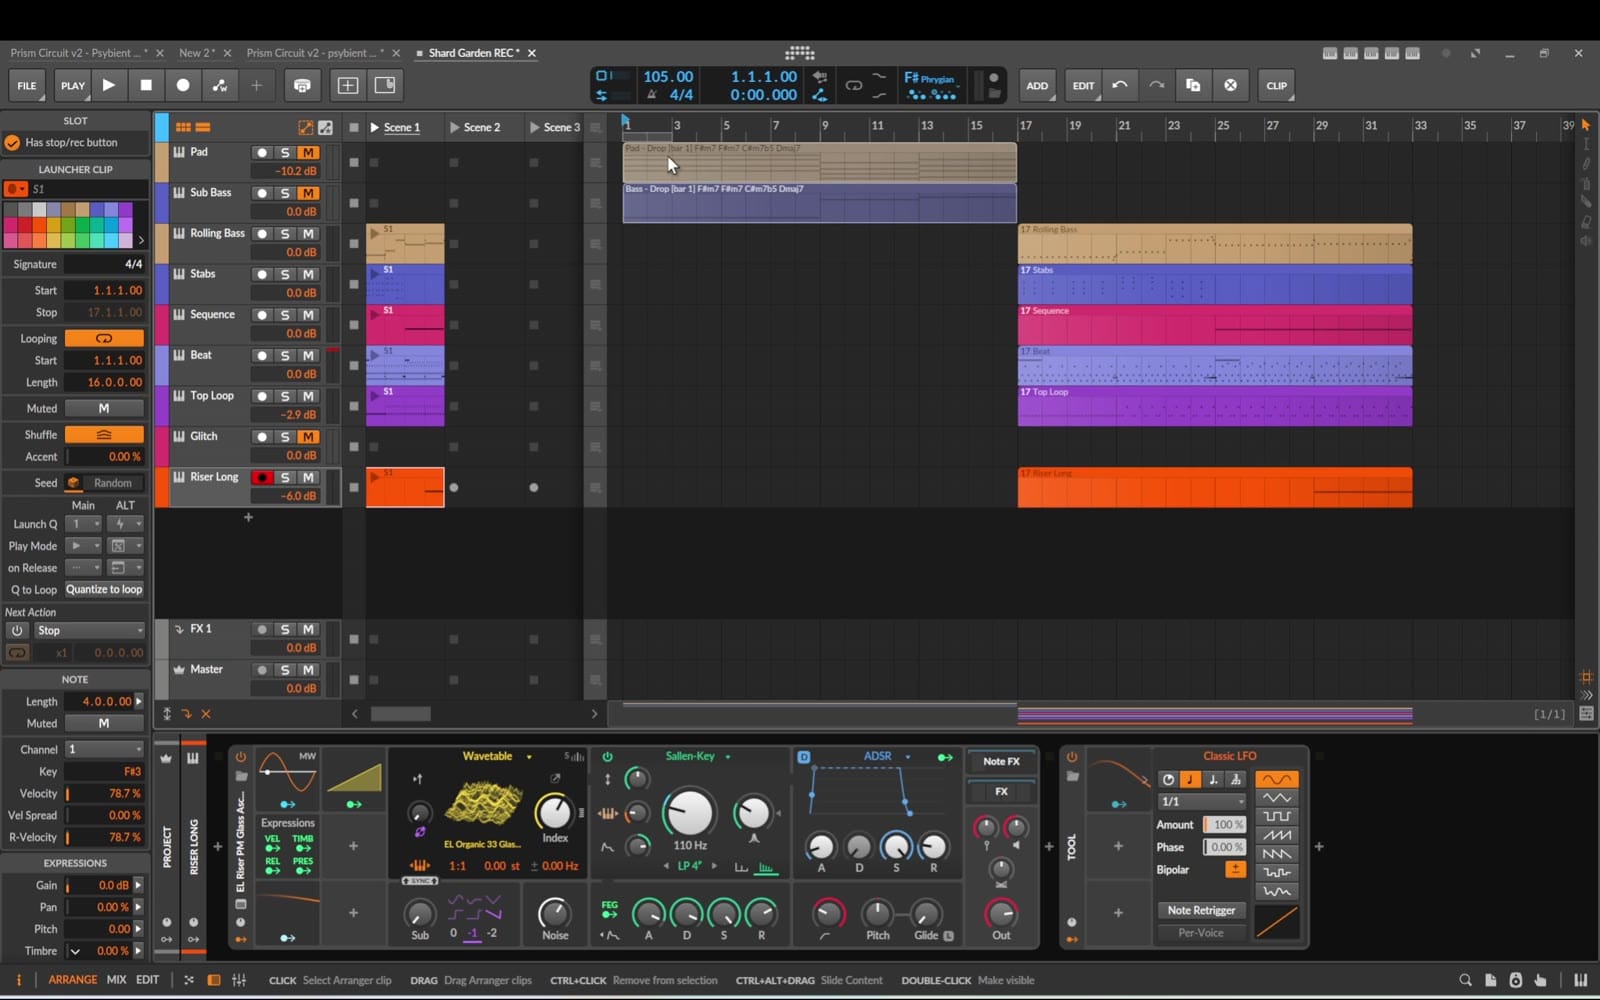
But listen to the transition: the jump from that calm intro into the full groove is too sharp. It sounds like two different tracks glued together. So the intro needs a bridge, and the separate drum tracks make it easy:
- small, sparse glitches from bar two, so something is happening from the start
- the top loop fading in with soft ticks from bar nine, then the hats
- a half-time kick at bar thirteen – the pulse arrives, but not the full energy yet
- the full beat at bar fifteen
- a two-part snare roll with the riser, straight into the drop at bar seventeen
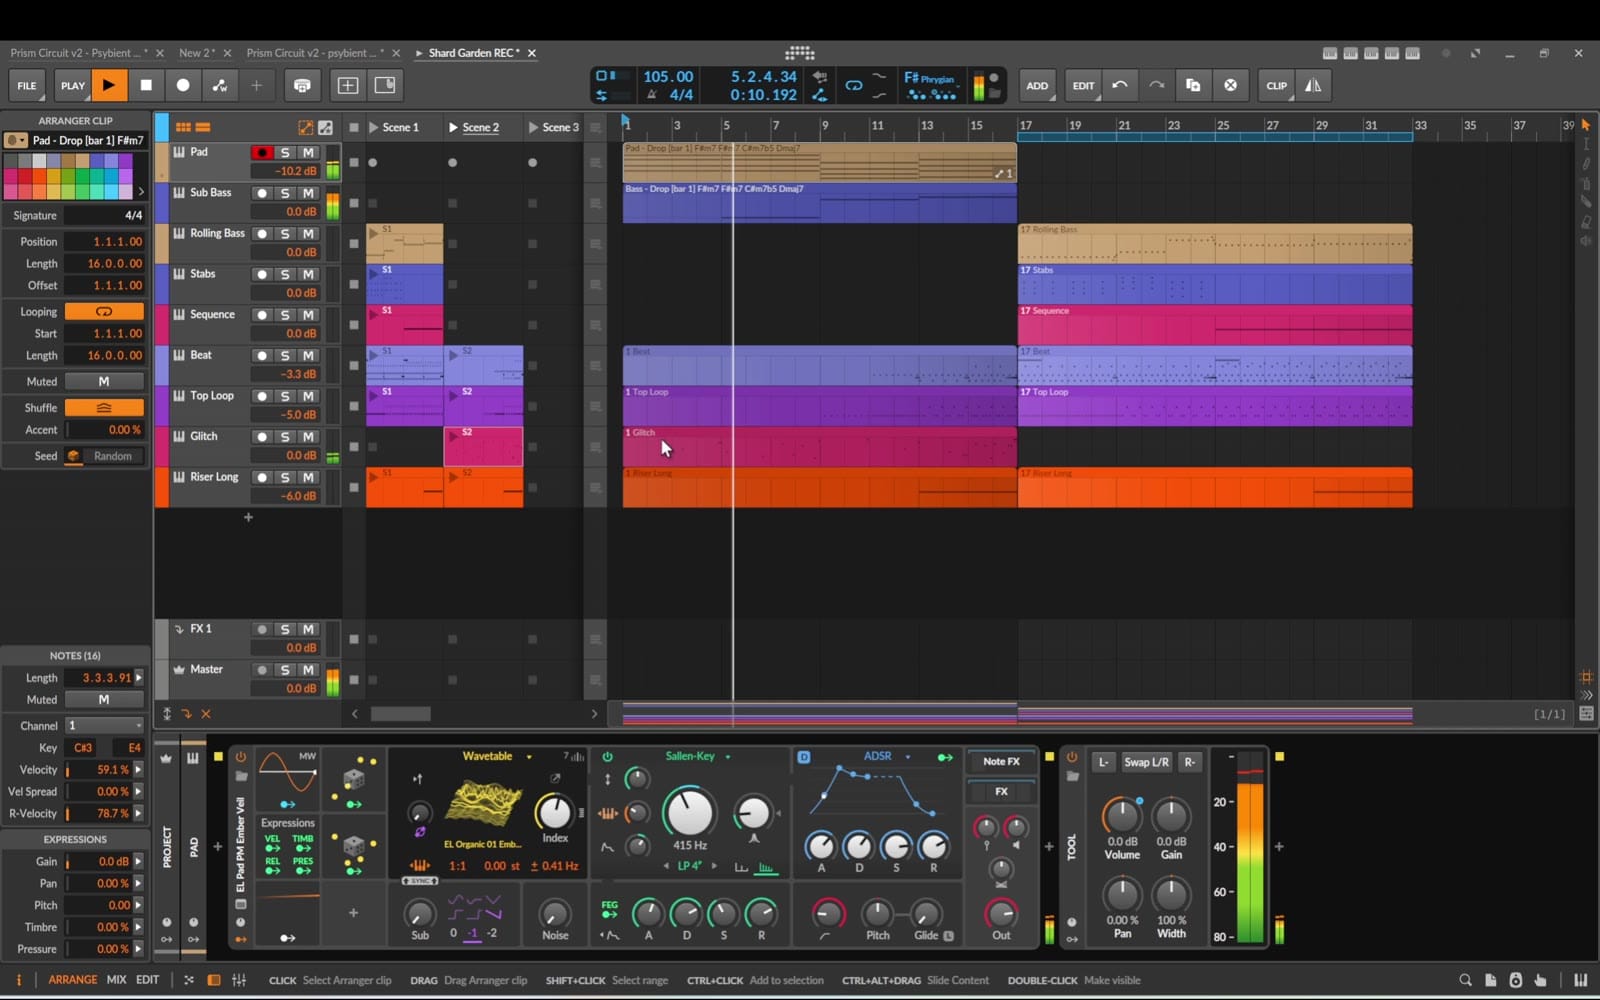
Play it from the start and the difference is huge. The intro now feels like it's heading somewhere, and the drop lands with real weight.
Common mistakes to avoid
- Too many layers at once. If the stabs and the sequence both play all the time, neither one is heard. Hand them over instead.
- Busy top percussion. Toms and triple hits sound exciting solo but clutter the groove. Keep the top loop light.
- Bass on the beat. If the rolling bass hits with the kick, the low end gets muddy. Keep it on the offbeats.
- No build-up. Jumping from pad and sub straight into the full groove sounds abrupt. Bring the drums in stage by stage.
Takeaways
- Harmony first. A generated progression in Track Builder gives you chords and bass in minutes, so you can spend your time on sound and groove.
- Stock instruments are enough. Polymer, Phase-4, Drum Machine and Sampler cover a complete psybient loop – the sound comes from the presets and the arrangement, not from plugins.
- Hand layers over. Stabs in the first half, sequence in the second: movement without clutter.
- Build the intro in stages. Bring the drum parts in one by one and the drop lands much harder.
Get the tools
All the synth sounds in this loop come from Low Tide – 90 ambient presets for Bitwig's own Polymer, Phase-4 and Sampler. They're made for Bitwig's built-in synths, so if you own Bitwig, they load straight away – no extra plugins needed. The chords and bass came from Track Builder, which generates MIDI for every section of a track in a few minutes. Both are in the Etherloops shop.
Try building your own version: keep the same tempo and mode, pick a different progression in Track Builder, and see how far you get with only what's already inside Bitwig.