Blank Project to Self-Evolving Ambient Loop in Bitwig (Vital, Surge XT & Free FX)
From a blank project to a 16-bar ambient loop that never plays the same twice: Track Builder and Driftline for the MIDI, Vital and Surge XT for the sounds, and note probability plus random modulators for the movement.
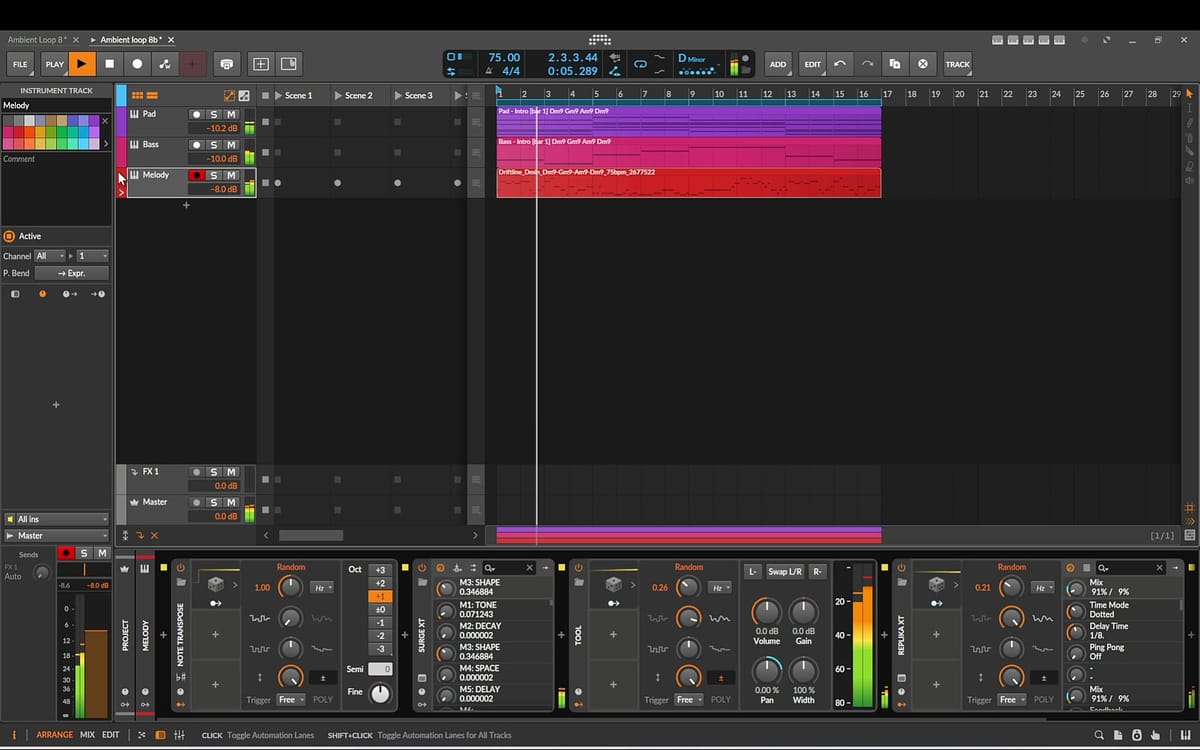
A loop that plays itself. In this tutorial we go from a completely blank Bitwig project to a 16-bar ambient loop that keeps changing on its own, so it never sounds exactly the same twice. The chords, bass and melody come from two small web apps, the sounds come from Vital and Surge XT, and the movement comes from note probability, Random modulators and two free effects from Native Instruments.
This post follows the video step by step, with the settings I used, so you can rebuild the loop at your own pace. You can follow along in any DAW; the probability and modulator tricks are shown in Bitwig, but most DAWs have something similar.
What you'll build
- Key and tempo: D minor, 75 BPM, a relaxed pace for ambient
- Length: one 16-bar loop, with the chords changing every four bars (Dm9, Gm9, Am9, Dm9)
- Three tracks: an evolving wavetable pad in Vital, a deep drone bass in Surge XT and a plucky melody in Surge XT
- Movement: note probability on the pad, random octave jumps and random panning on the melody, and a delay whose mix rises and falls on its own
1. Chords and bass in Track Builder
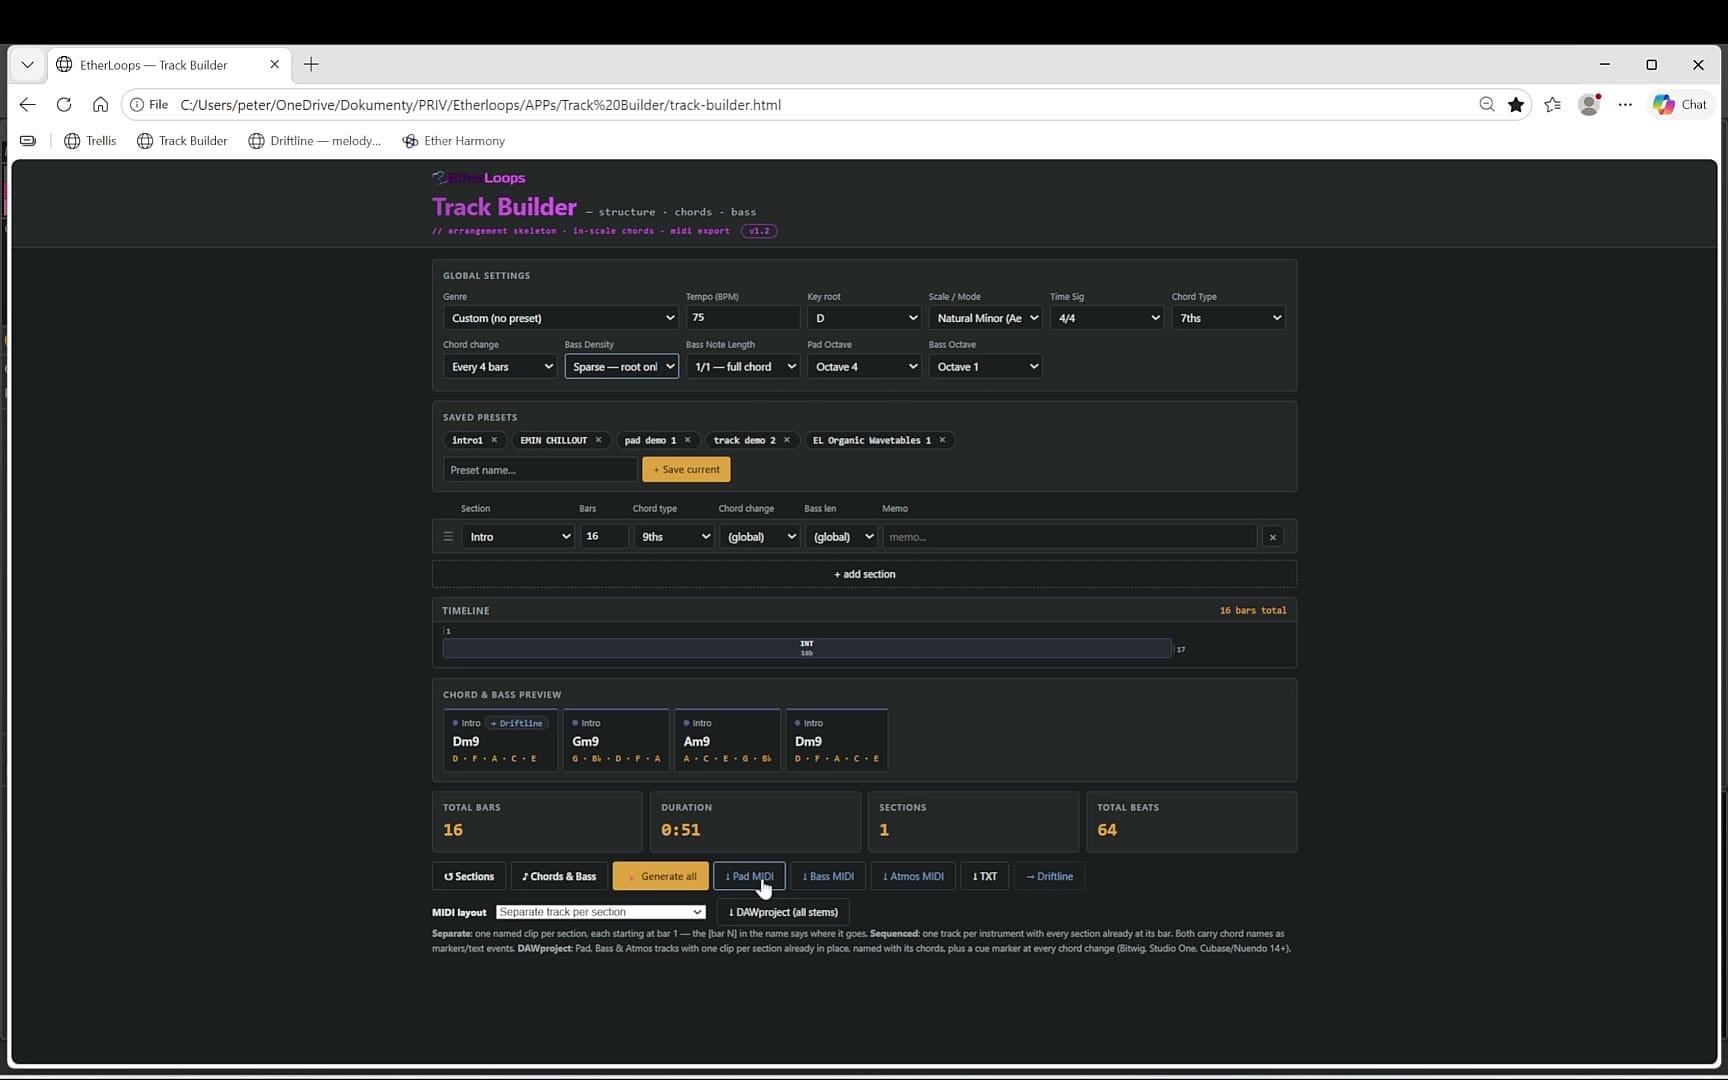
Start with an empty project and set the key to D minor and the tempo to 75 BPM. Then open Track Builder in your browser and enter the same song settings.
- Set the chords to change every four bars.
- Set the bass to play root notes only, each held for the full length of the chord.
- Delete the default song sections and keep just one, set to 16 bars.
The progression is generated automatically. If you don't like it, press regenerate as many times as you want until one fits. Then export the pad (chords) part and the bass. The MIDI file goes straight to your Downloads folder, and you can drag it from there onto the Bitwig timeline.
If you want to go further and generate a whole track section by section, see How to Generate MIDI for a Complete Track.
2. A melody in Driftline
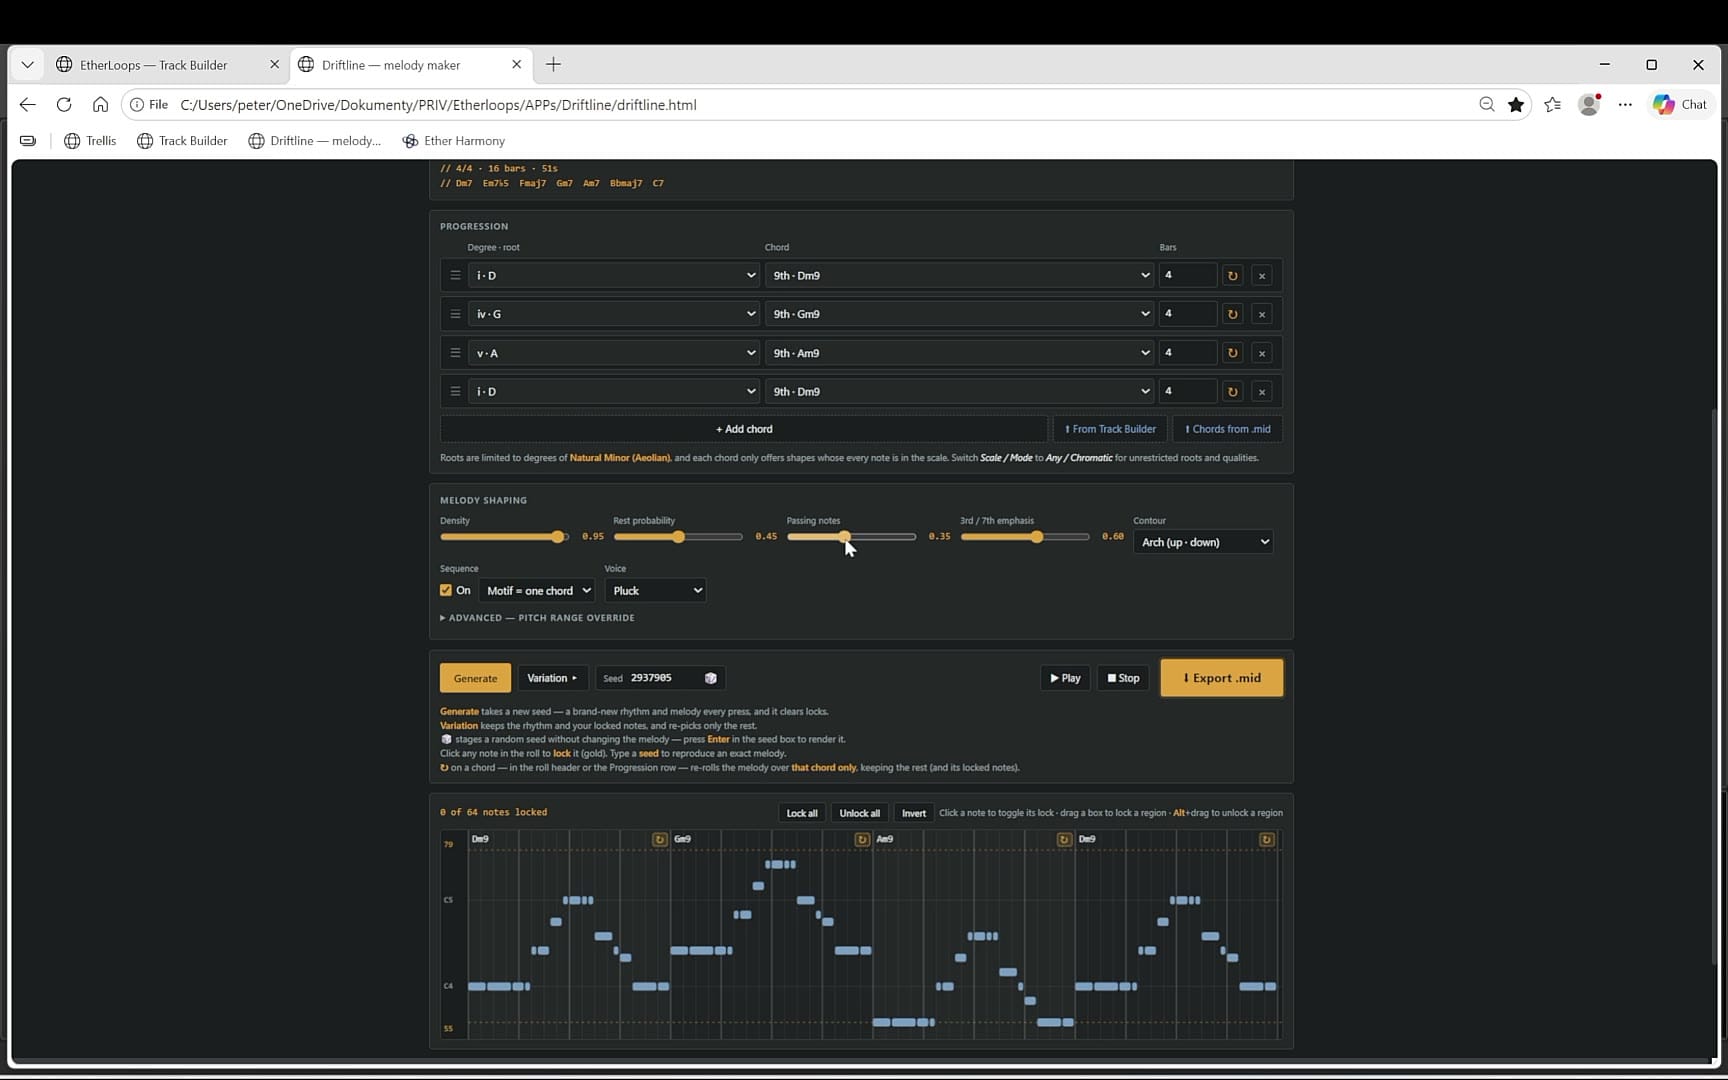
Back in Track Builder, click the Driftline button. This sends all the current settings to Driftline, my melody generator. Open Driftline and press From Track Builder, and the key, tempo and chords are carried over automatically.
- Set Note Rate to Mix (weighted) and blend sixteenth and eighth notes.
- Adjust the melody octave, the density and a few other parameters to shape the feel.
- In Advanced mode, narrow the note span so the notes stay close together and the melody doesn't jump around too much.
Press Generate and you get a melody for the whole 16-bar loop. You can also regenerate single chord sections if one part doesn't work. When you're happy, press Export MIDI and drag the file onto a new track.
More on writing melodies over your own chords: How to Write an Ambient Melody Over Your Own Chords.
3. The pad: Vital with an evolving wavetable
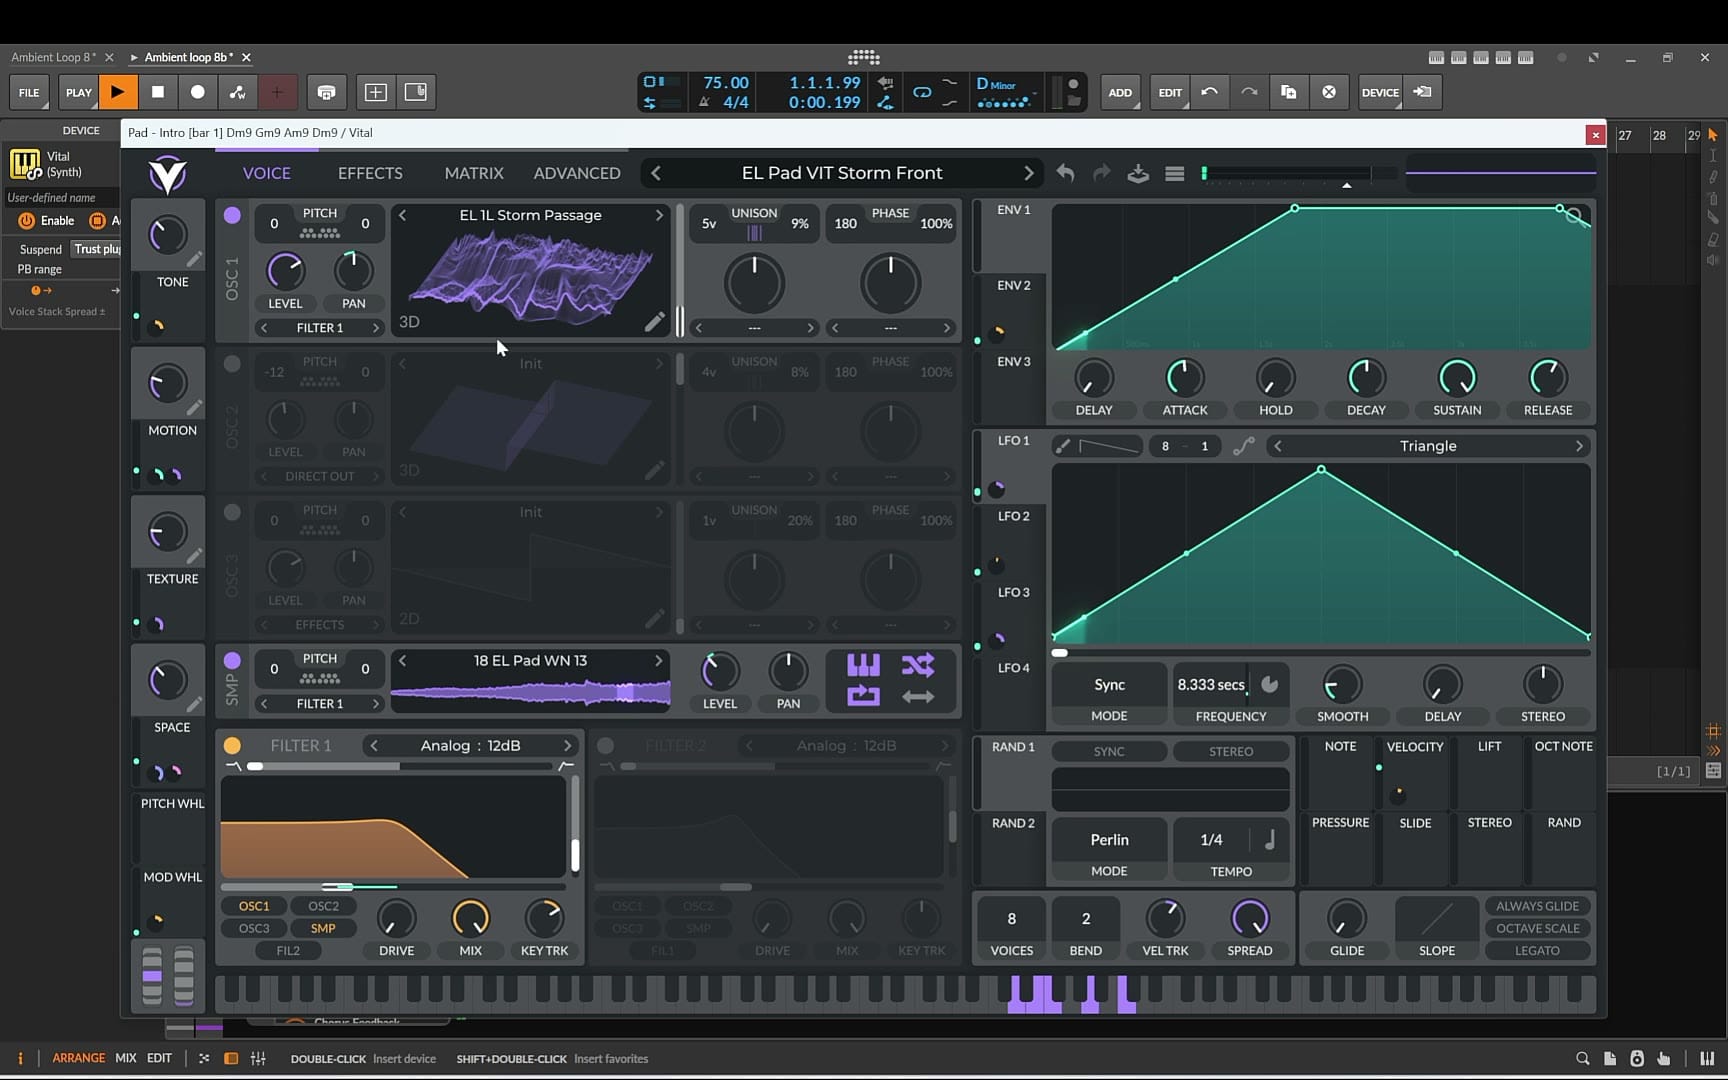
Loop the whole section and solo the pad track. Delete the default instrument and load Vital (free). I picked EL Pad VIT Storm Front, an evolving pad built around a wavetable oscillator, from Slow Forms — Vital Edition. The slowly shifting wavetable gives that atmospheric texture that works so well in ambient music.
Smoother voicings
Open the pad's MIDI editor. To make the chords flow more smoothly from one to the next, select the top notes in the progression and press Shift + Down arrow to move them down an octave.
Slice the chords into one-bar pieces
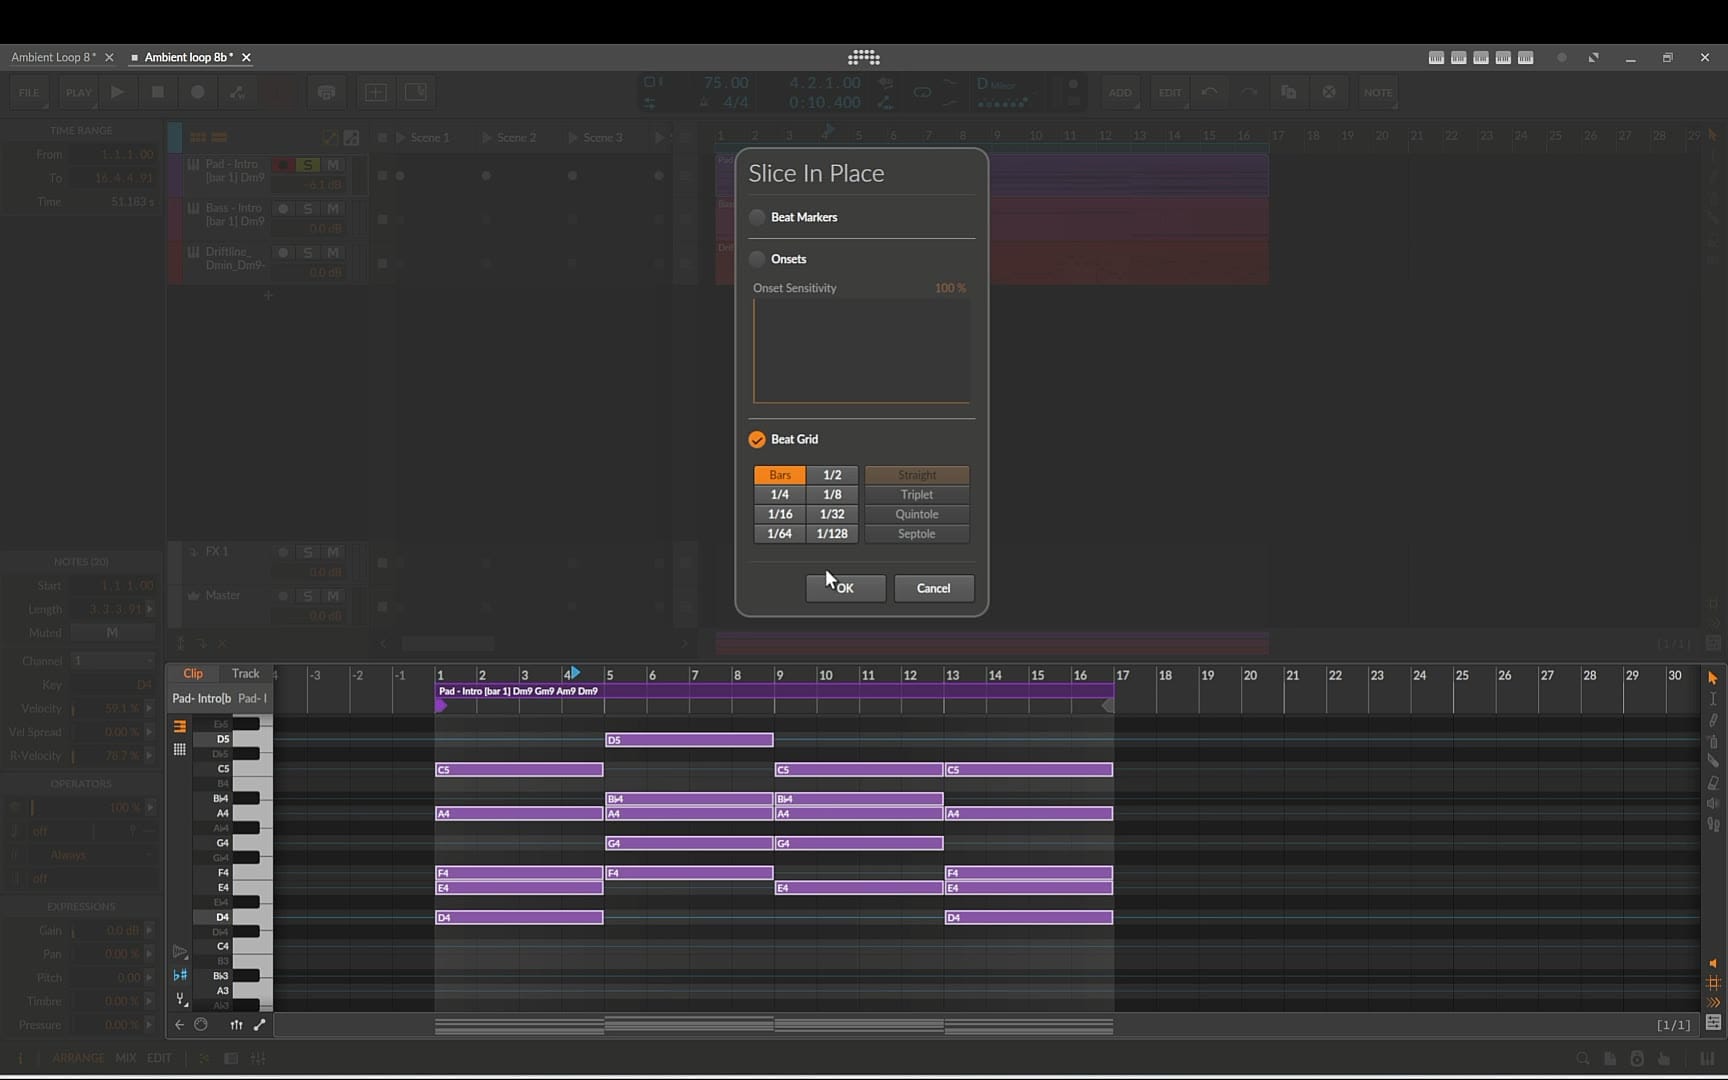
Select all the notes, right-click one of them and choose Slice in Place. In the dialog, choose Beat Grid, pick the first option, Bar, and click OK. Every chord is now cut into separate one-bar notes, which gives us room for variation.
Note probability
With all the notes still selected, go to the Operators panel on the left and pull the probability down to around 75–76%. Now each one-bar piece of each chord plays or skips at random, so the pad changes a little every time the loop repeats. This is the main trick behind the generative feel.
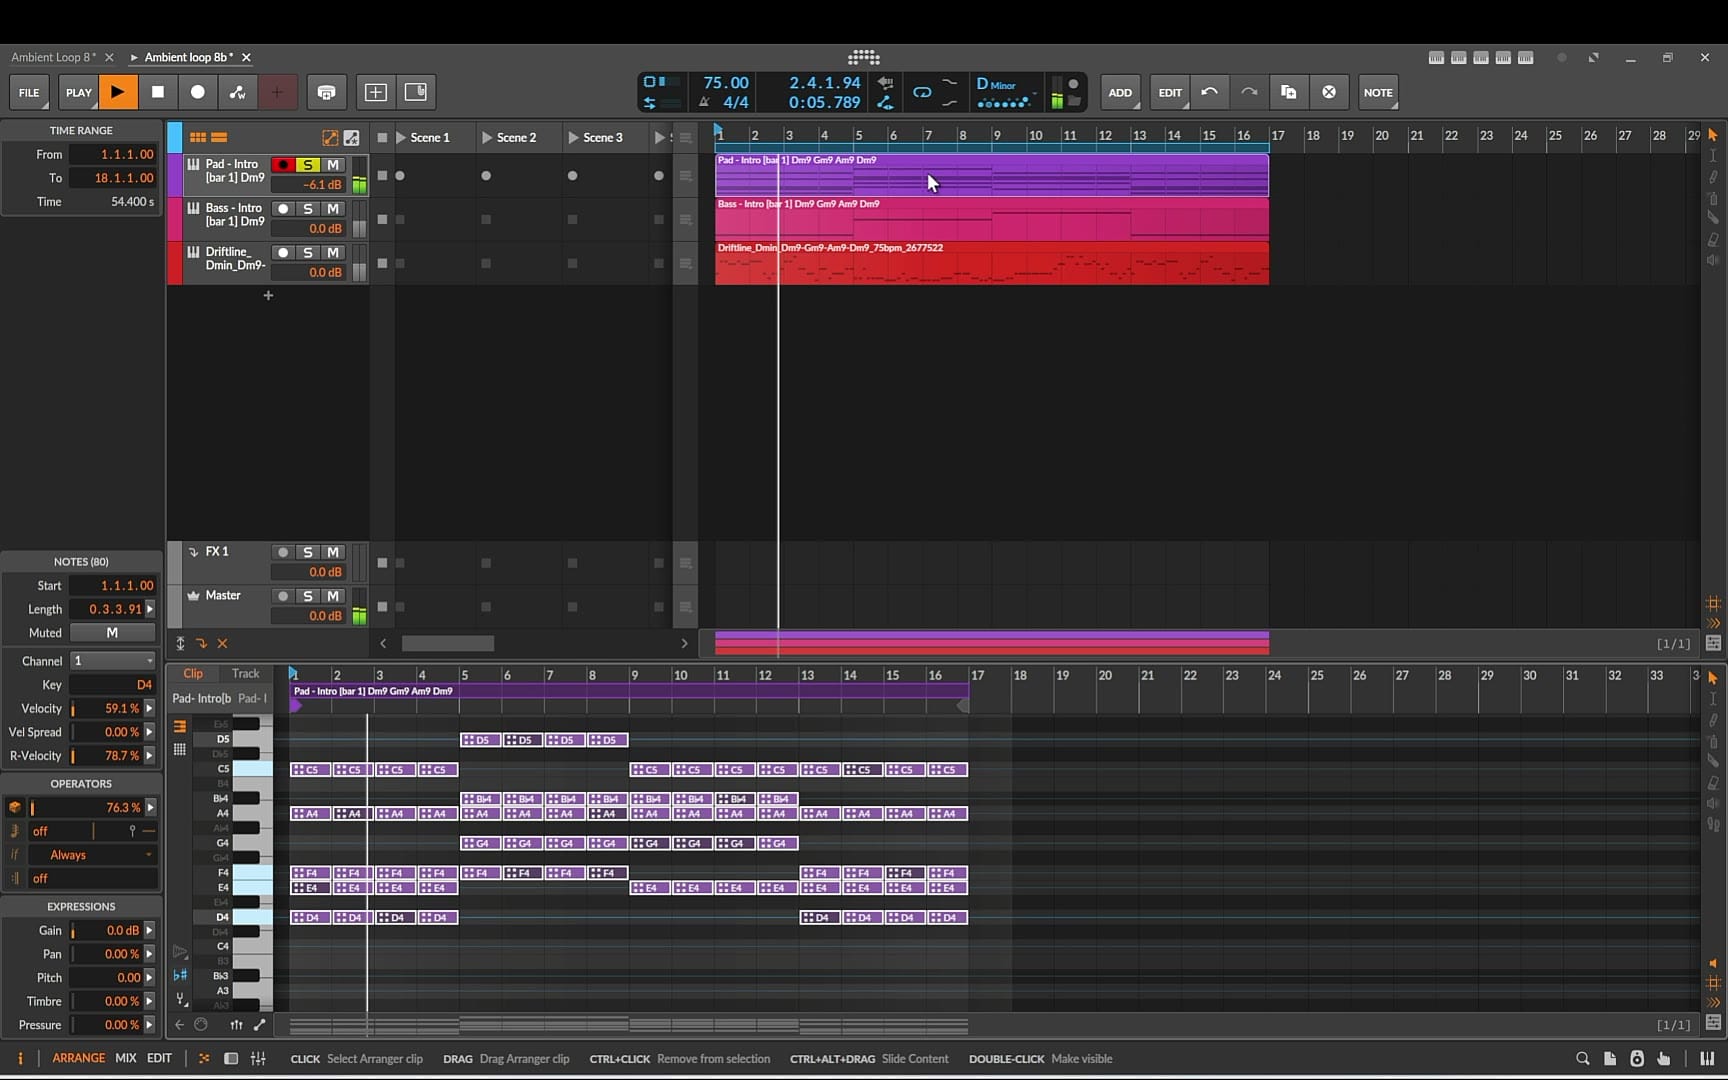
Shaping the pad
Add a multiband compressor to bring out the mid and high frequencies so the pad sounds clearer and has more presence. Then add a filter and set the cutoff by ear until the pad sits right. Later you can automate the filter for even more movement.
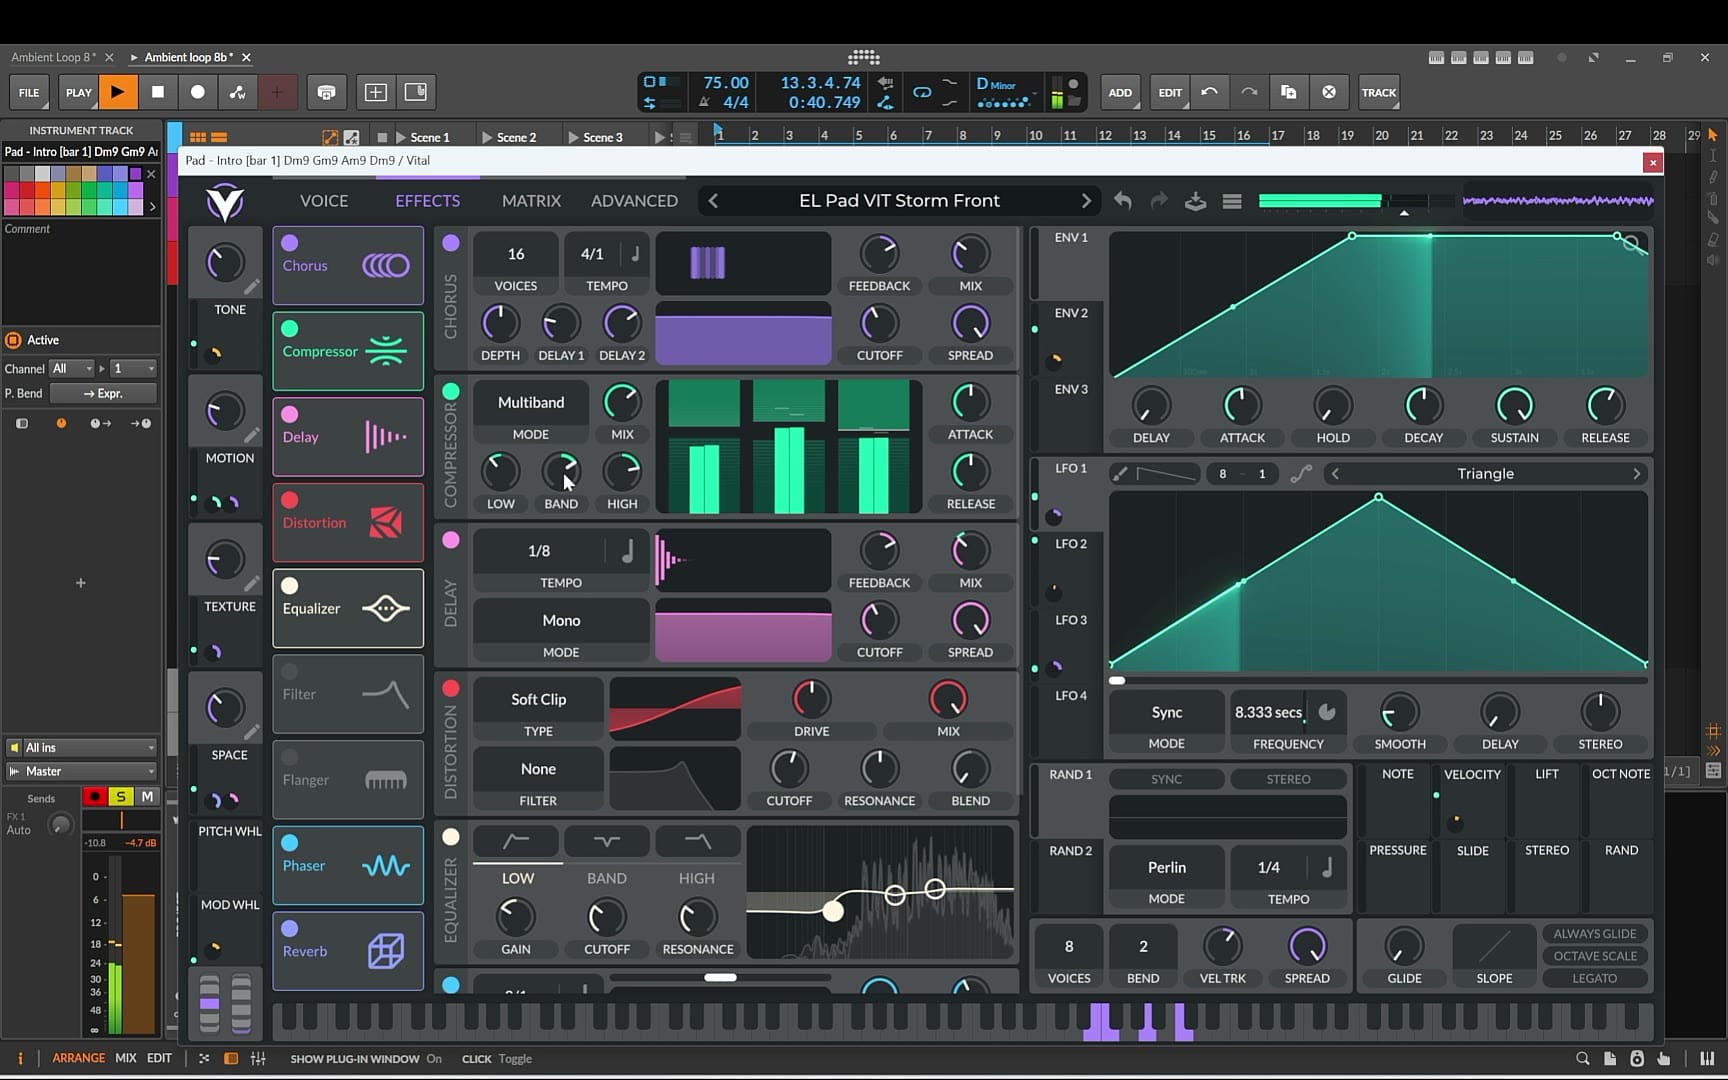
Want to design a pad from scratch instead? Try How to Build a Lush Ambient Pad in Surge XT.
4. The bass: a deep drone in Surge XT
For the bass, load Surge XT (free) and pick a deep, evolving drone. I used EL Drone FM3 Rust Cathedral from Engines — Surge XT Edition, then tweaked its macros to taste.
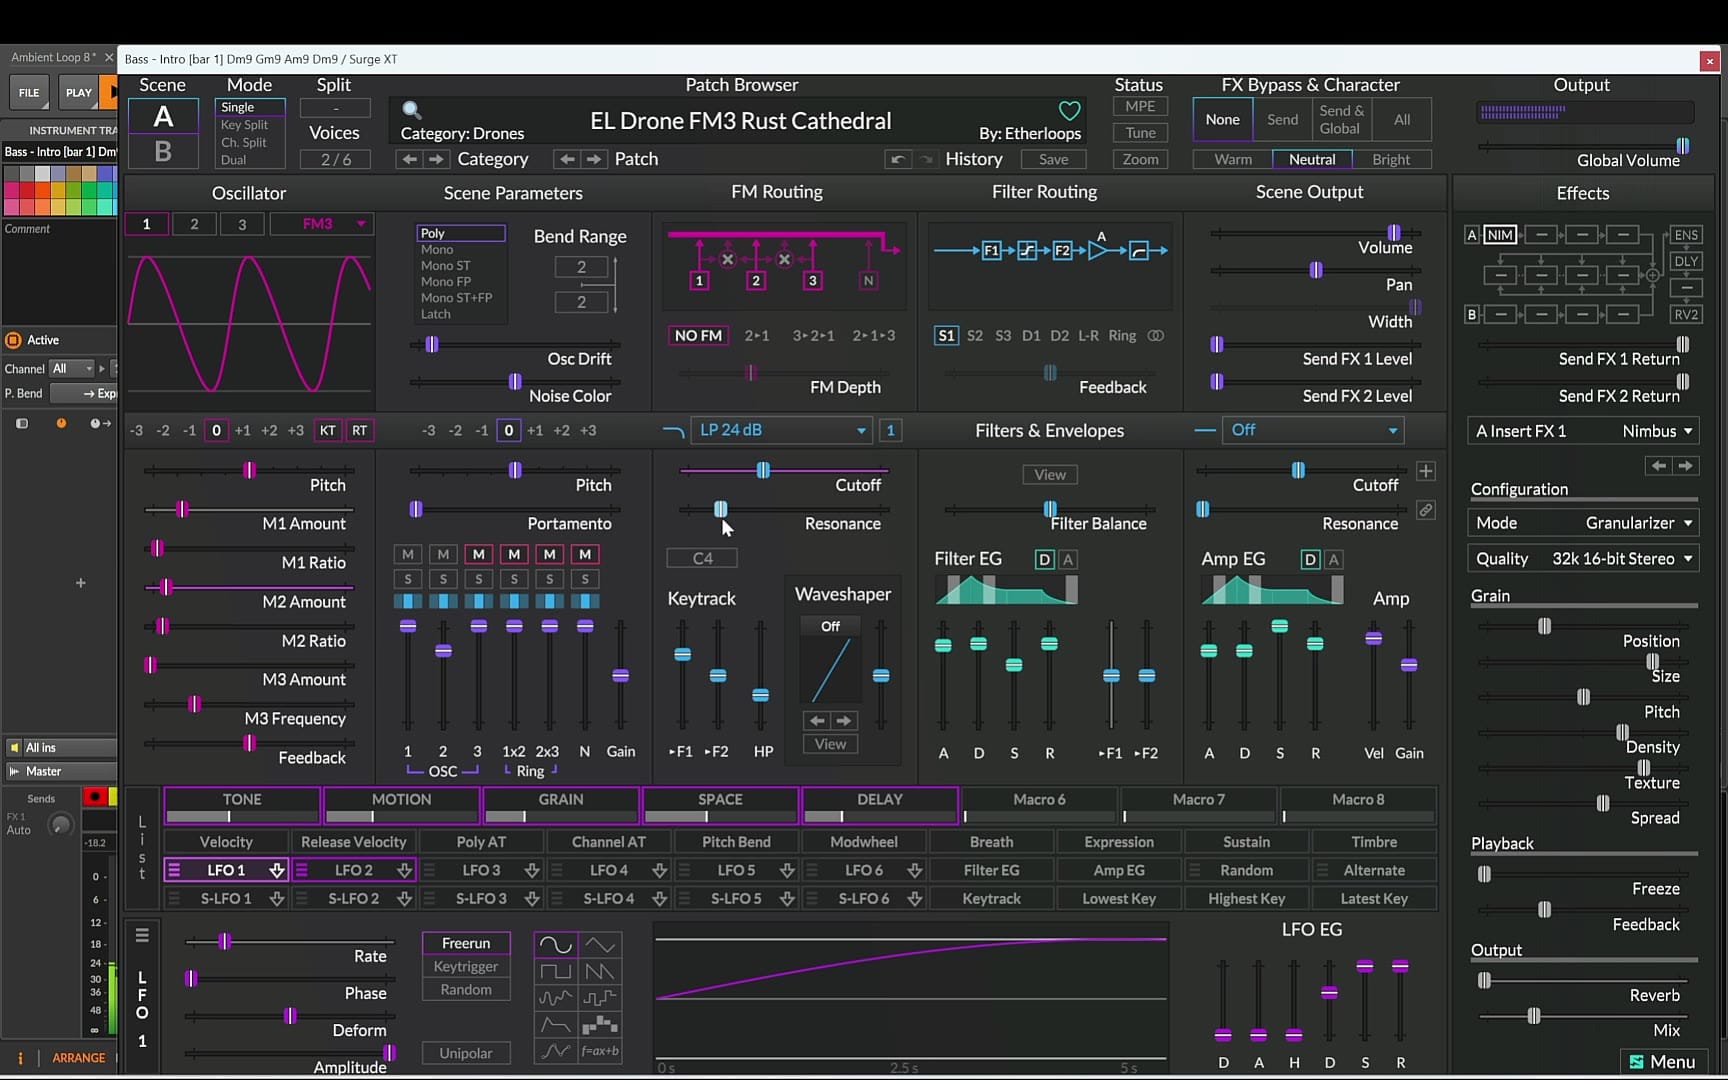
- Put a Note Transpose device before Surge XT so you can quickly try different octaves.
- Add an EQ to lift the low end and give the bass more weight.
- Bring the pad back in to hear the bass in context.
- For more movement, split the long bass notes and move each part to a different pitch.
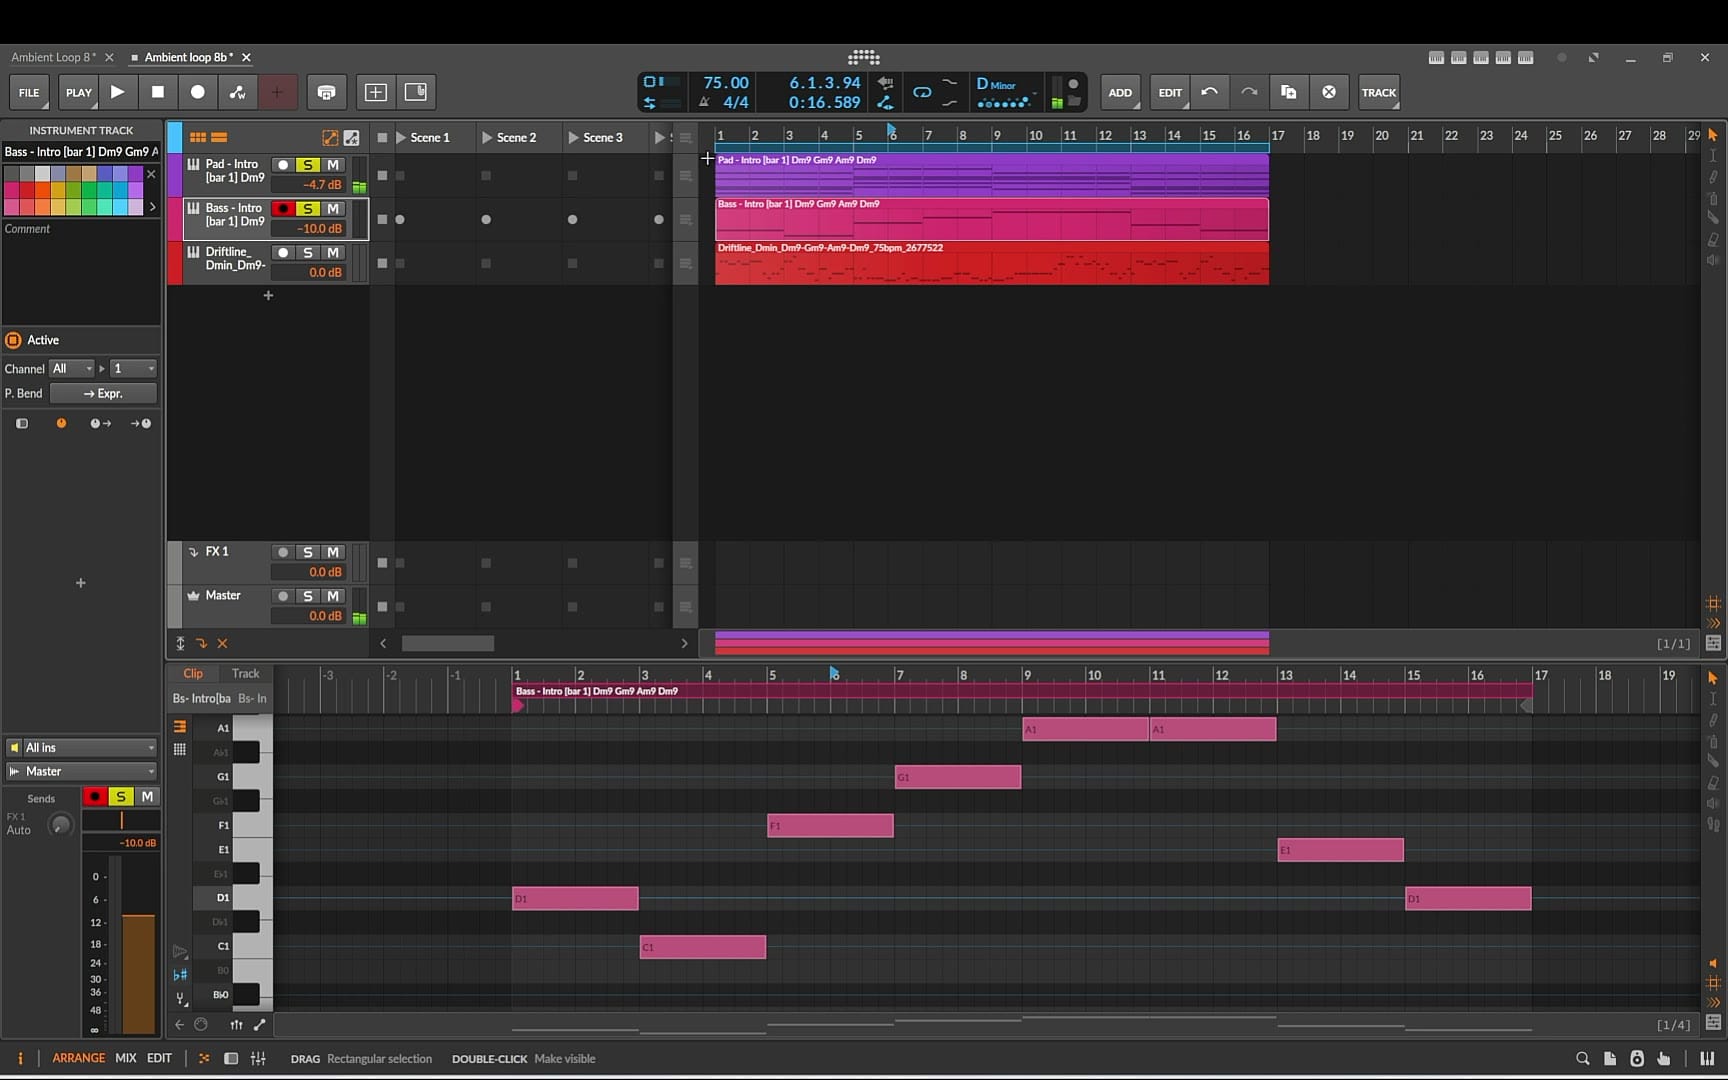
5. The melody: a pluck with random octaves and panning
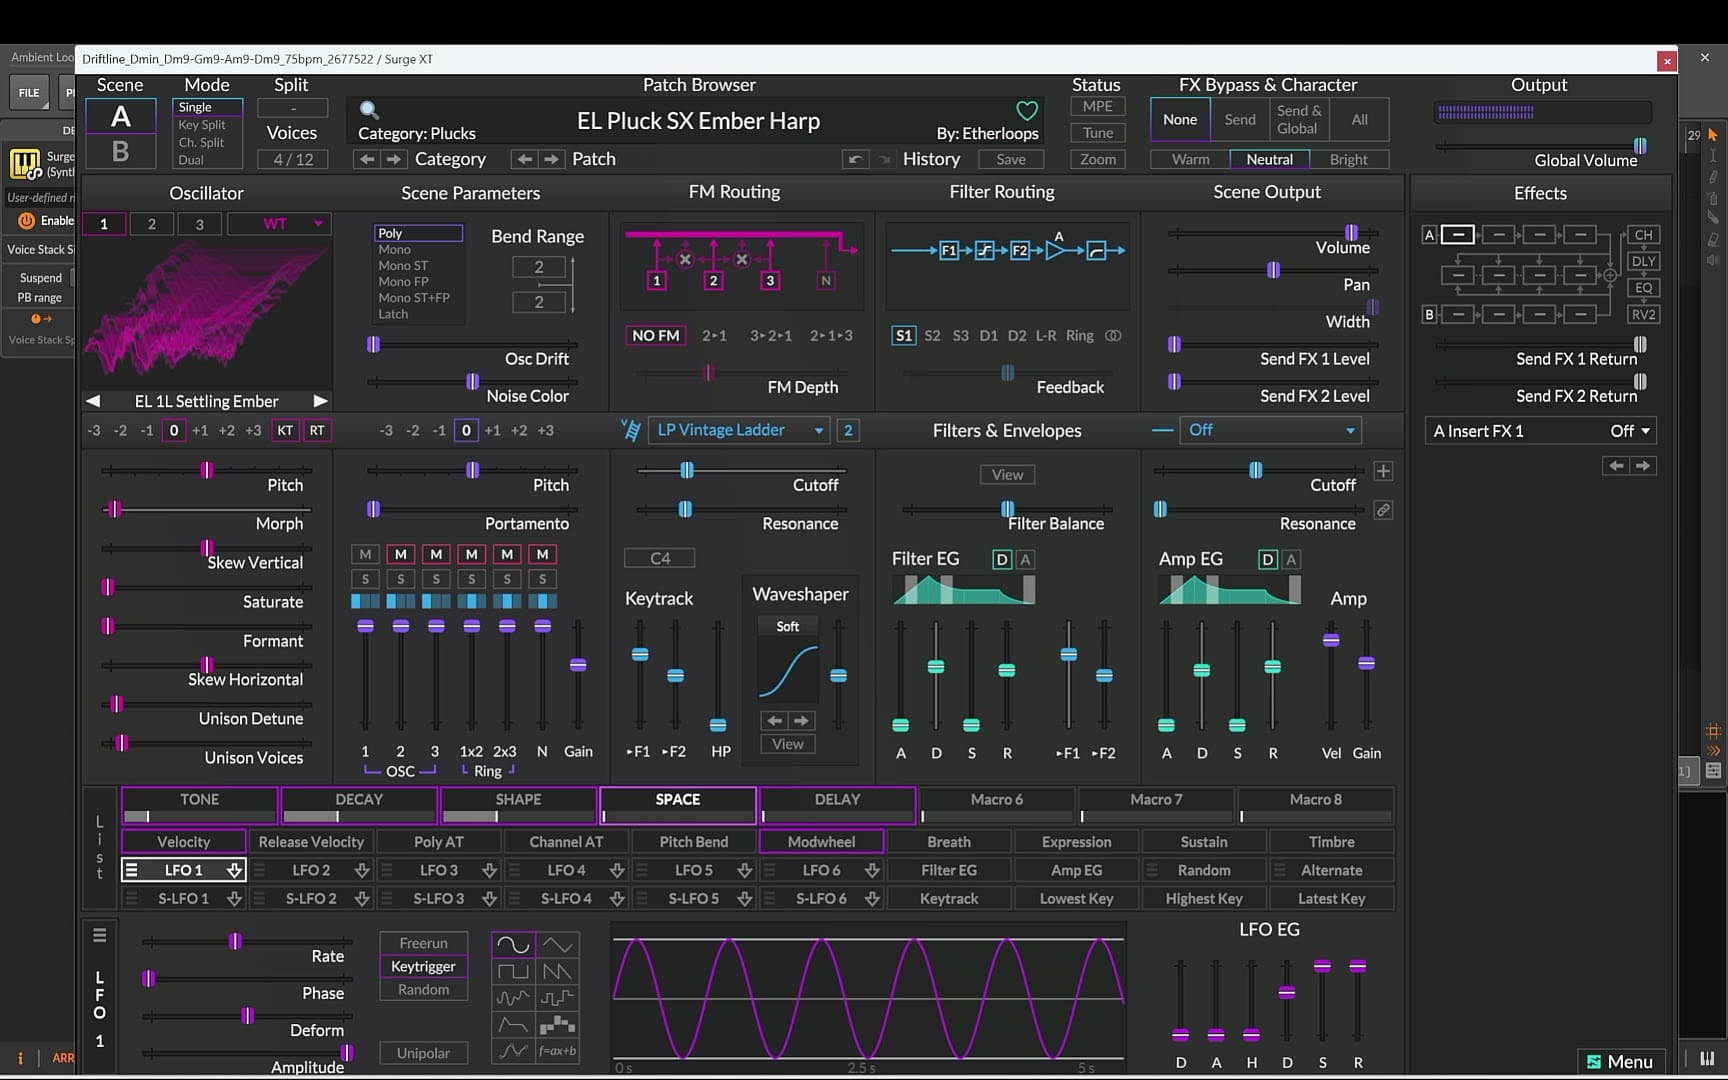
On the melody track, delete the default instrument and load another Surge XT. I picked a plucky sound, EL Pluck SX Ember Harp from Slow Forms — Surge XT Edition, and adjusted the macros. I switched off the patch's own space and delay effects because we'll add our own delay and reverb later.
Random octave shifts
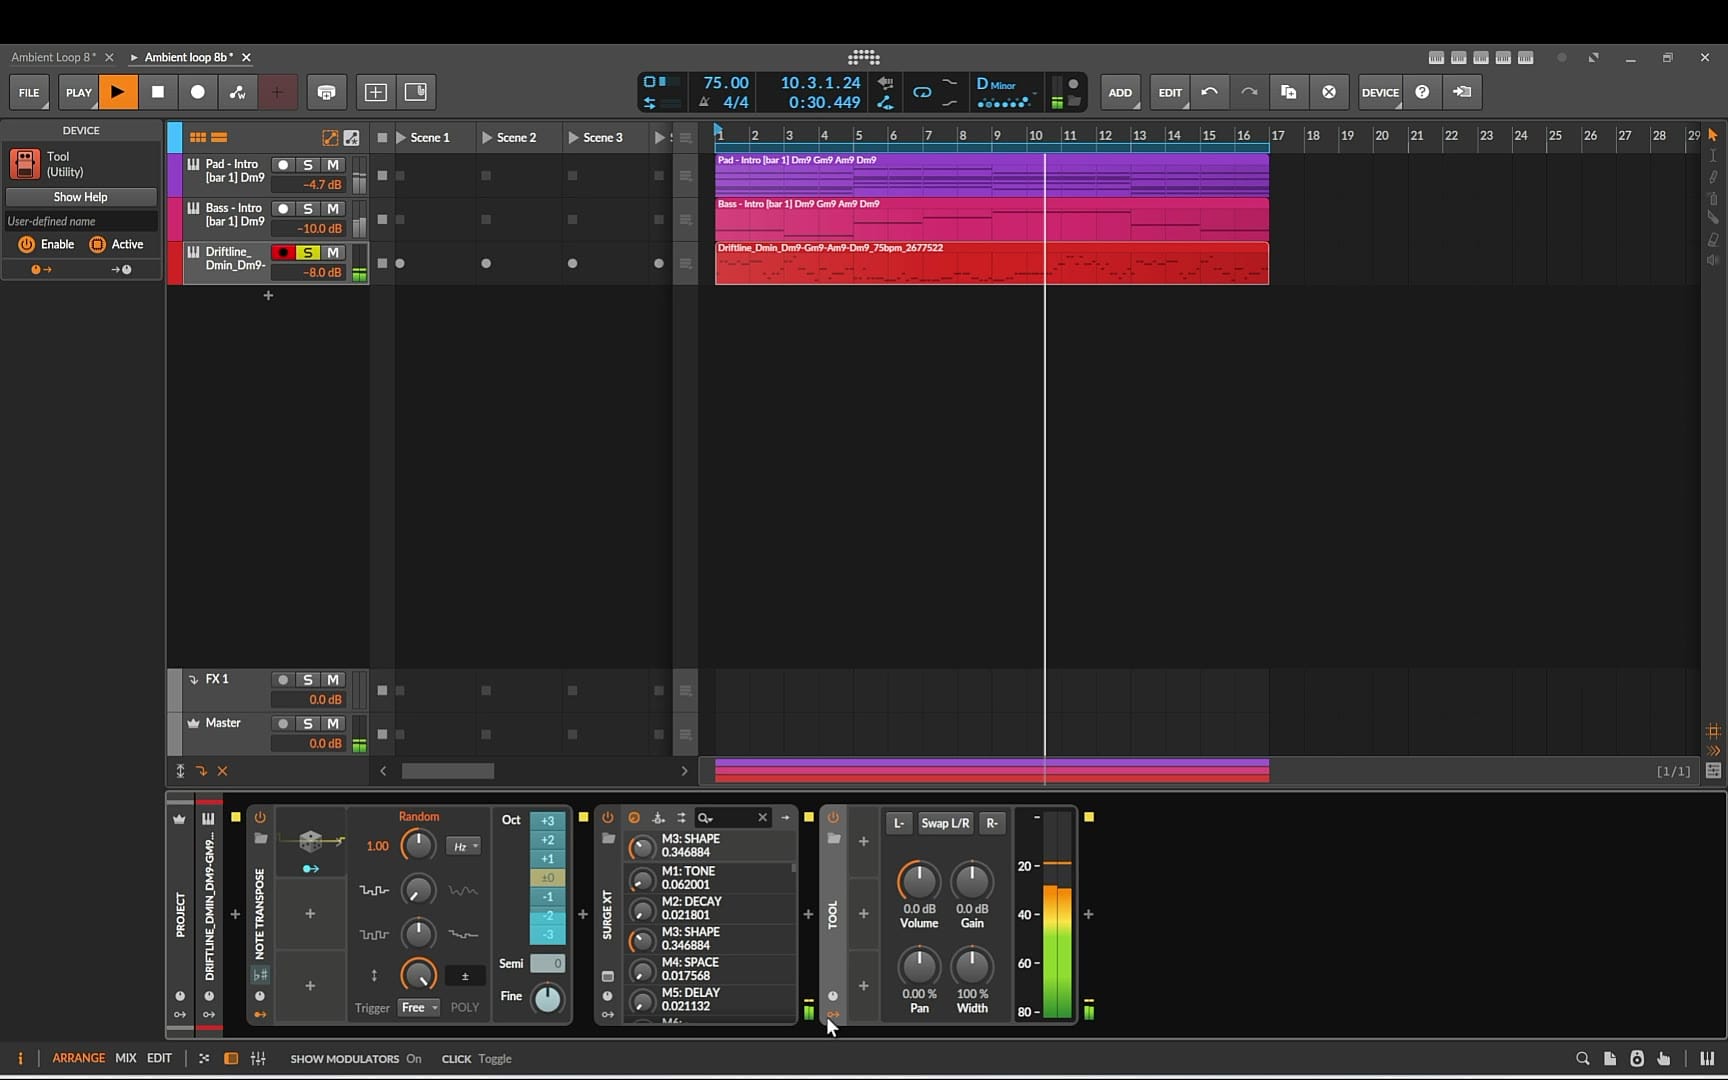
Place Note Transpose before Surge XT again. Then add a Random modulator and map it to the octave shift of Note Transpose. The melody now jumps between octaves at random as the loop plays. Adjust the modulation amount until the range of jumps feels right.
Random stereo panning
Add the Tool device, then another Random modulator. Set it to a slower rate in hertz, switch it to bipolar so it moves both left and right, and map it to the Pan knob in Tool. The melody notes now drift gently across the stereo field, which makes the whole loop feel wider.
6. Delay and reverb: Replika XT and Raum
For space, I used two free plugins from Native Instruments: Raum for reverb and Replika XT for delay. Put Replika XT before Raum in the chain, so the delay repeats get washed into the reverb.
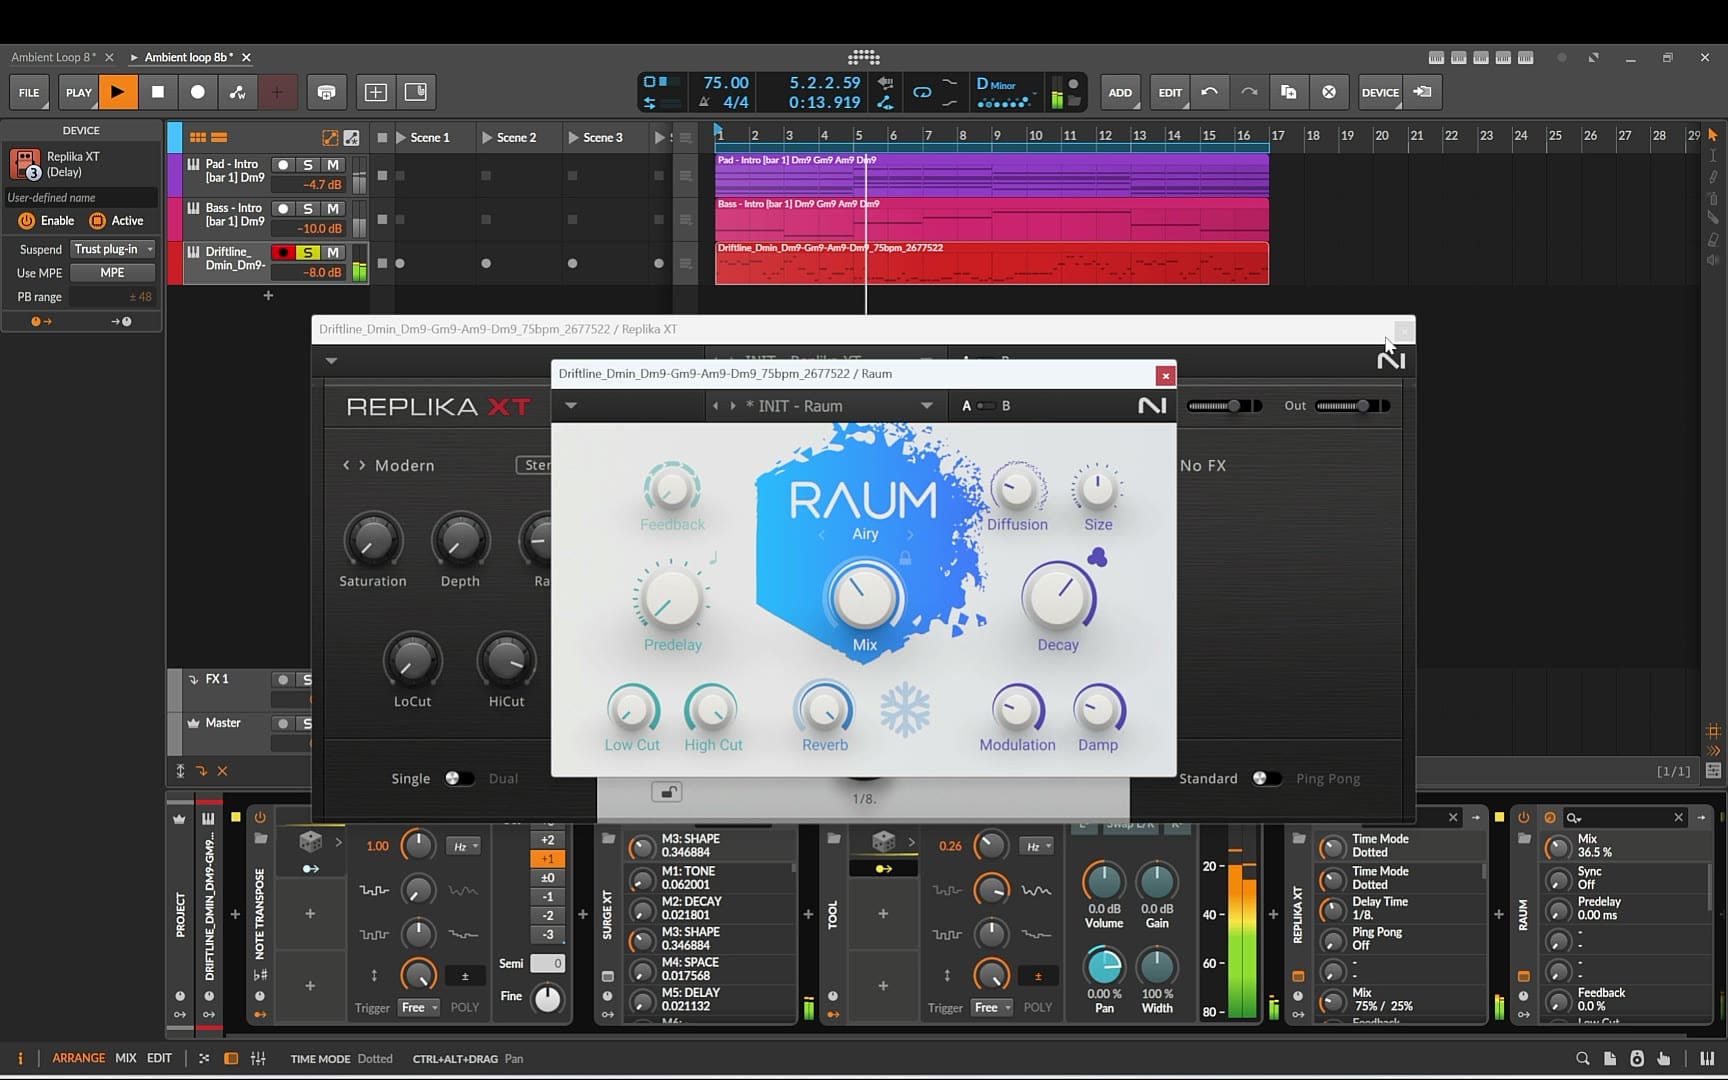
One last modulation: on Replika XT, add another Random modulator, make it smooth, slow it down and map it to the Mix knob. The delay intensity now rises and falls continuously, so the echoes come and go in a natural way.
7. Final mix
Bring all the tracks back in and balance them with the track gain. That's it: a loop that keeps evolving by itself. Try changing the probability, the modulator rates and amounts, and the effects to make your own variations.
Tips and variations
- Lower the probability (around 50–60%) for a sparser, more open pad, or raise it for a fuller one.
- Keep the octave range small on the melody modulator; one octave up or down is usually enough.
- Slow modulators sound more natural. Fast random modulation on pan or delay mix can sound nervous.
- Automate the pad filter over 16 or 32 bars for a slow, breathing change.
Like this approach? There's a stock-devices version in Generative Ambient Chords in Bitwig, and a Surge XT loop with arps and sidechain in How to Build a Dynamic Ambient Loop in Bitwig with Free Surge XT. For a loop built in Vital, see How to Make an Ambient Loop with One Free Synth.
Questions
Do I need Bitwig?
No. The synths and effects are free plugins that run in any DAW. Note probability and random modulators are shown in Bitwig, but many DAWs have note chance and LFO or random modulation that do the same job.
Are the synths and effects free?
Yes. Vital and Surge XT are free synths, and Raum and Replika XT are free from Native Instruments (part of Komplete Start). The presets and the two MIDI apps are from the EtherLoops shop.
Can I use Track Builder and Driftline without Bitwig?
Yes. Both run in the browser and export standard MIDI files you can drag into any DAW.
Get the tools and sounds
- Track Builder: chords and bass MIDI for ambient, chill and psy
- Driftline: a melody maker for ambient, chill and psy producers
- Slow Forms — Vital Edition: 75 ambient presets for Vital (the pad)
- Slow Forms — Surge XT Edition: 75 ambient presets for Surge XT (the melody)
- Engines — Surge XT Edition: 64 ambient presets for Surge XT (the bass)
Free plugins used: Vital, Surge XT, and Raum and Replika XT in Komplete Start.
Browse more tutorials, the apps and sound packs, or grab something from the free downloads. Subscribe below to get new tutorials and packs by email.