Build a Full Ambient Track in Bitwig with Only Stock Devices
A complete ambient track in Bitwig from an empty project – three pads, sub, drums, two sequences, arrangement and master chain – using only Polymer, Phase-4, Poly Grid and Sampler.
Most "full track" tutorials quietly depend on a folder of plugins you don't own. This one doesn't. Every instrument and effect in this track ships with Bitwig Studio: Polymer, Phase-4, Poly Grid and Sampler for the sounds, and Bitwig's own EQs, delays, reverb and dynamics for everything after them. We start with an empty project and finish with a complete, arranged ambient track with an intro, a build, a peak, a break, a return and an outro.
The point is not the specific sounds. The point is the order of decisions: which layer comes first, how many notes each part really needs, and how one eight-bar loop becomes a track that lasts several minutes. Once you have seen that process from start to finish, you can repeat it with any sounds you like.
Watch the full build
The video shows every step in real time, with the silent parts sped up. This article follows the same order, so you can read a section, then jump to the matching chapter. Watch the tutorial on YouTube.
What you will build
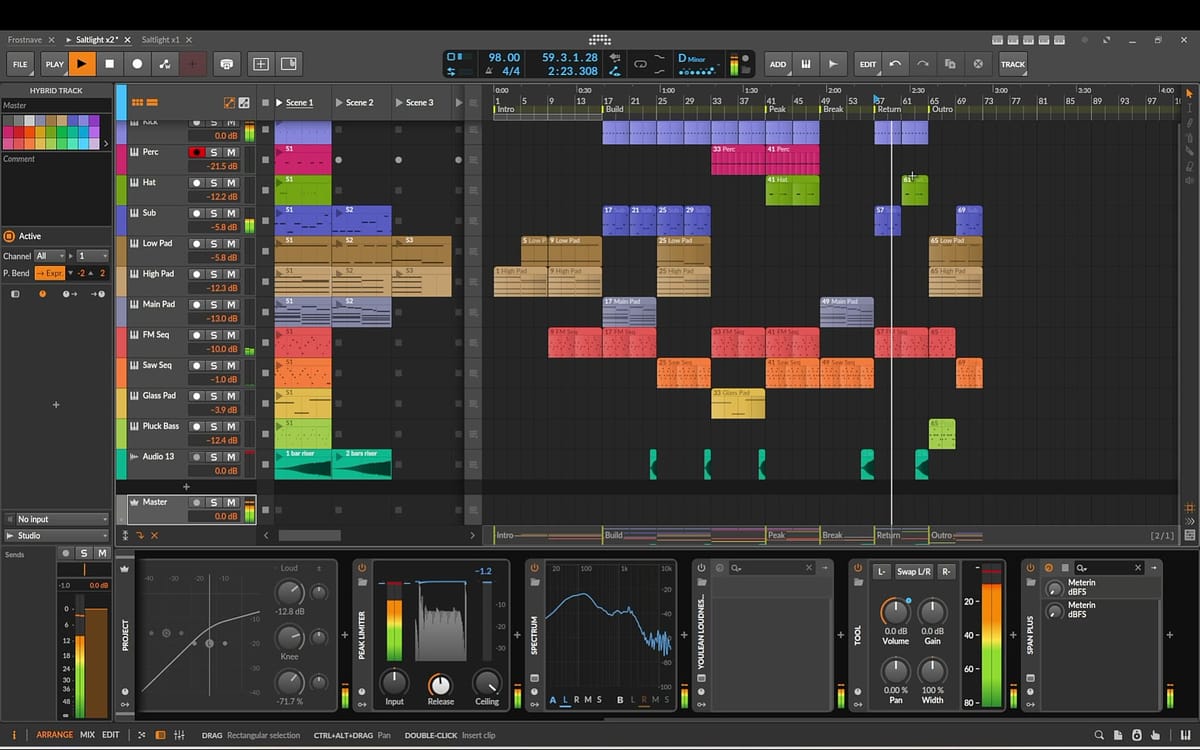
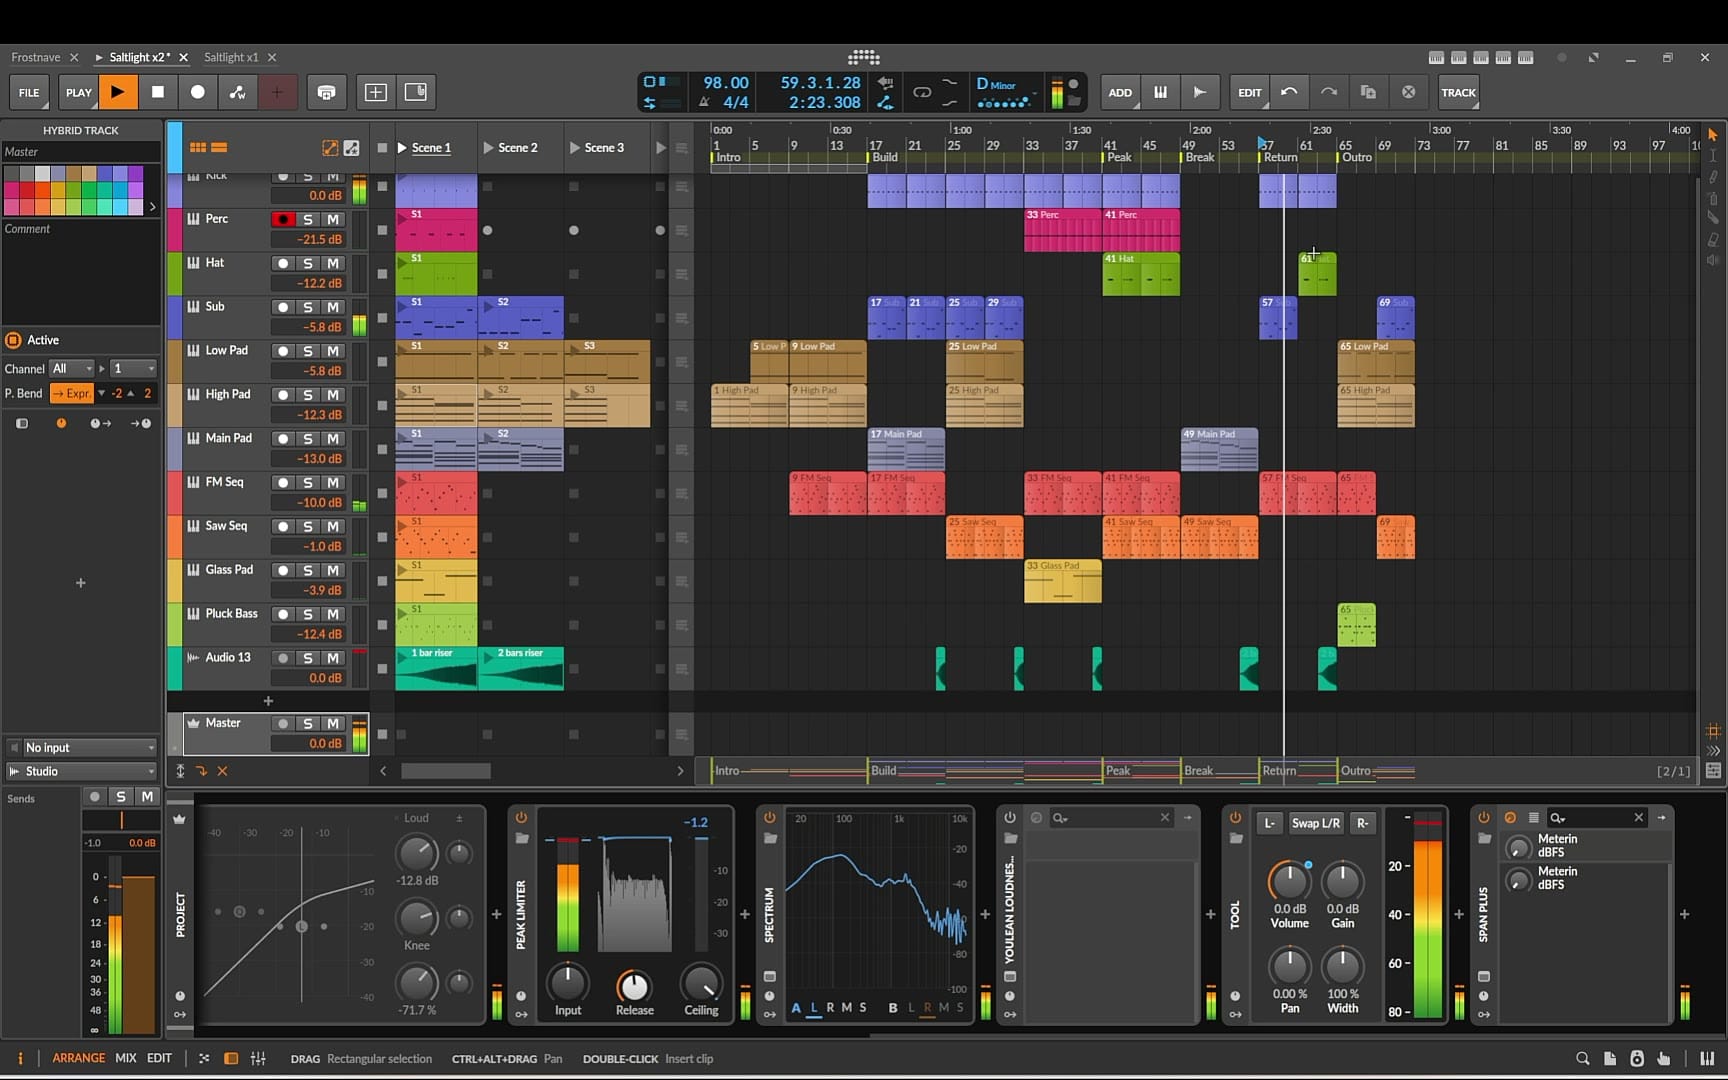
The finished project has twelve tracks at 98 BPM in D minor:
- Three pads – a low, a main and a high pad, all Polymer
- Sub bass – Polymer
- Kick, percussion and hi-hat – three Samplers with one sample each
- Bell sequence – Phase-4
- Arp sequence – Polymer with an Arpeggiator in front
- Glass pad – Phase-4
- Pluck bass – Poly Grid
- Riser – a reversed cymbal on an audio track
Before you start
Two things make the build faster. First, set the tempo to 98 BPM and decide on the key before you add a single device. Everything in this track stays inside D minor, which means any part can play over any chord without clashing.
Second, the MIDI clips in the video were prepared in advance. Writing notes on camera is slow to watch and it hides the real lesson, which is what the notes are doing. Each section below describes the pattern so you can write your own.
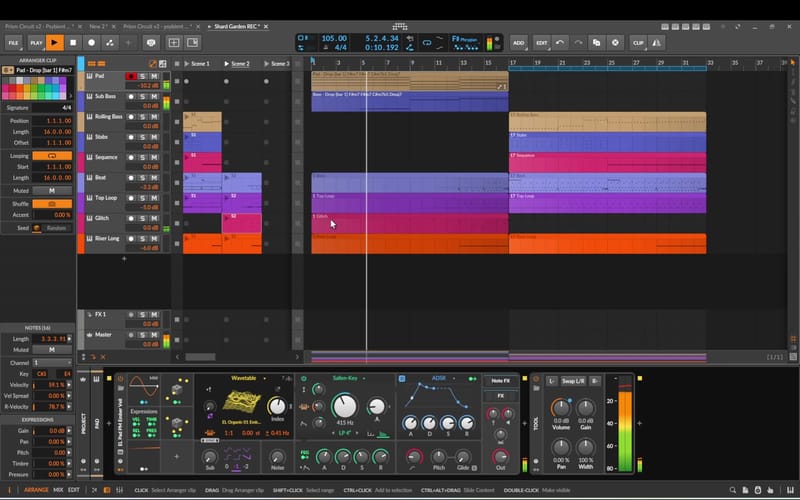
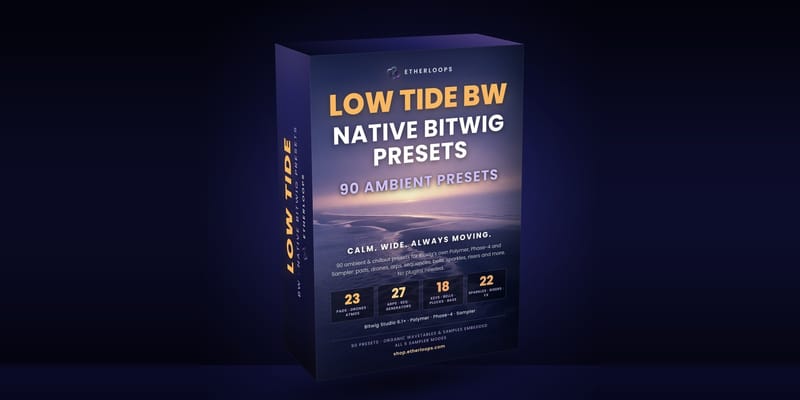
The presets I load come from EtherLoops Low Tide BW, a pack of native Bitwig presets, and the pads use wavetables from EL Organic Wavetables Vol. 1. Both are optional. Any soft pad, simple sub, bell and pluck from Bitwig's factory library will take you through the same steps.
Step 1: Three pads in three octaves
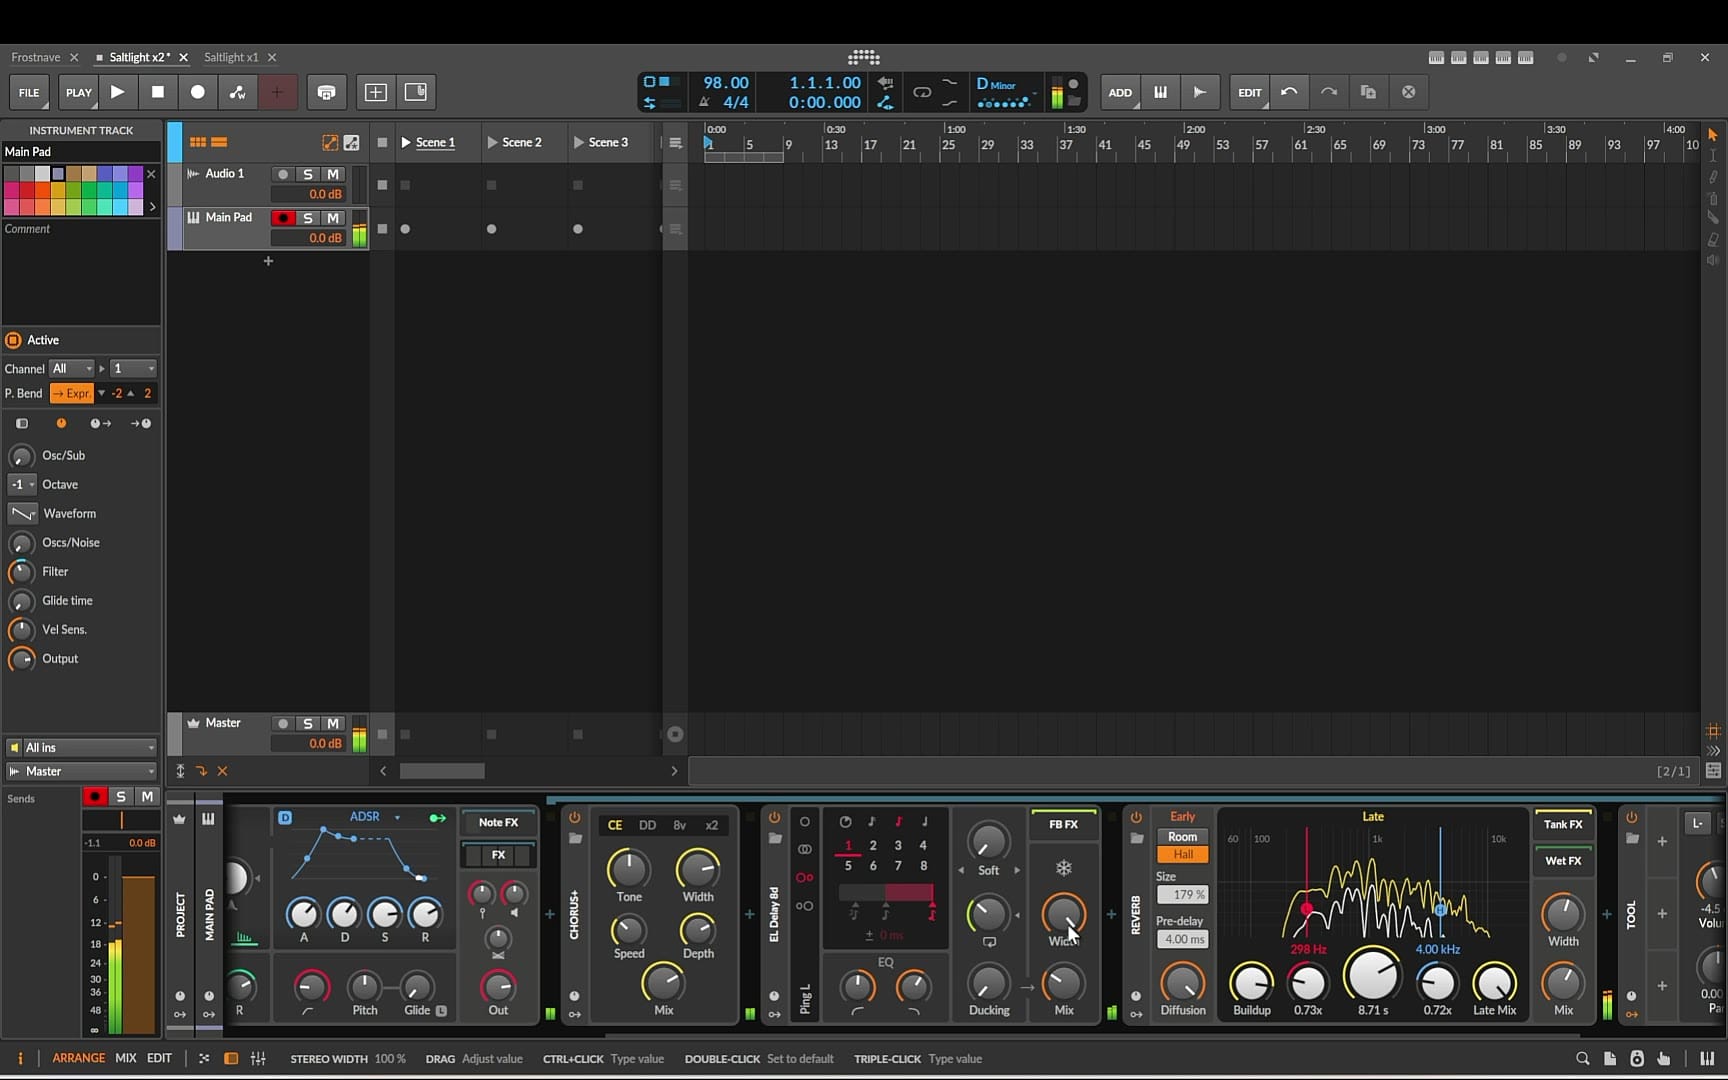
The track starts with harmony, not drums. Add an instrument track, load Polymer and pick a slow wavetable pad. In the video this is the Ember Veil preset, followed by a chorus, a delay and a reverb. The chorus gives width, the delay fills the gaps between chord changes, and the reverb pushes the sound back. That is the main pad.
Now add two more Polymer tracks with different pad presets, one darker (Velvet Shoal) and one brighter (Frost Lace). Put a Note Transpose device in front of each. Shift the dark one down an octave and the bright one up an octave.
This is the most useful trick in the whole build. The three pads can share the same chord notes, but because they sit in three different octaves they sound like one very wide instrument. And because the octave shift happens in a note effect, you never have to edit the synth or rewrite the clip.
Step 2: Chords and balance
The chords are long, held notes. The low and high pad play eight-bar clips, the main pad a four-bar clip. Different clip lengths matter: the layers drift against each other, so the harmony keeps shifting slightly even though nothing is automated.
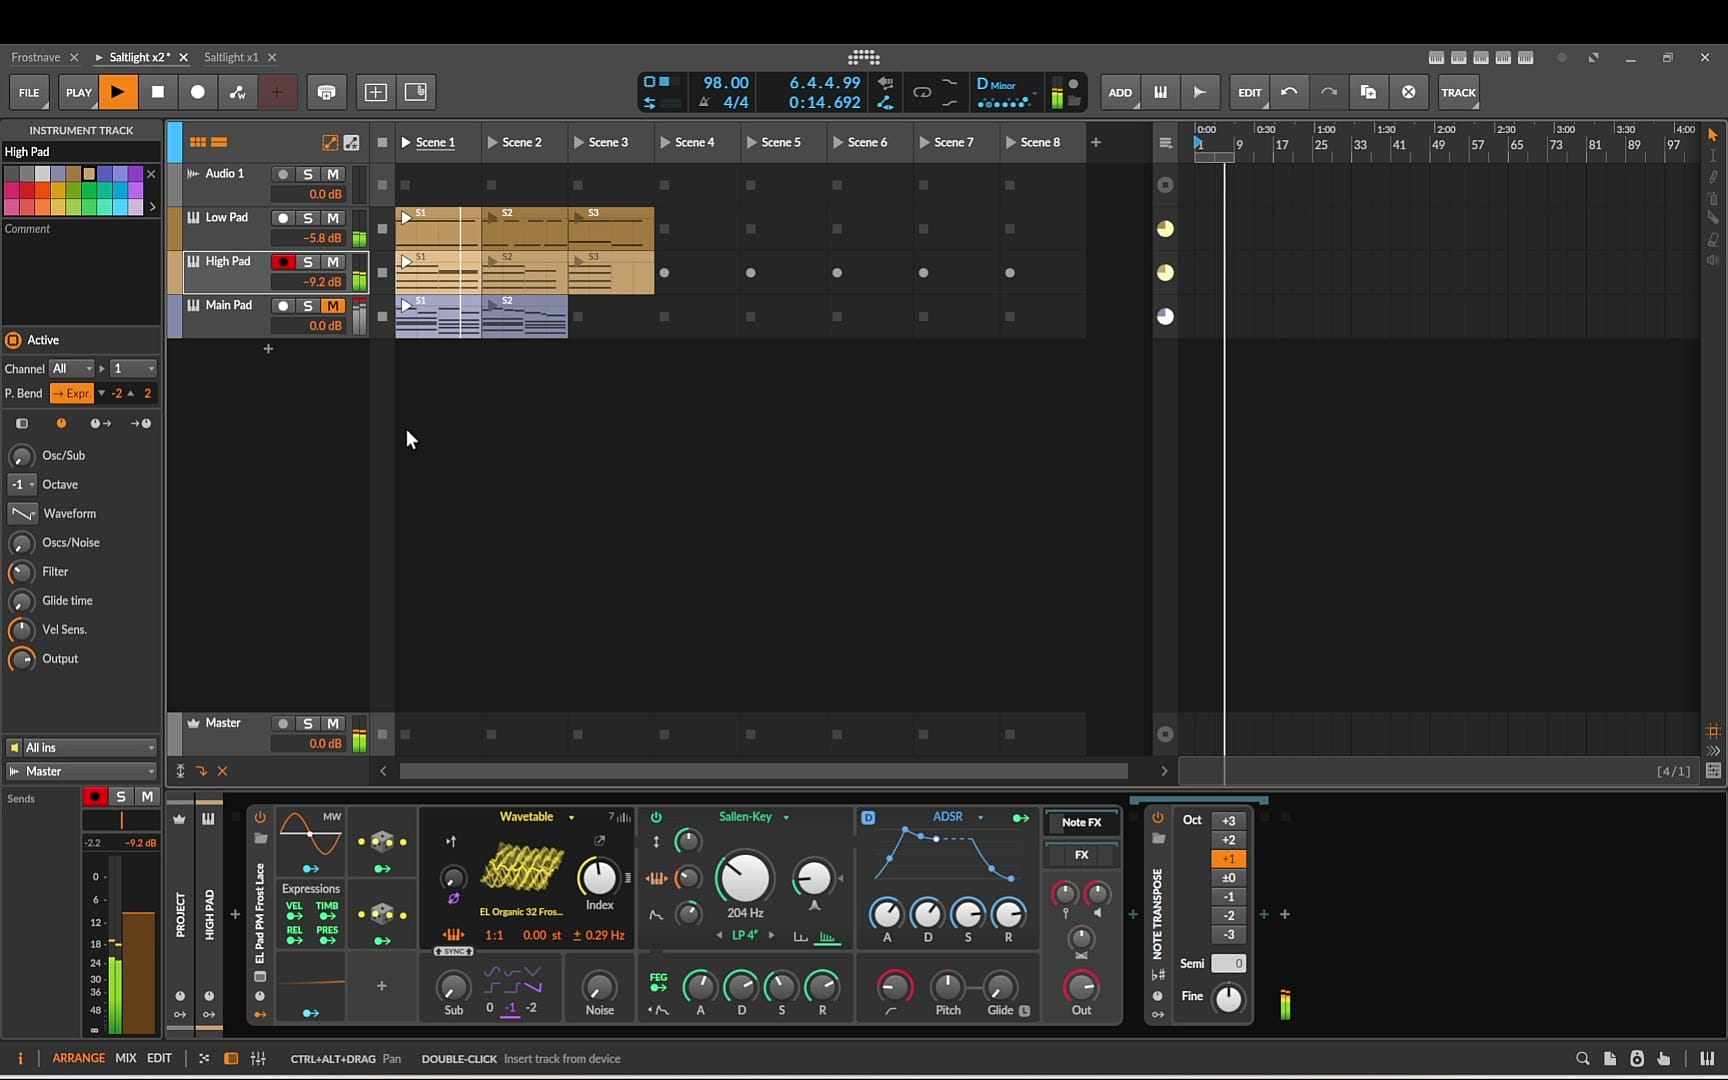
Then balance them. Pull the high pad down the most, because bright sounds become tiring very quickly, and keep the low pad as the body of the sound. Listen to the first two layers on their own until they blend into one sound, then bring in the third and hear what it adds. You should miss each layer when it is muted, but never notice it as a separate sound while it plays.
Step 3: Sub bass
Add another Polymer with the simplest patch you can find: one oscillator and a low-pass filter. The sub plays a slow four-bar pattern on the root notes of the chords, with short gaps between notes so the low end can breathe. A Note Transpose in front puts it in the right octave.
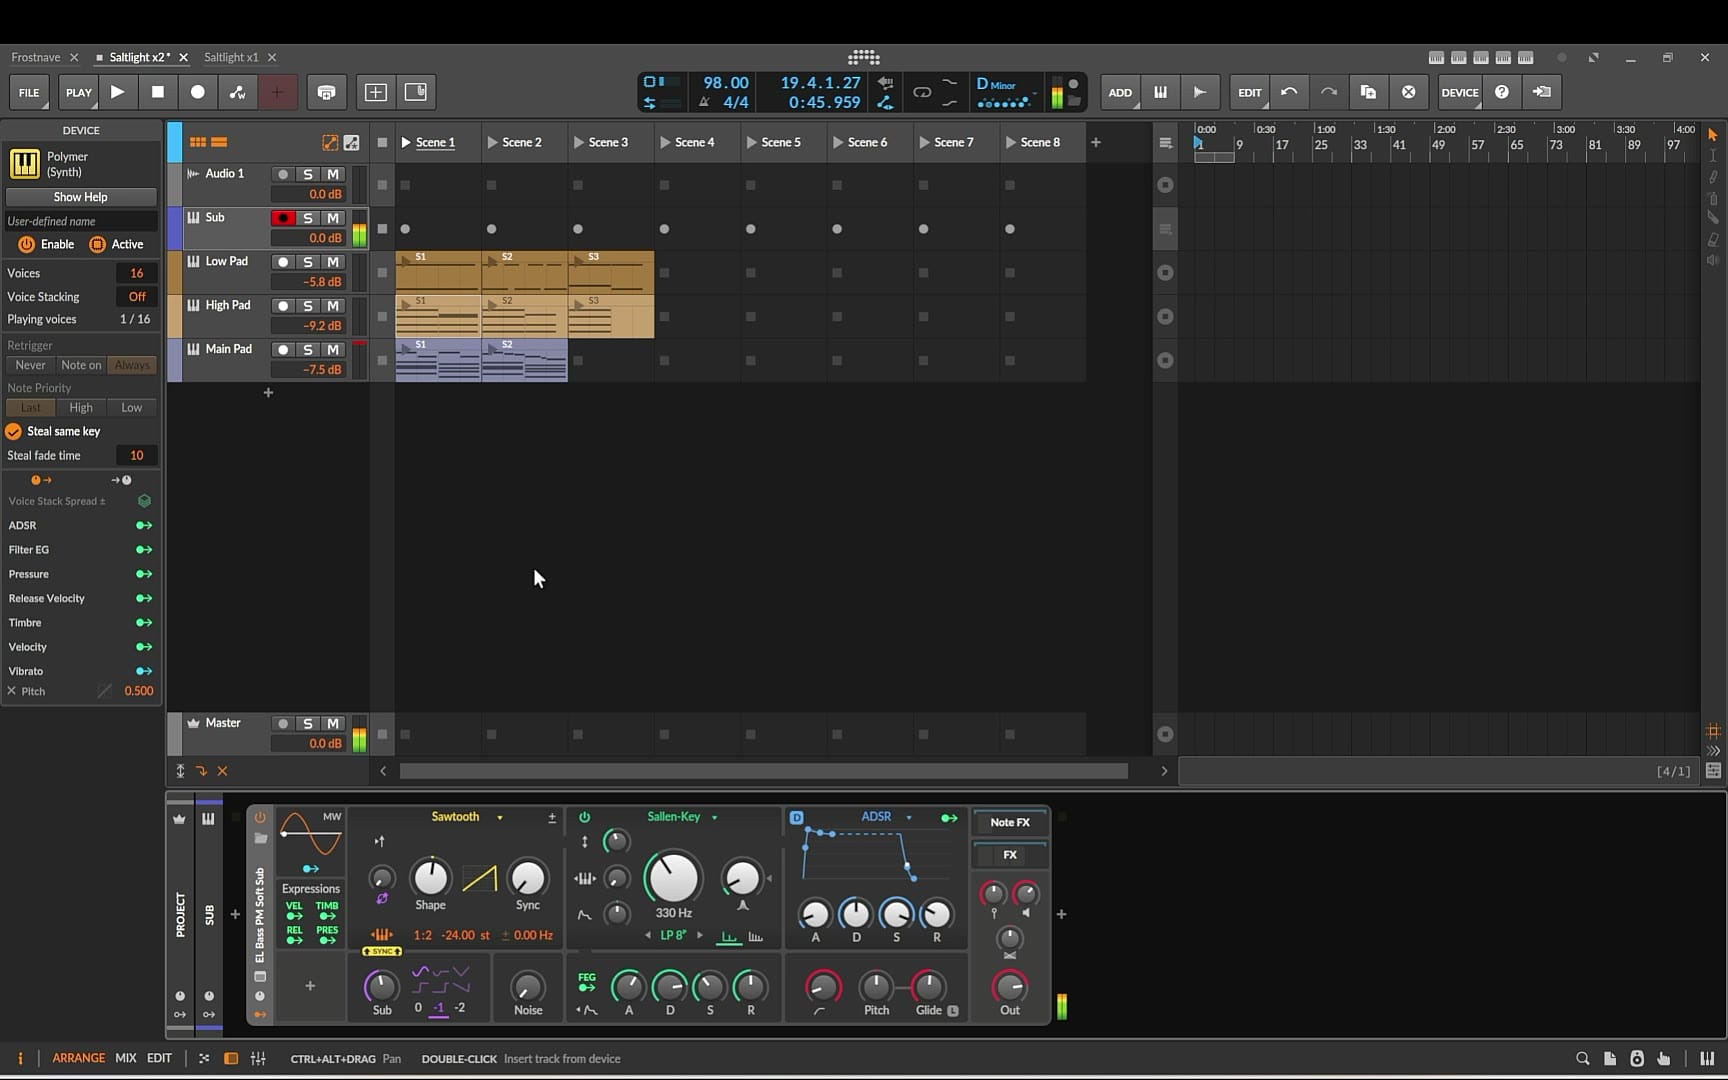
Set the level so you feel the sub more than you hear it. If it is as loud as the pads, it is too loud. On small speakers, you will barely notice it, and that is fine. Its job is weight, not melody.
Step 4: Drums from three Samplers
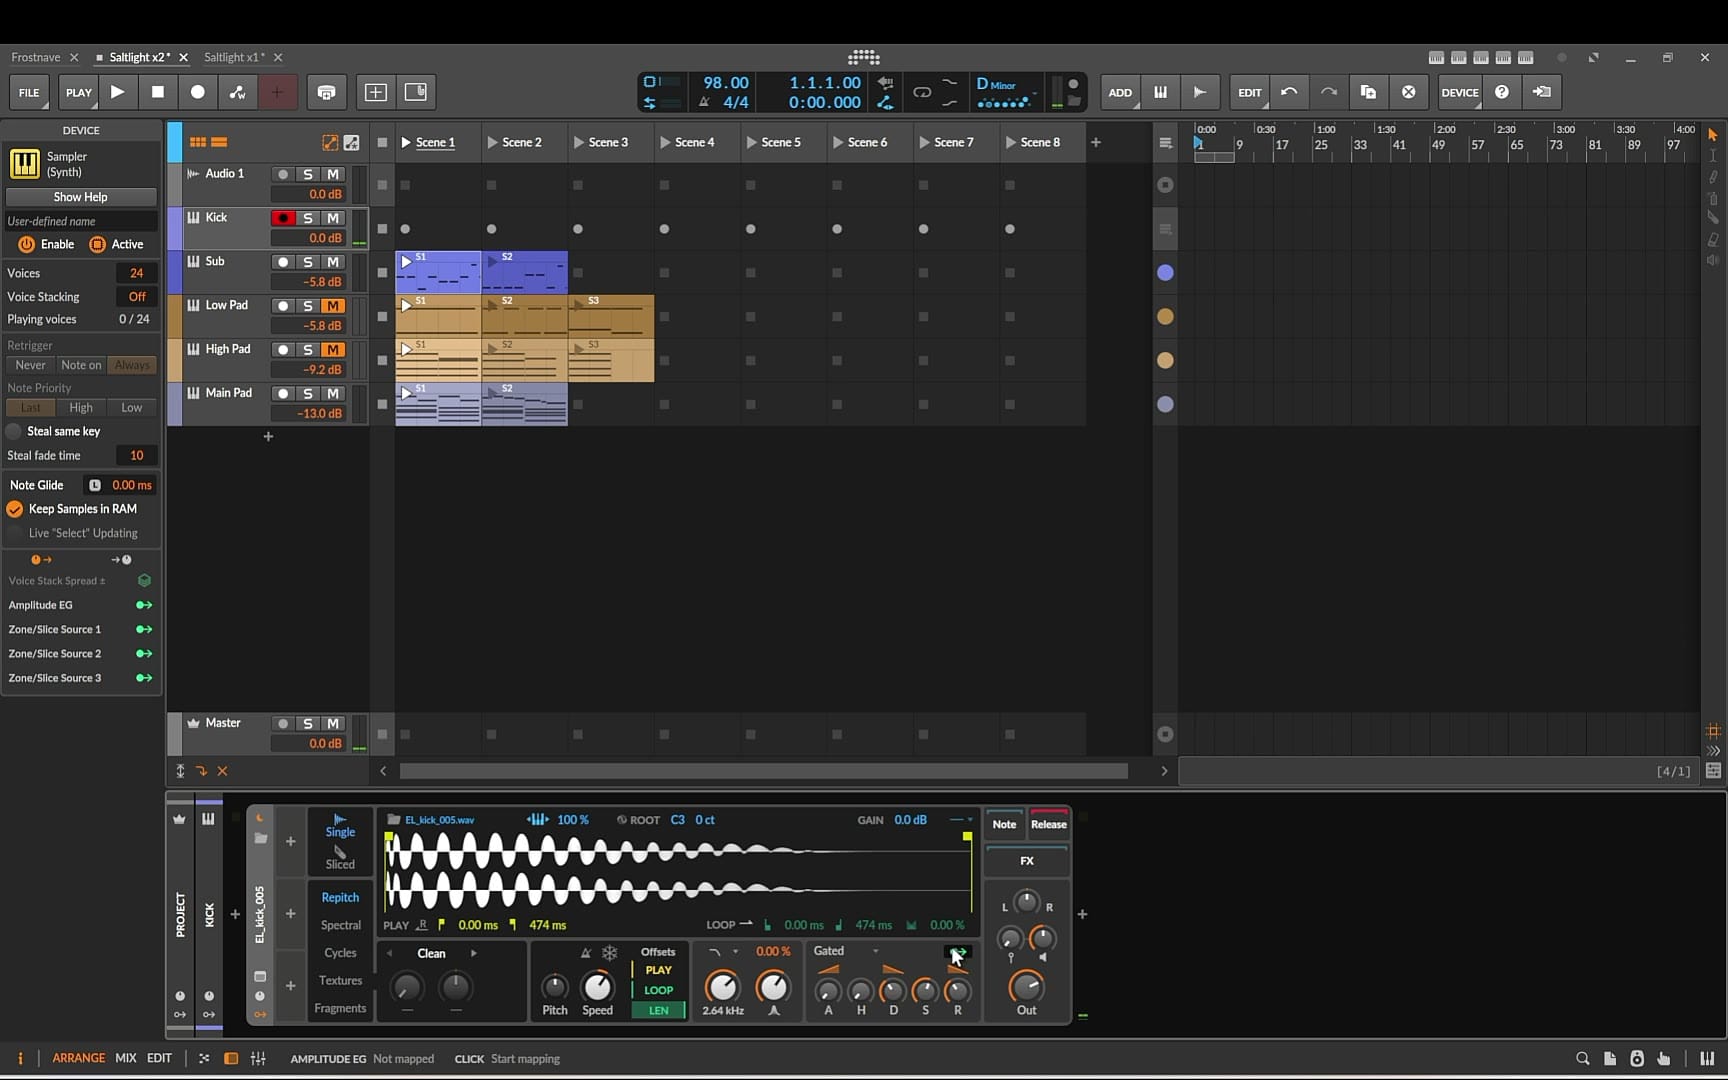
Ambient drums work best when each sound has its own track and its own small effect chain. Use Bitwig's Sampler three times, with one one-shot sample in each.
Kick
Choose a soft, round kick rather than a punchy club kick. Add a Peak Limiter after the Sampler to catch the loudest hits. That keeps the kick steady without the pumping you would get from heavy compression.
Percussion
Instead of a regular snare, load a more abstract, textured hit, something that adds a bit of character to the groove. The sample has low rumble you don't need, so an EQ-2 cuts everything below roughly 900 Hz and leaves the low end clear for the kick and the sub. A Delay+ with moderate feedback, around thirty percent, turns a single hit into a small rhythmic echo. A Reverb pushes it further back in the mix, and a Tool at the end sets the final level.
Hi-hat
Load a single closed hi-hat and shorten the sample's end point. A short, tight hat leaves more room for the pads. Then add four small devices, each with one job: a Compressor+ to even out the hits, an EQ-2 cutting everything below about 2 kHz so only the top of the hat remains, a Delay-1 for a quiet echo between the hits, which makes a simple pattern sound busier than it really is, and a Tool for level.
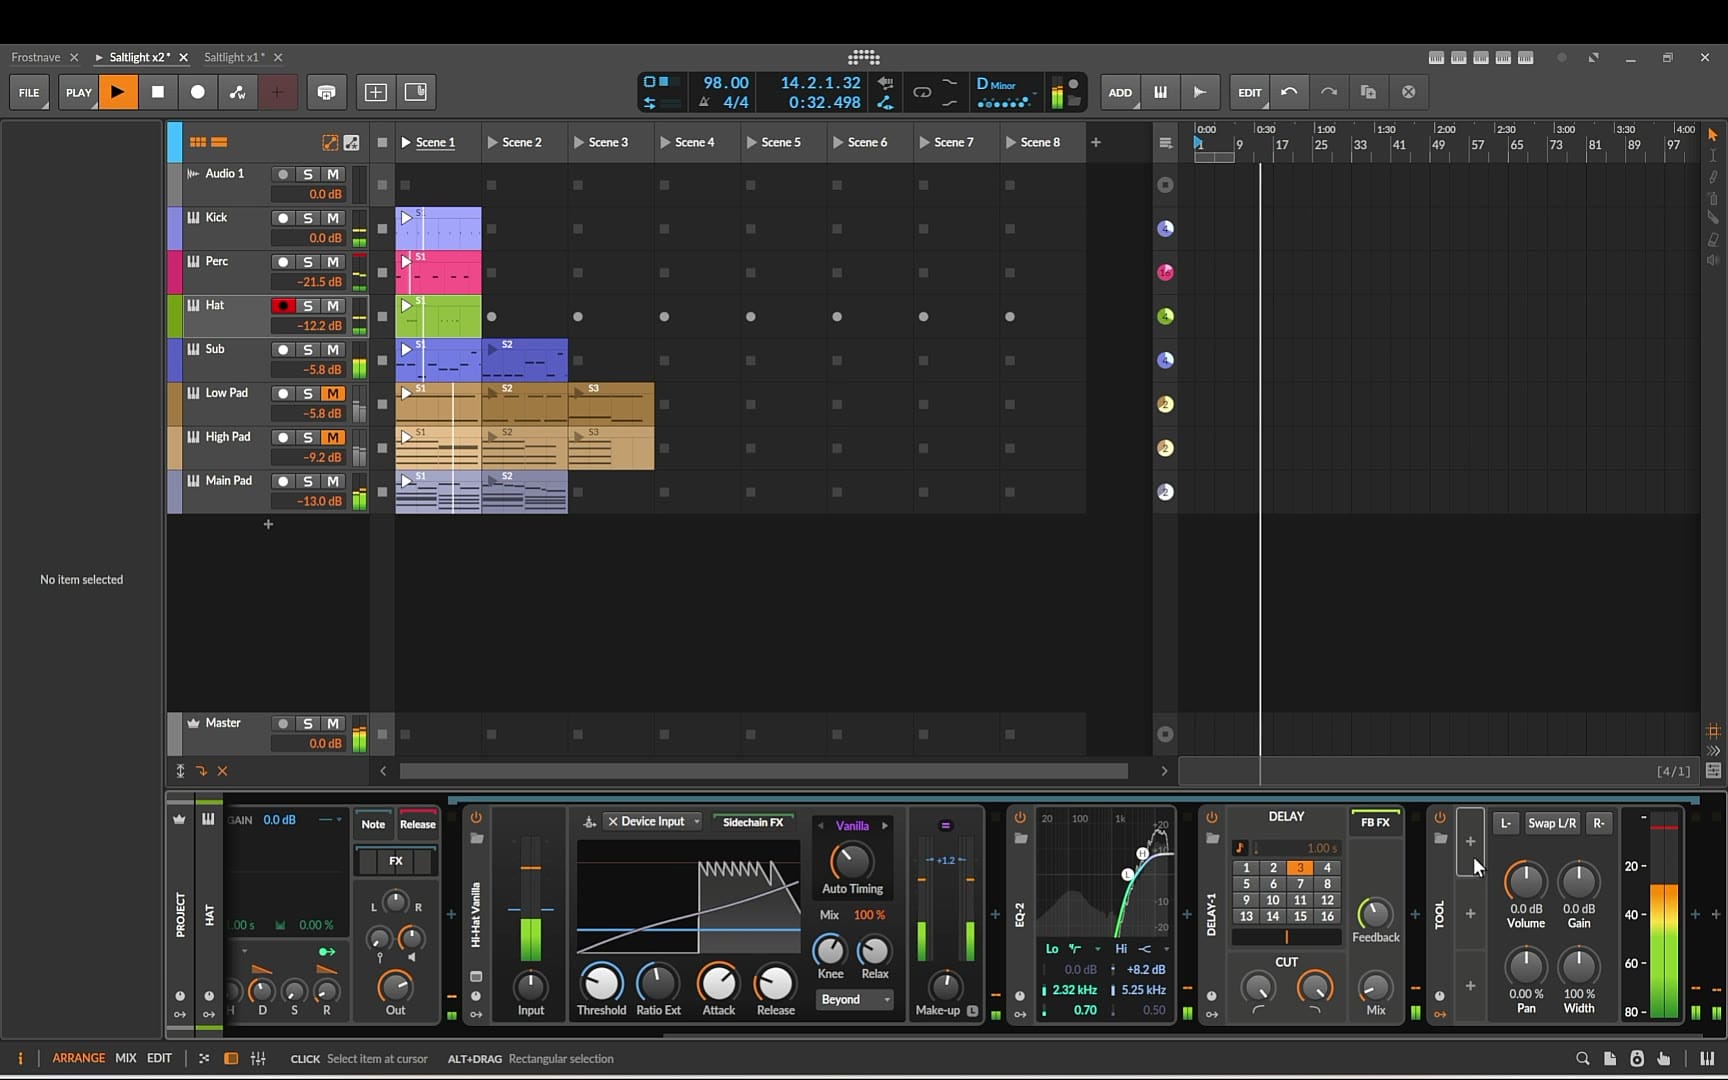
One more detail on the hat. Add an LFO modulator and map it to the pan of the Tool. The hat now drifts slowly between left and right. Listen with the LFO, then without it. It is a tiny change, but movement like this is what keeps a loop from sounding static.
The patterns are simple. The kick plays a steady four-on-the-floor. The hi-hat has a short run of quick notes at the start of the bar, followed by a few single hits, so it never turns into a constant tick. None of the settings on the drums are extreme. In ambient music, small moves are usually enough.
Step 5: A bell sequence in Phase-4
Phase-4 is Bitwig's phase modulation synth, and it is very good at glassy, bell-like tones. Load a bell preset (Ice Tines in the video) with a phaser, a stereo delay and a reverb behind it. Lower the filter cutoff a little. A softer bell sits behind the pads instead of on top of them.
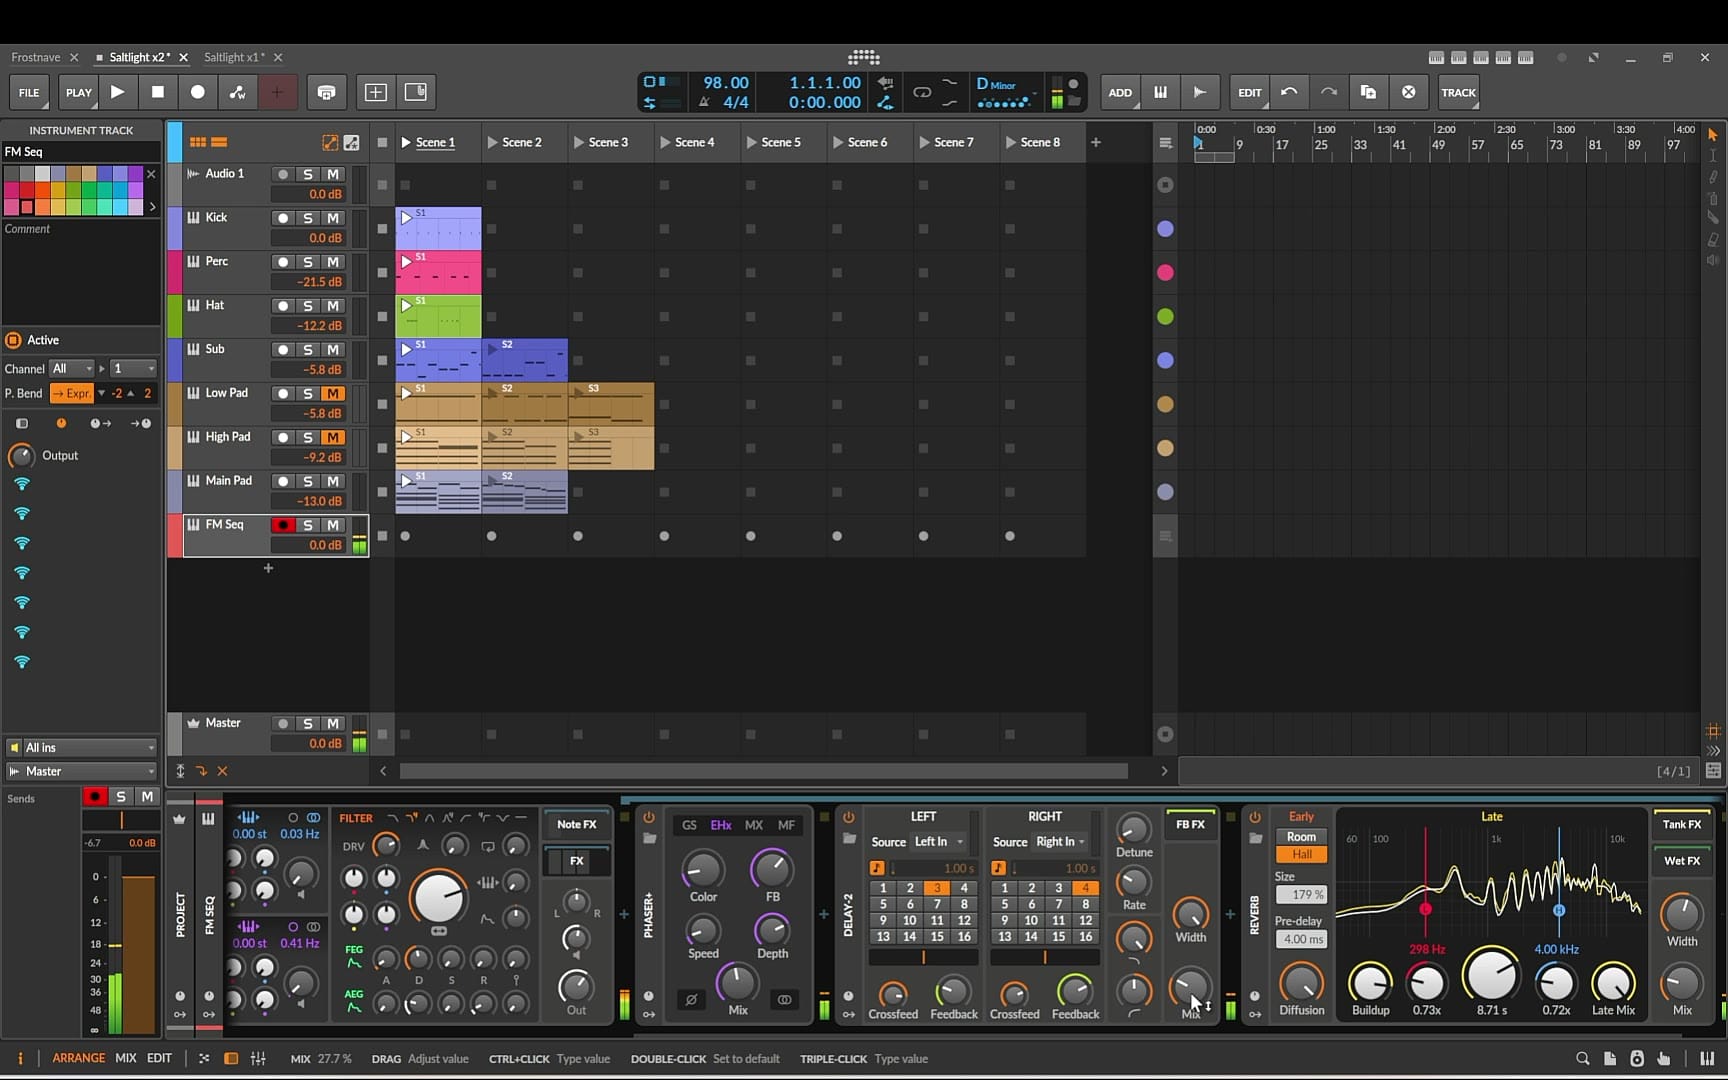
The pattern is four bars of short notes spread across more than an octave. Because the delay fills in the gaps, the notes themselves can stay sparse. Solo it for a moment to check the sound, then bring the level down to around -8 dB so it works as a subtle detail rather than a lead.
Step 6: An arp that writes itself
The second sequence needs a different character. Use Polymer again, this time with a brighter preset (Amber Pulse). The interesting part sits in front of the synth: a Note Transpose and an Arpeggiator. Even when the clip holds just a few short notes, the Arpeggiator adds some randomness and turns them into something more varied and interesting.
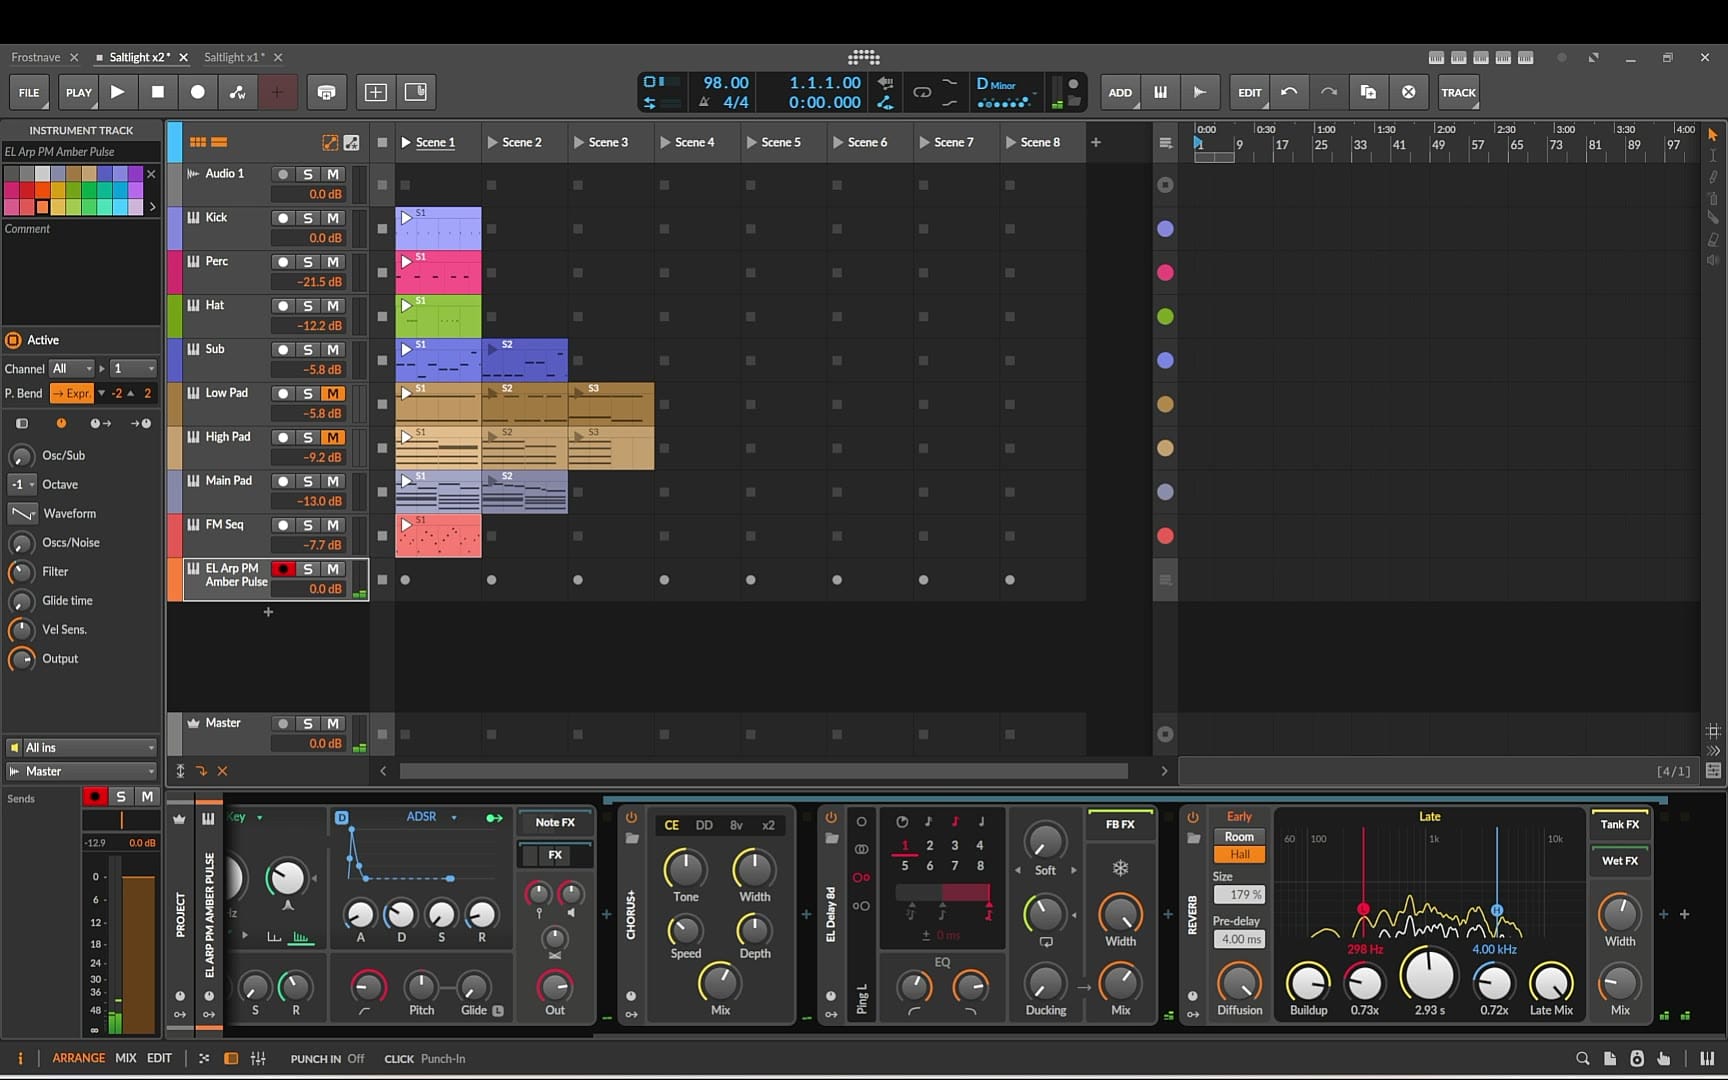
After the synth, swap the standard delay for a Delay-2. Separate delay times for left and right spread the pattern across the stereo field. Shorten the reverb to about two and a half seconds so the notes stay clear.
Two sequences playing at once can easily fight each other. Here they don't, because the bell is soft and slow while the arp is brighter and faster, so each has its own place in the mix. Keep the arp notes within the D minor chord tones and it will fit over every chord in the progression. Even so, lower the arp until it sits just under the pads.
Step 7: Glass pad and pluck bass
Two more layers complete the loop. The first is a glassy pad from Phase-4 (Frost Pad) with a flanger, a delay and a reverb behind it. It is a highlight for the busiest section only, and it plays just three long notes over eight bars. With this much reverb, any more notes would quickly turn into mud. Two small tweaks help it sit: reduce the filter modulation amount so the sound opens up more gently, and lengthen the amp attack so each note fades in instead of starting abruptly. A slow attack is one of the easiest ways to make any sound feel more ambient.
The last instrument is a plucky bass built in the Poly Grid. The patch is very simple: one oscillator with a bit of wavefolding, going into an ADSR envelope. A short decay is what gives it the plucky character.
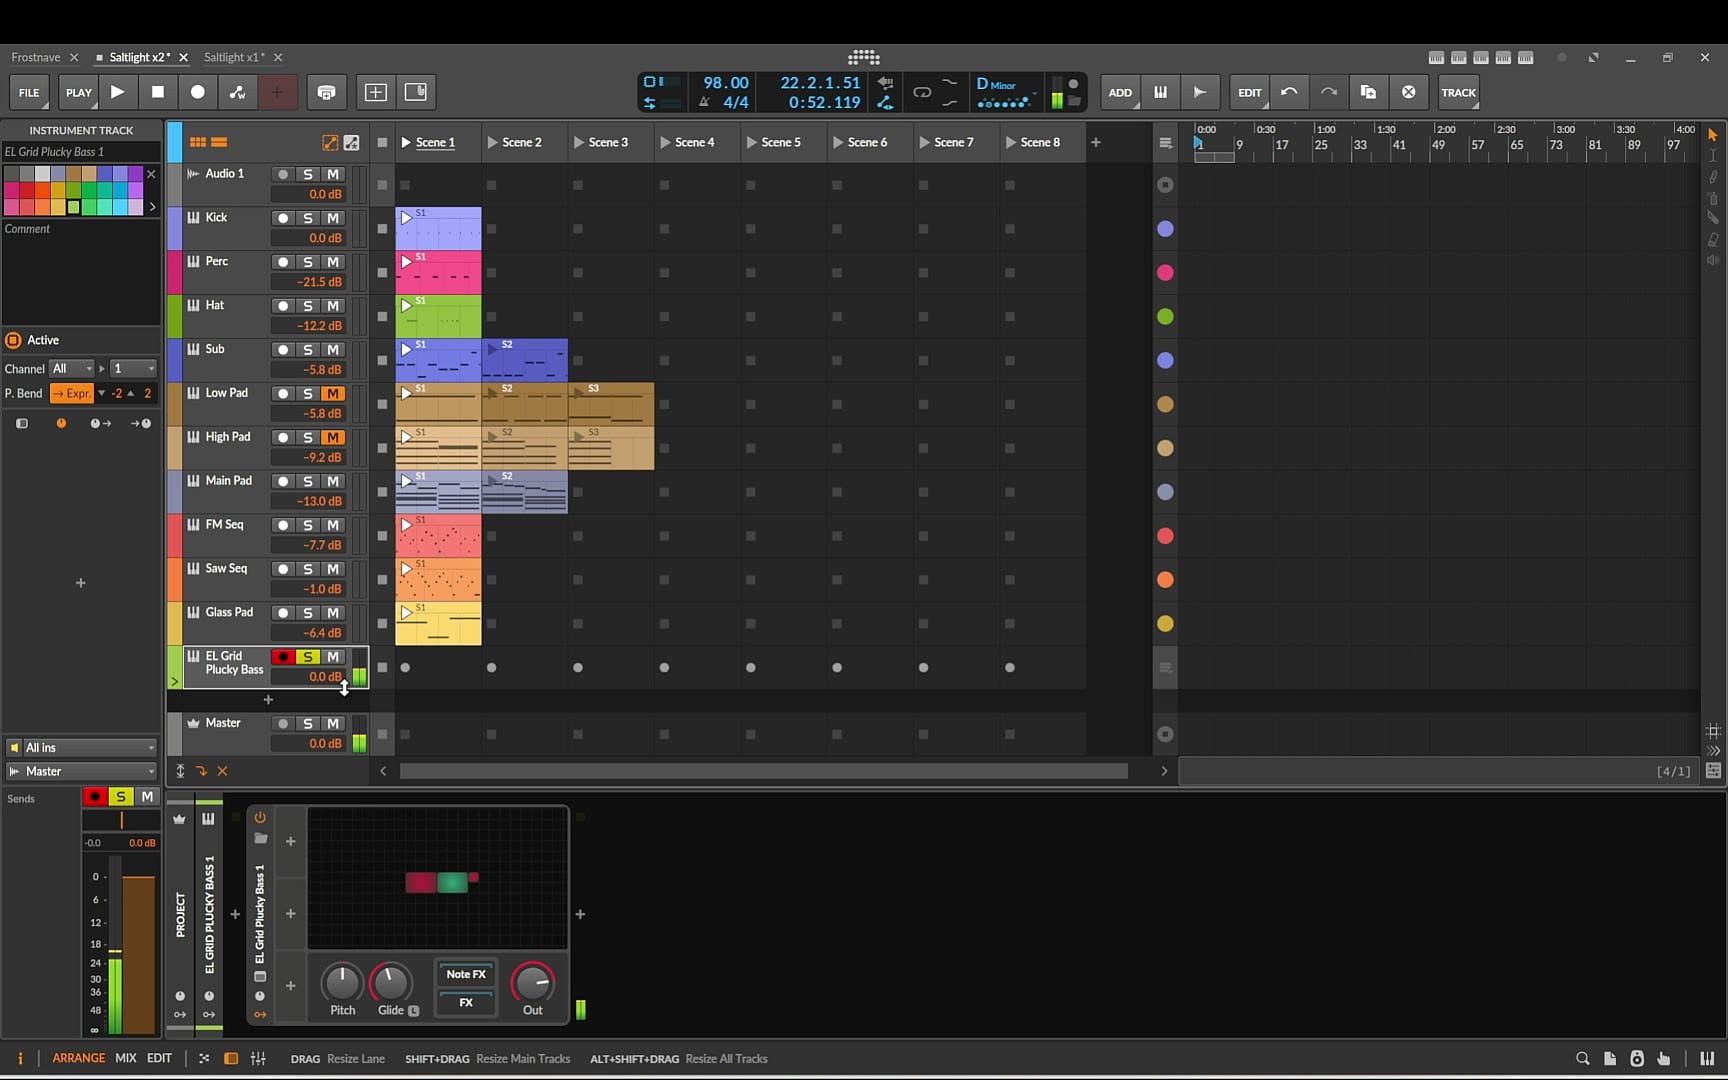
It needs two fixes. A Note Transpose moves it down an octave, so it sits between the sub and the pads. Then open the Grid patch and tweak the ADSR settings until you get a short, clean pluck. If you have never opened the Grid before, a patch this small is a friendly place to start.
Now every part of the loop is in place, so play it all together and set the levels. Solo a few tracks as you go. The method is simple: start with the kick and the sub, add the pads, then bring up each extra layer only until you can just notice it. If you can clearly hear every single layer all the time, the mix is too crowded.
Step 8: One riser, two lengths
Before arranging, prepare a single transition effect. Drag a reversed cymbal onto an audio track. It swells and ends exactly on the beat, which makes it a natural lead-in to a new section. An EQ+ removes everything below about 6 kHz, so only the airy top remains and it doesn't clash with the pads.
Make two versions by stretching the clip: a one-bar riser and a two-bar riser. Set the stretch mode to Elastique Pro, then adjust the clip tempo for each version until it fills exactly one bar or exactly two. One sample now covers small and large transitions.
Step 9: From loop to arrangement
A finished loop is not a track. The arrangement is built entirely from the clips you already have, by deciding which of them play together. Start by adding cue markers on the timeline for each section. Seeing the structure before placing a single clip makes every later decision easier. If you would rather plan this step with a tool, Trellis builds the section map for you.
Intro
The intro starts with only the high pad. After a few bars the low pad joins, and halfway through the bell sequence enters. The rule is one new element at a time. Each entry gives the listener something new without any big change.
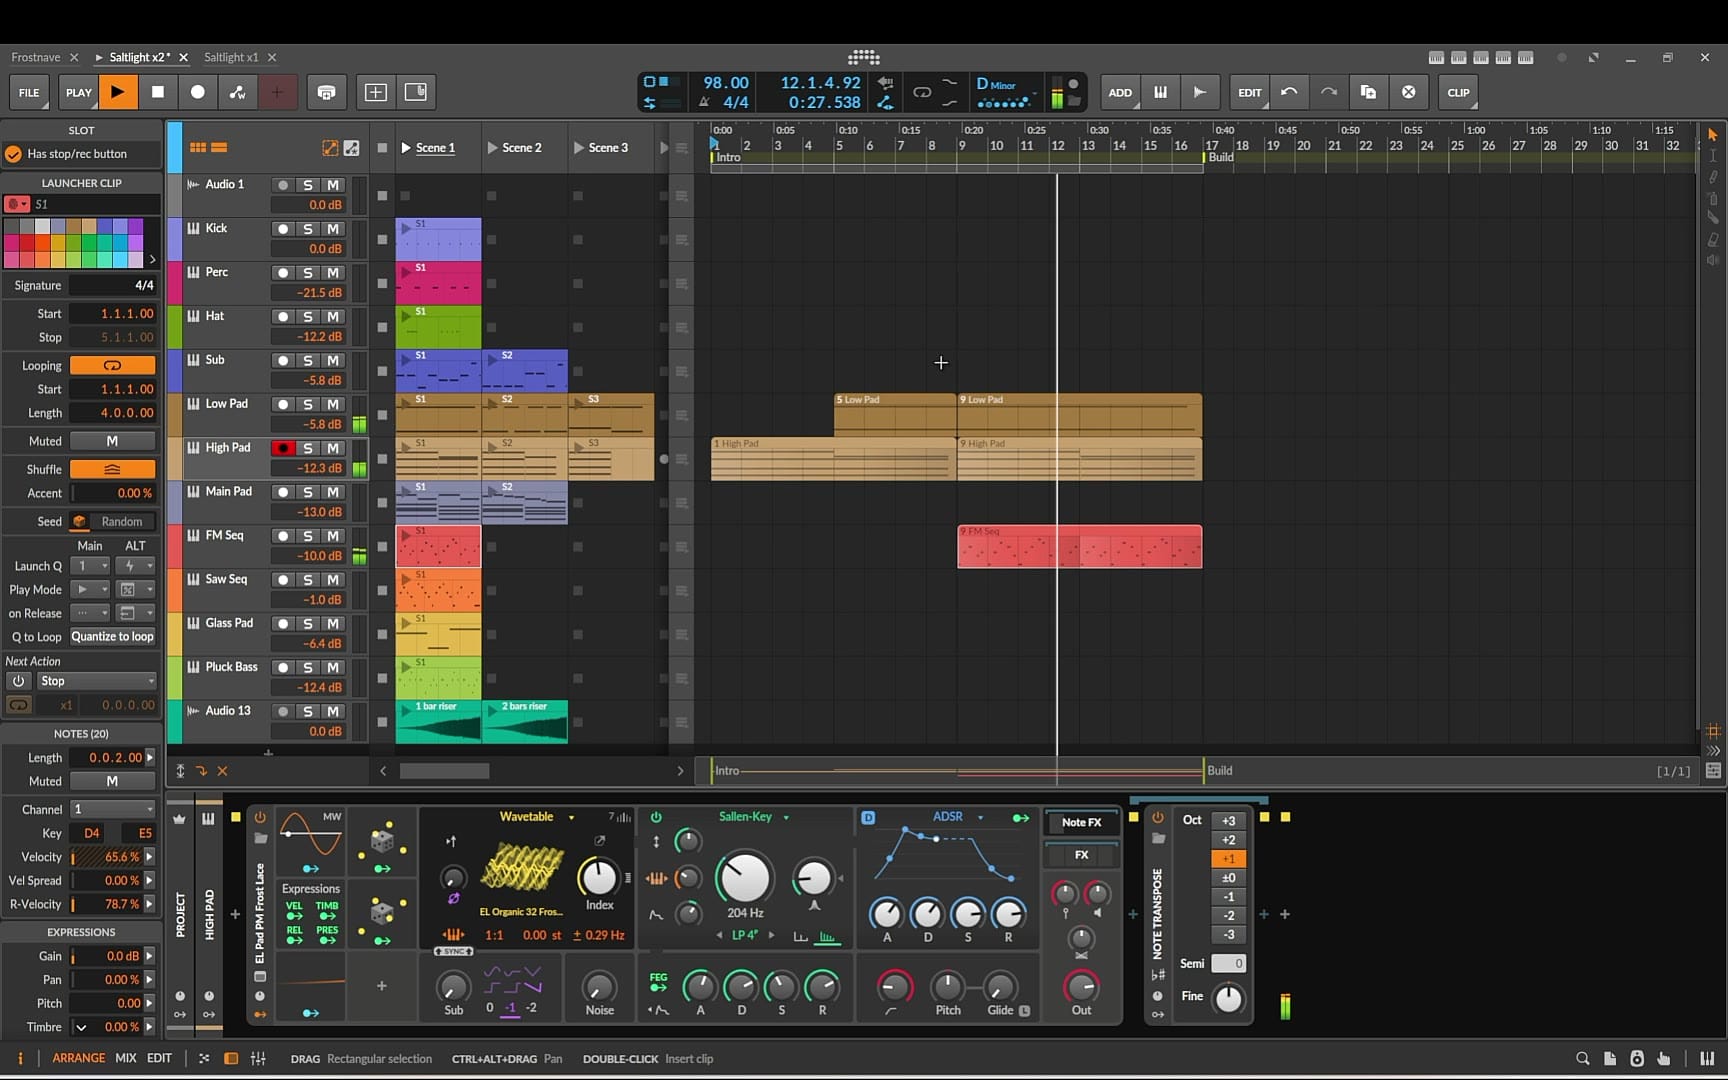
Build
At bar 17 the kick and the sub come in. To make room for them, take out the two outer pads and switch to the main pad. Swapping layers, instead of only adding new ones, keeps the track from getting louder and louder. Place the one-bar riser right before bar 17 so the kick doesn't arrive out of nowhere. The bell sequence continues through the change; it is the thread that connects the intro to the build. Eight bars later the arp enters and the low and high pads return underneath it, while the kick and sub keep going. Raise the delay mix on the arp a little here, so the echoes become more intense and fill the empty gaps.
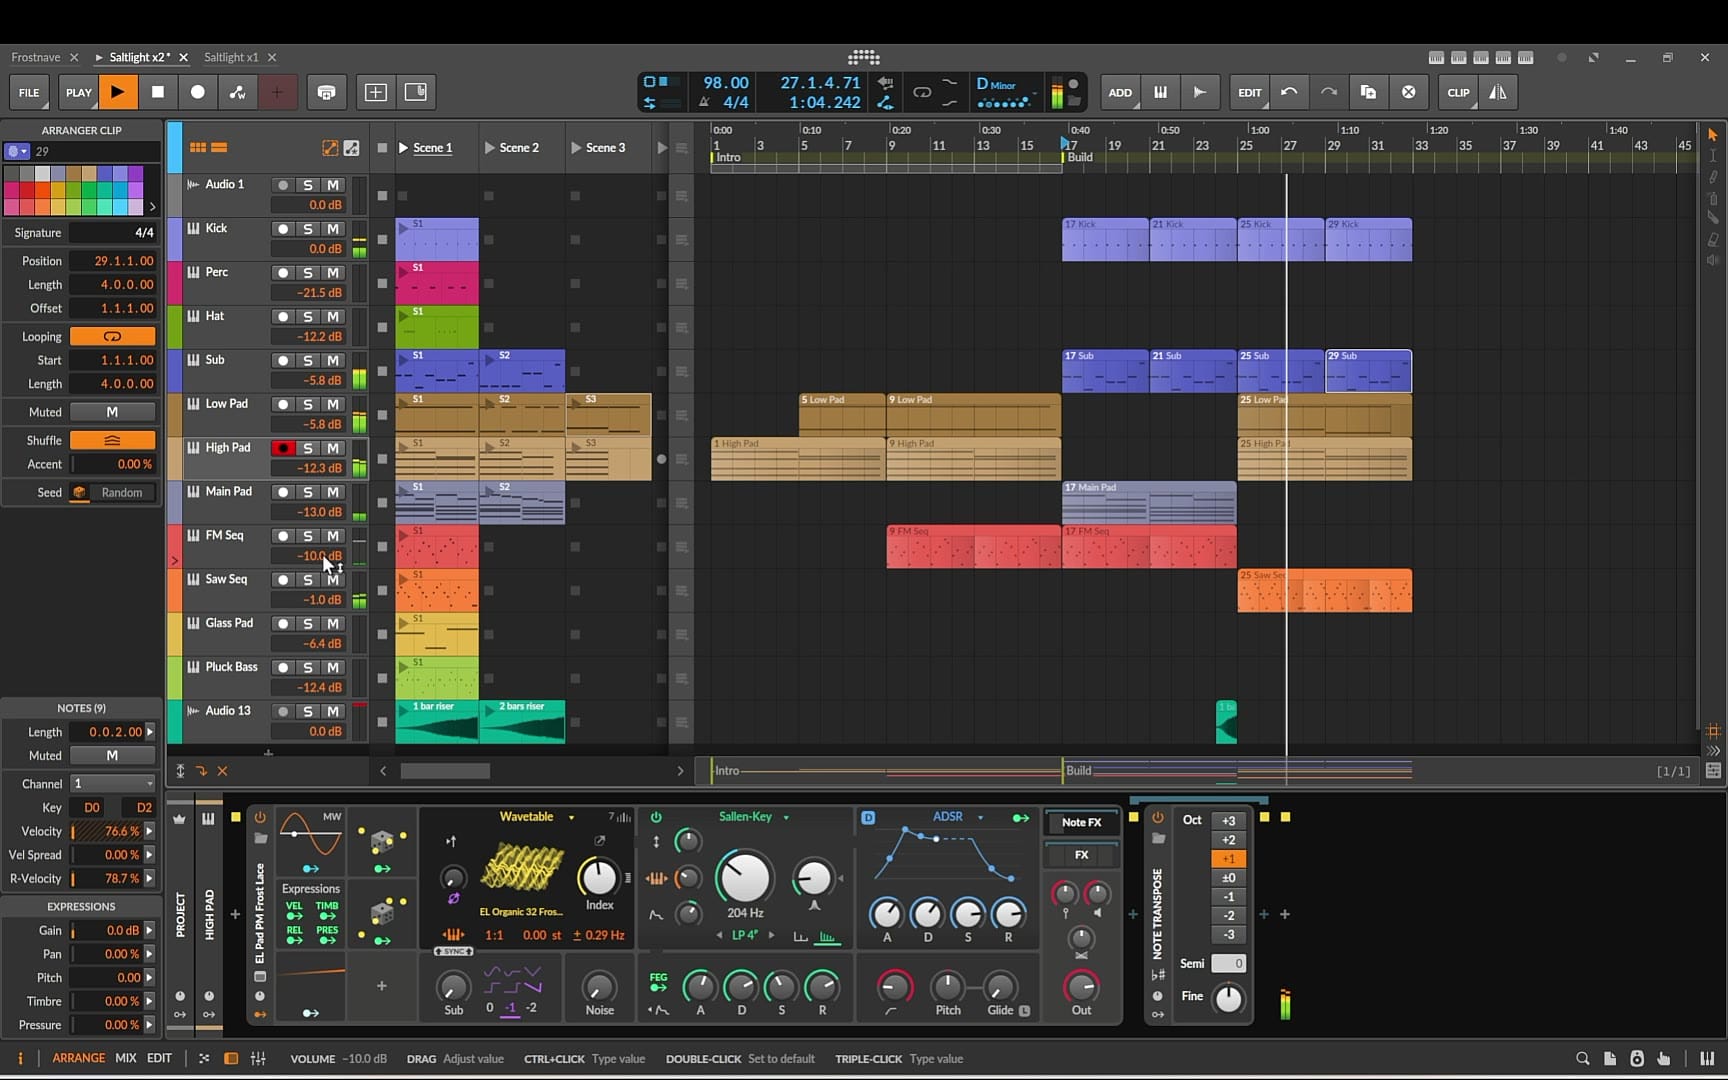
Peak, break, return and outro
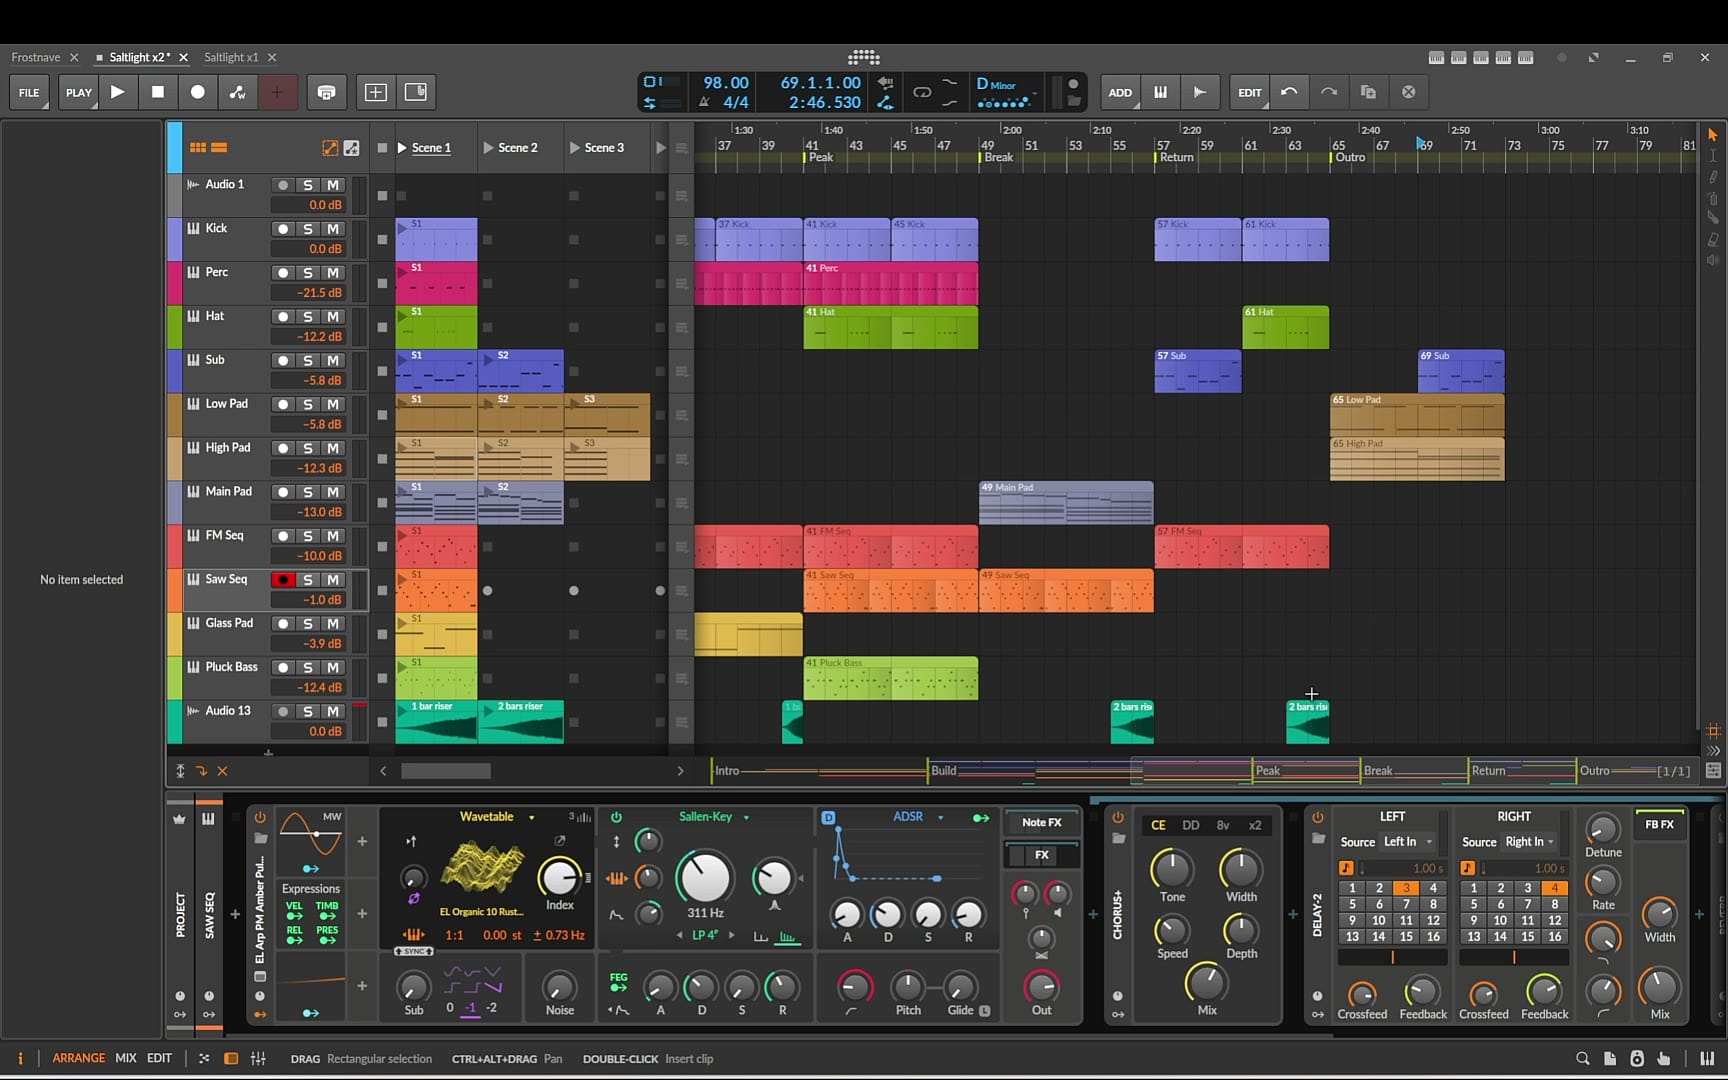
The next section adds the percussion and the glass pad. The percussion gives the rhythm more detail, and the glass pad is a bright new layer that hasn't been heard yet. Another riser marks the change. Play it back and check that it feels like a step up from the build, not like a different track. Then comes the peak, where the hi-hat and the pluck bass finally enter. For eight bars almost everything plays: kick, percussion, hi-hat, sub, both sequences and the pluck bass. It works as the fullest moment because those two parts were held back until now.
The break takes out all the drums and the sub and leaves the main pad and the arp. A break gives the ears a rest, and it makes the return hit harder. A two-bar riser leads back in, and the kick, hi-hat and sub come back together with the sequence as a shorter, lighter version of the peak.
The outro removes elements in the reverse order of the intro: first the drums, then the sequences, until only the low and high pads are left. The track ends the way it started. The full structure is intro, build, peak, break, return and outro: 73 bars, just under three minutes.
Step 10: A short master chain
The master chain stays short on purpose. First a Tool, with a short volume fade drawn on the master at the very end of the outro. Then an EQ-5 for gentle tone shaping, a Compressor+ with a low ratio that glues the layers together, and a Peak Limiter as the last processing step, catching the peaks so nothing clips. After that there are only meters, a Spectrum analyzer and a loudness meter, which don't change the sound at all.
While the track plays, watch the spectrum. You are looking for a smooth slope from the lows down to the highs, with no single area sticking out. If something does stick out, fix it on the track that causes it, not on the master.
What to take from this
- Harmony first. Three pads in three octaves give you a full sound before any drums exist.
- Few notes. The more reverb and delay a part has, the fewer notes it needs.
- One job per device. Short chains of simple effects are easier to control than one complex one.
- Hold something back. A peak only works if two or three parts have not been heard yet.
- Swap, don't stack. Changing which layers play is stronger than adding more.
Common questions
Can I do this in another DAW?
Yes. The devices are Bitwig's, but the method is not. Any wavetable synth can replace Polymer, any FM or phase modulation synth can replace Phase-4, and every DAW has a sampler, an arpeggiator and a note transpose effect. The order of the steps and the arrangement logic stay exactly the same.
My loop sounds crowded. What should I remove?
Usually nothing. Lower the levels of the sequences and the glass pad first, then cut low frequencies from every track that is not the kick or the sub. Most crowding in ambient music comes from reverb tails piling up in the low mids, not from having too many parts.
How long should each section be?
Multiples of eight bars are a safe default. In this track the intro runs for sixteen bars, the build starts at bar 17, and the peak and the break are eight bars each. The whole arrangement is 73 bars, which at 98 BPM comes to just under three minutes. For a longer piece, repeat the build and the return with one layer changed each time rather than stretching every section.
Sounds and next steps
If you want the exact sounds from the video, the presets are in EtherLoops Low Tide BW (90 native Bitwig presets) and the pad wavetables are in EL Organic Wavetables Vol. 1 (50 evolving wavetables). Neither is required to follow the tutorial.
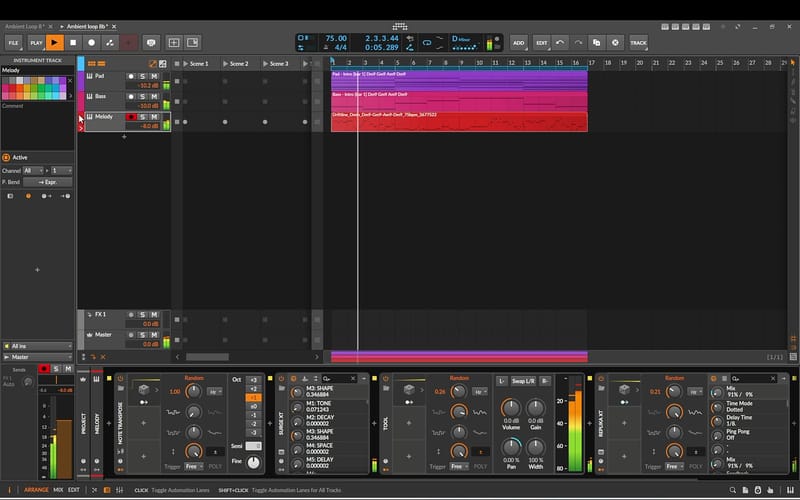
For a shorter project with the same stock devices, continue with Build an Ambient Loop in Bitwig Studio – Native Tools Only. And if you prefer to watch before you build, the full video is here: Build a Full Ambient Track in Bitwig (Stock Devices Only).